Quentin Daems, creator of the FlyXcopter series of quadcopter frames, sent me a FlyX-Mini frame for review purposes. In this post I’d like to report the details of the build I made with this frame and my impressions on the frame itself.
To visit the official FlyXcopter website click on the logo below.
![]()
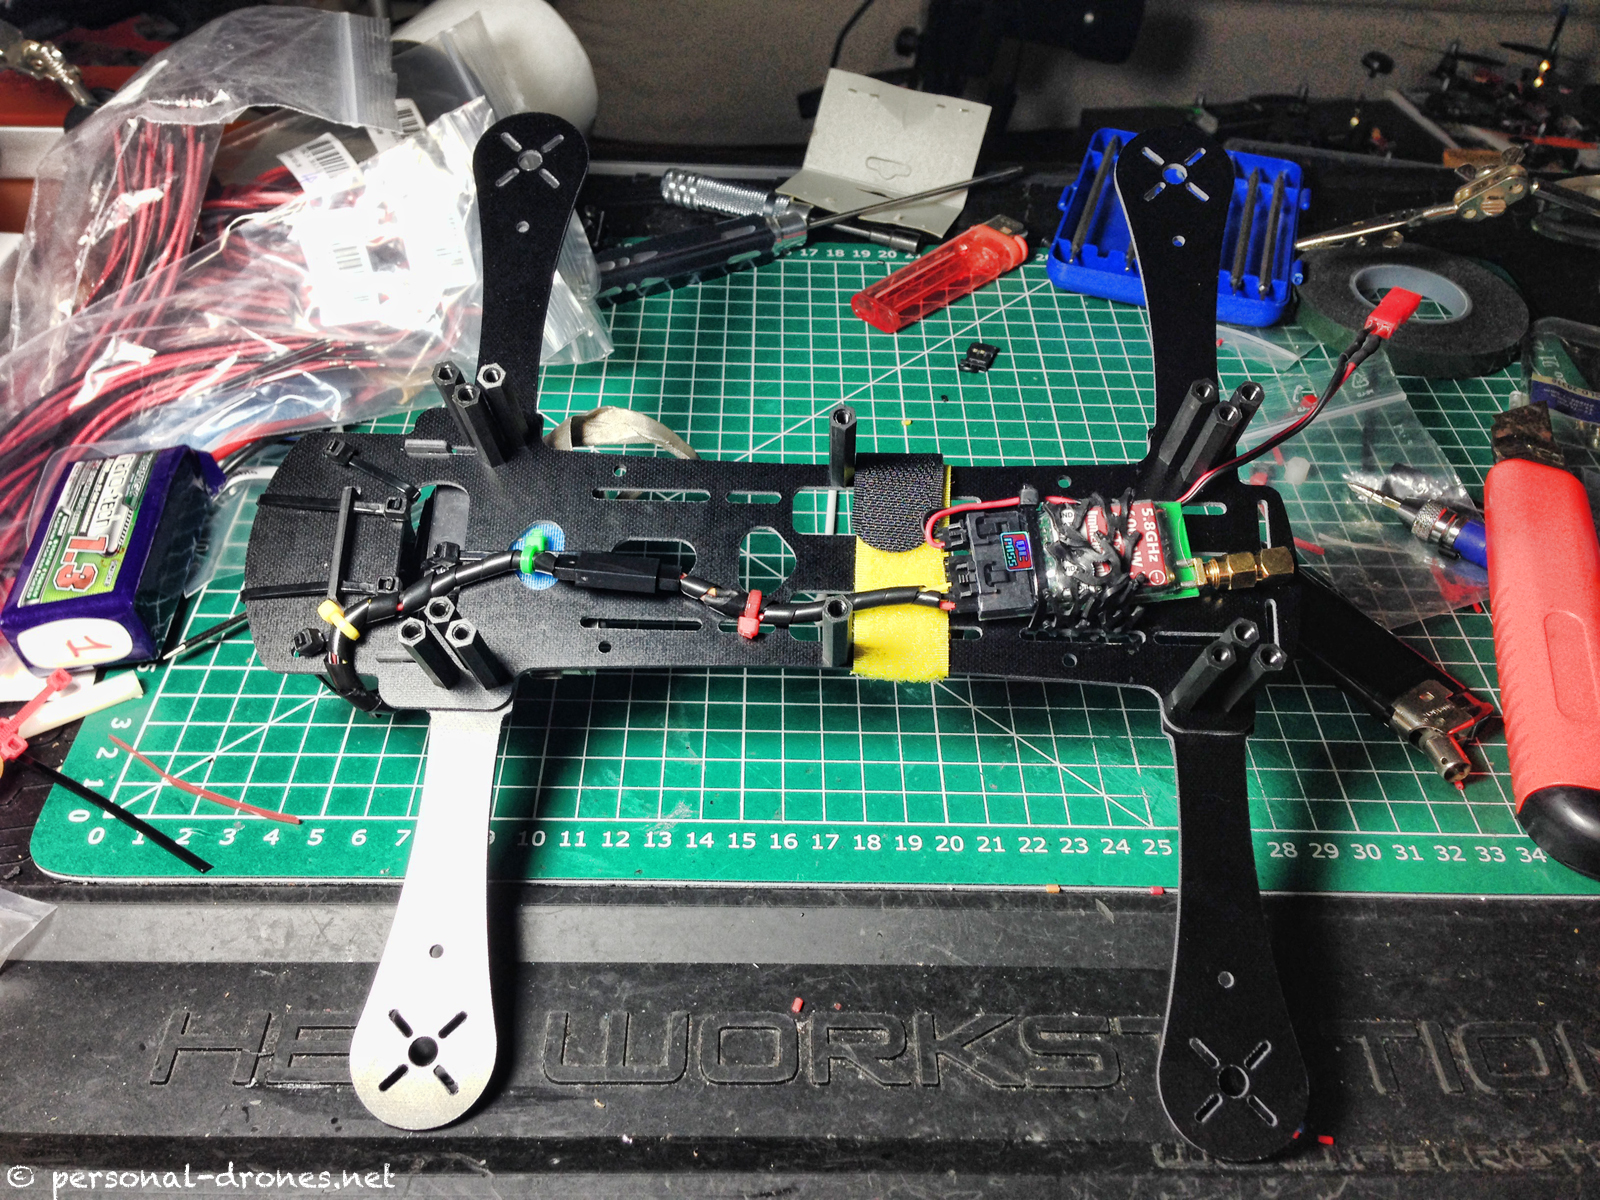
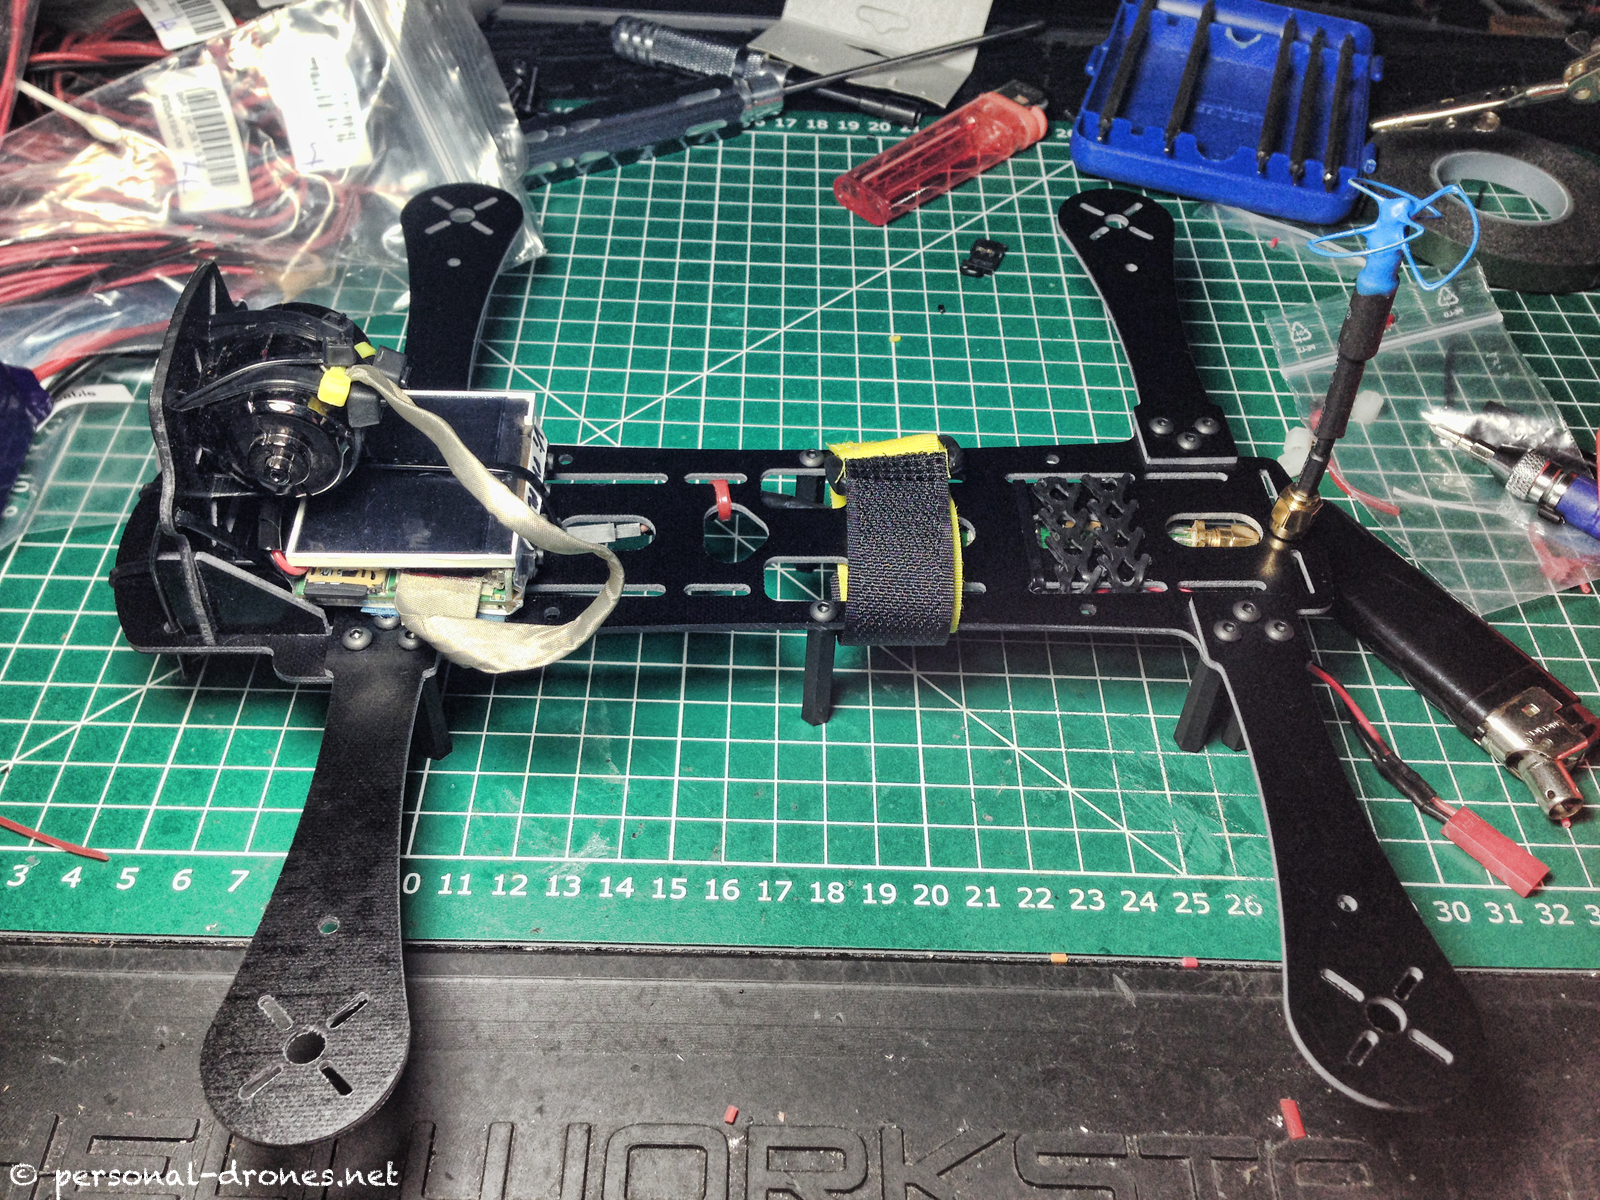
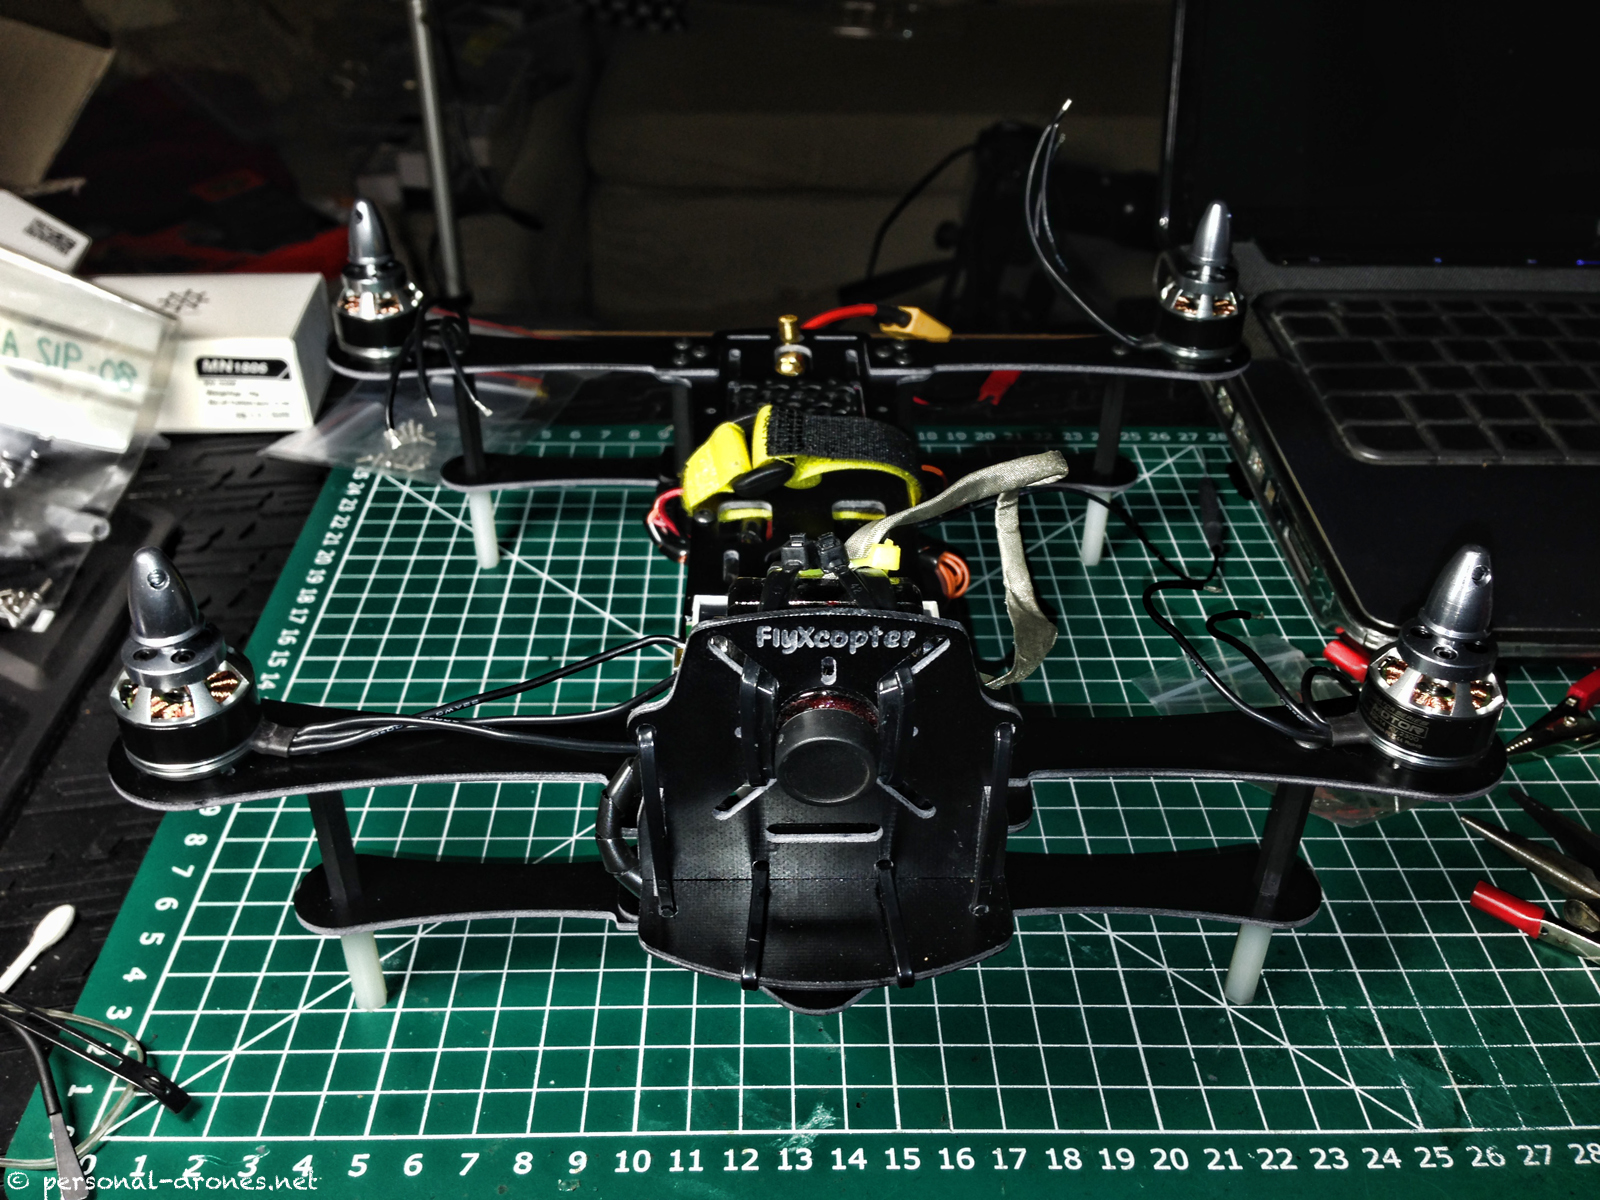
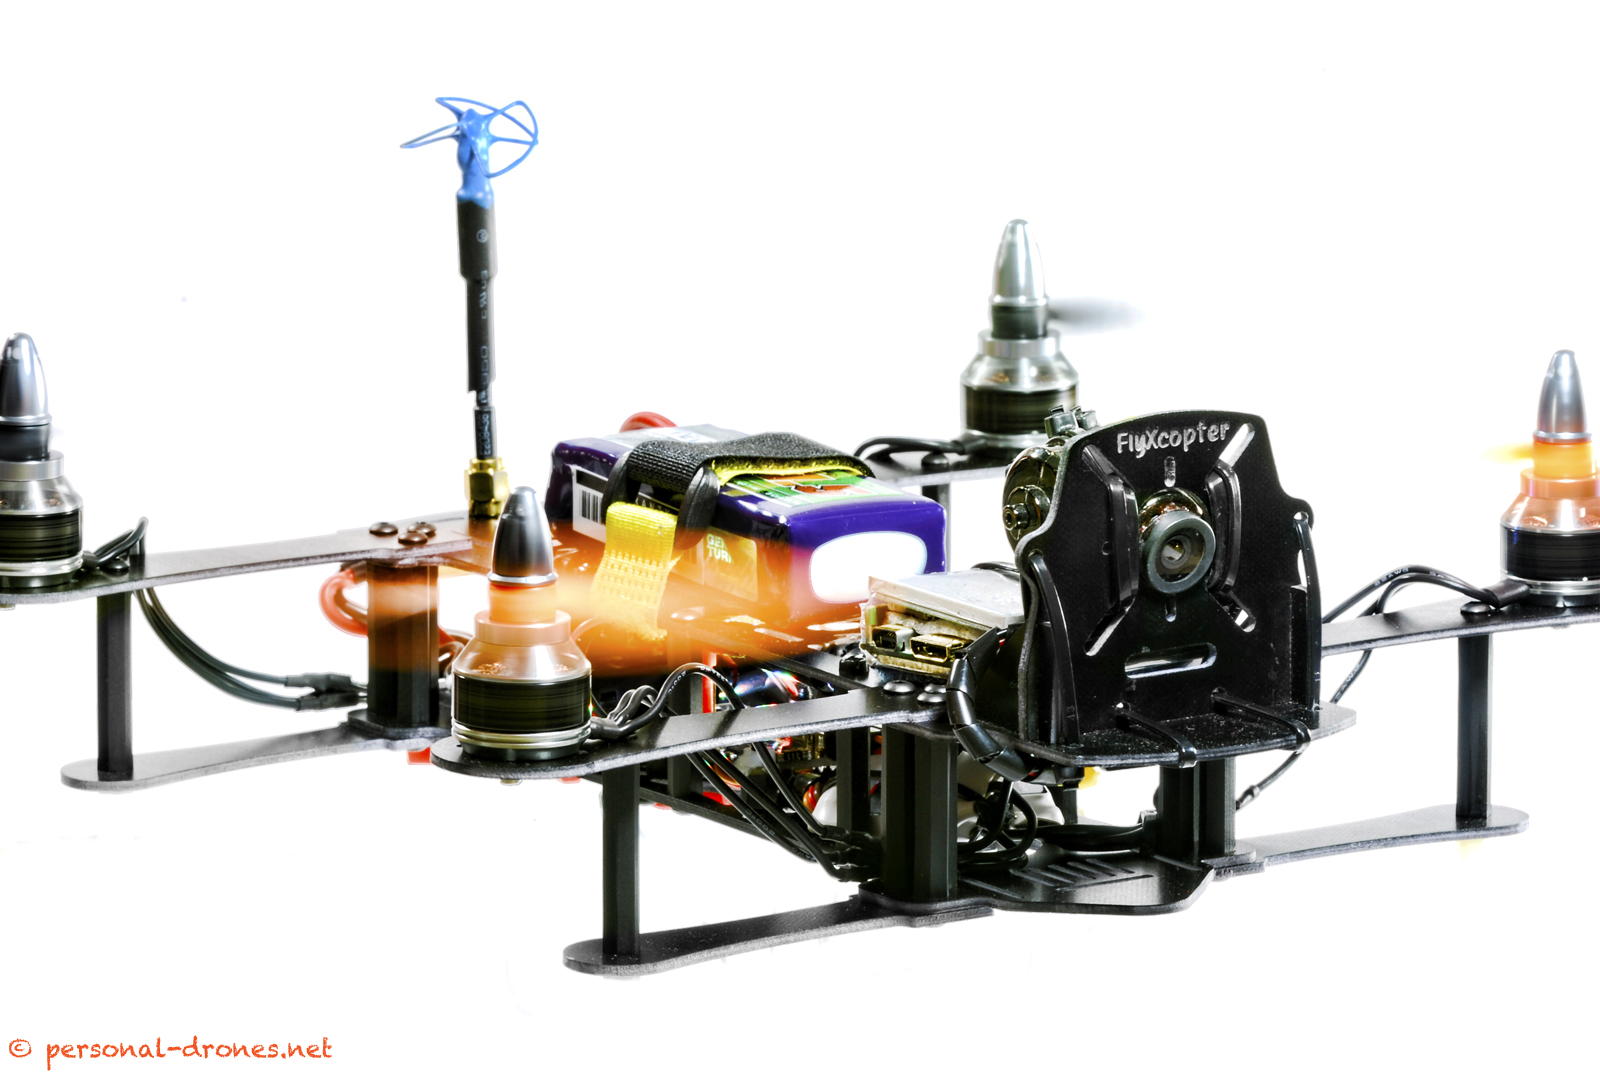
Let me start from the end and show you the final product after a few days of work and testing of this nice flying machine. Throughout this review you can always click on the images to access the full size.
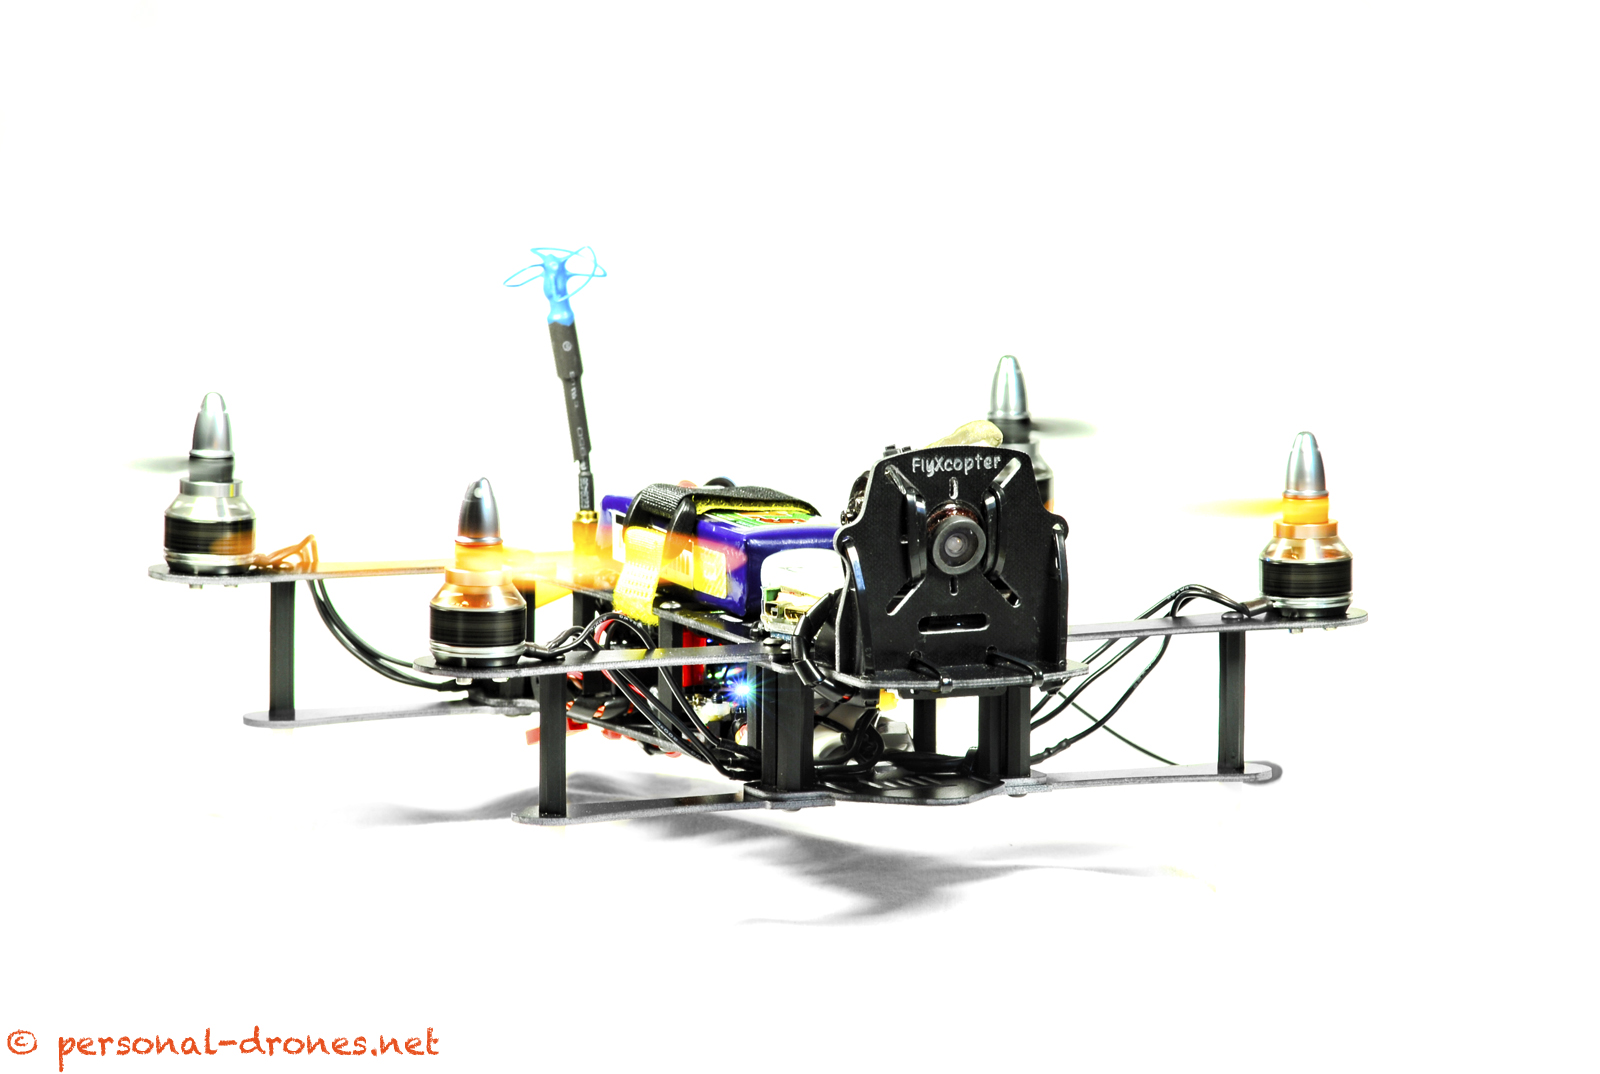
If you are not familiar with this model already, you can see from the picture above that the little bird definitely has character. It has a distinctive look that sets it apart from the countless clones of the Blackout mini H quad or QAV250 that can be bought from chinese sellers for very low prices these days.
The FlyX-Mini Frame

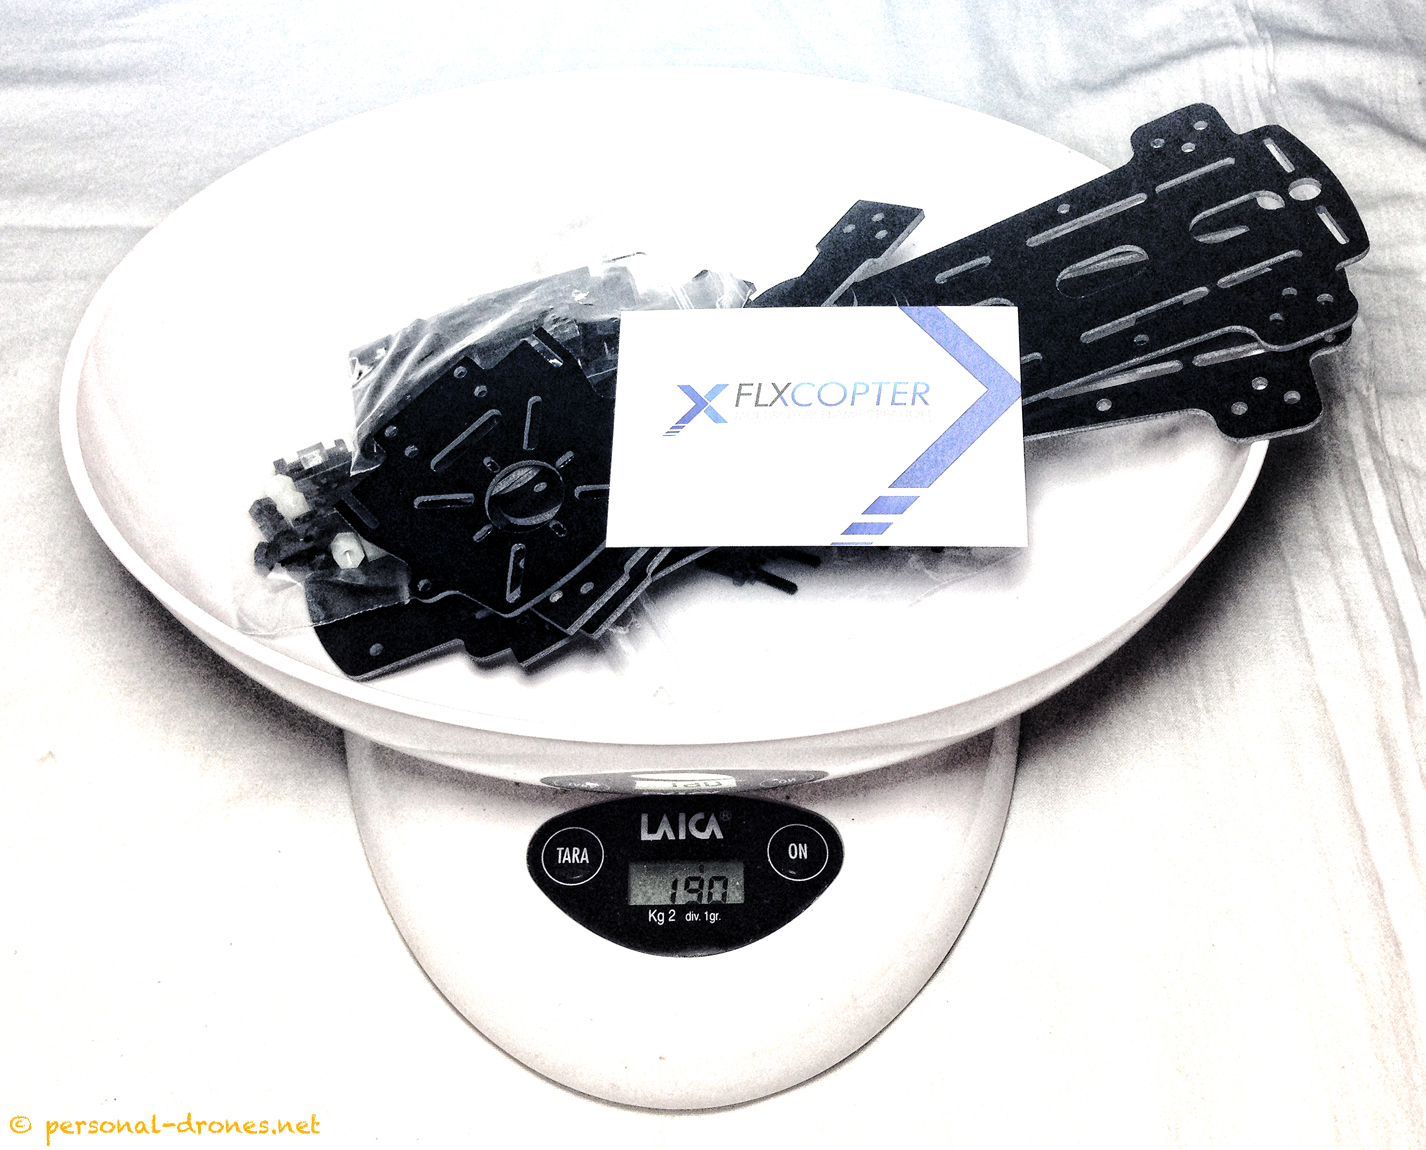
The FlyX-Mini is clearly the product of an original design effort that shows both in the final product look and during the allocation of components in the building process.
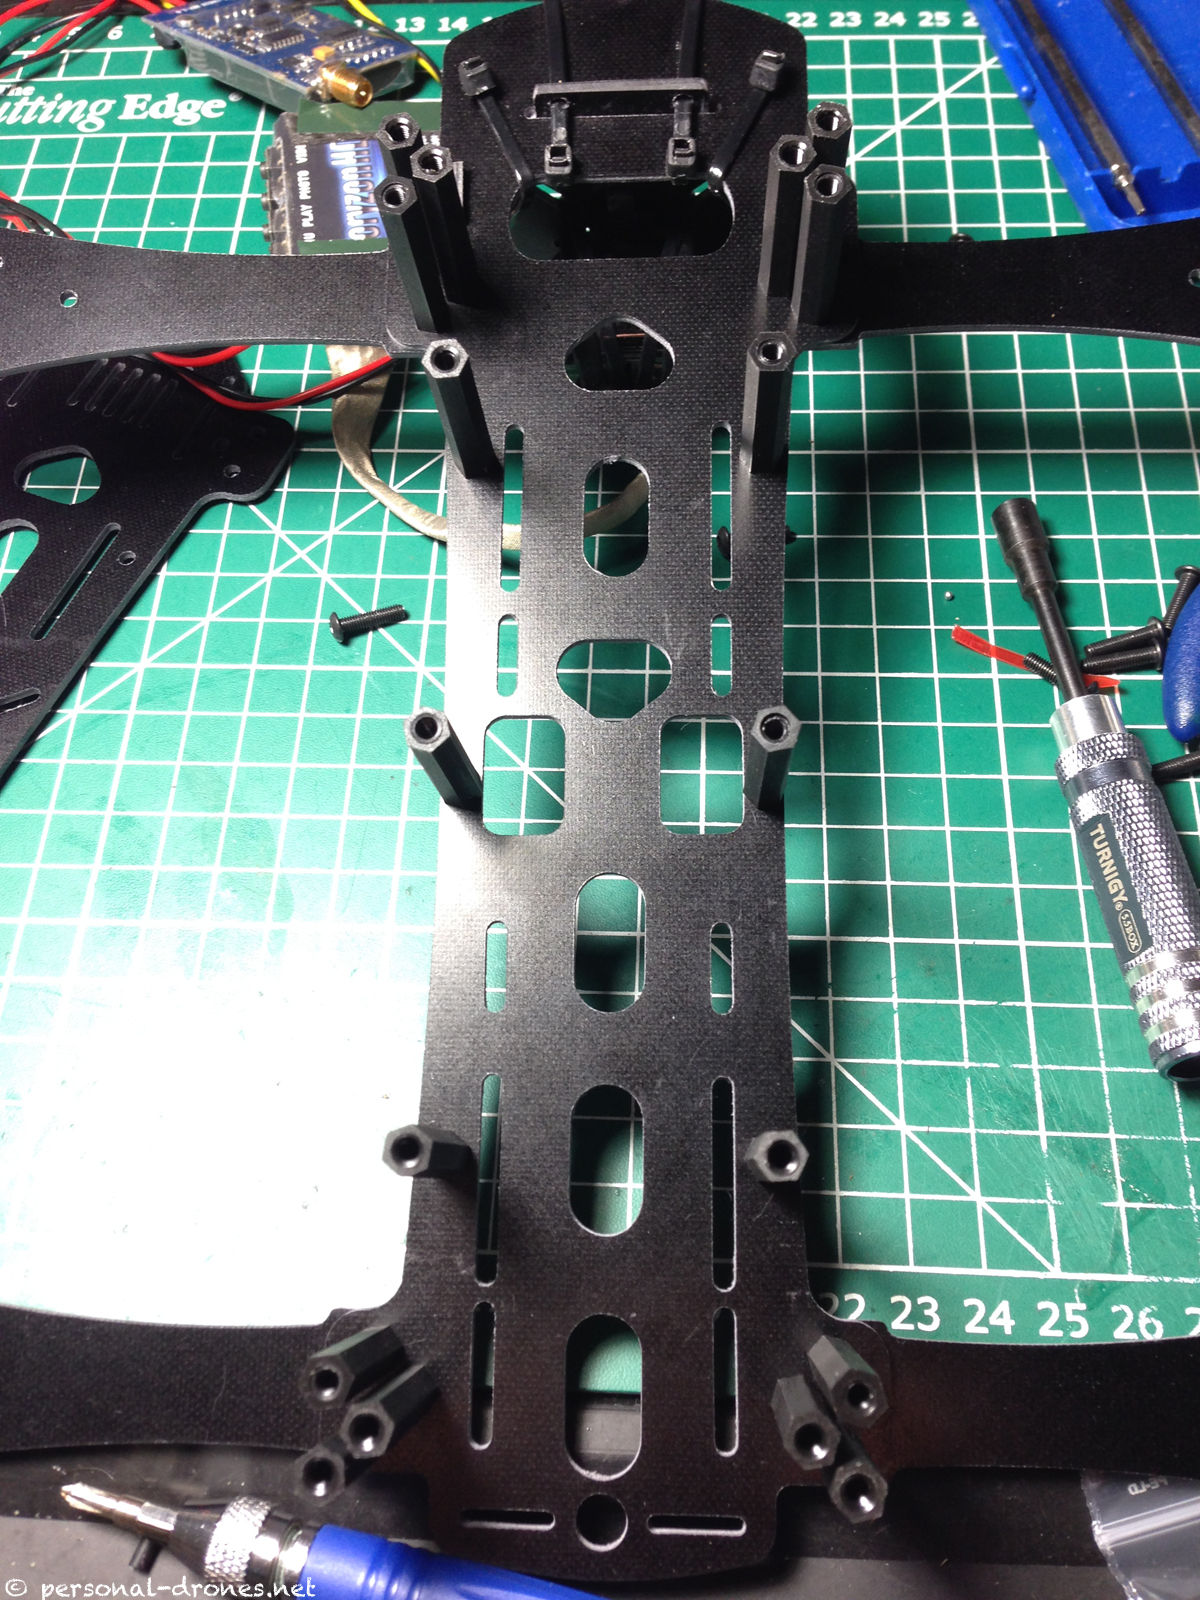
I have built now several of these miniquads, including the original Blackout Mini H Quad and several chinese variants. During the build, the design of the plates and in particular the presence and mutual position of the various holes, grooves and slits in the plates does matter as it can make it easy or difficult to position the various components in a particular arrangement.
In this respect, during this particular build, never did I have the feeling that I was missing some holes/hooking points in the frame. I always found, while proceeding with assembly, a choice in how to fix components. There seem to magically be, everywhere in this frame, both vertical and horizontal slits and holes that allow to hook things up, be it with zip ties or rapstraps, in pretty much exactly the way you desire.
As compared to the Blackout Mini H Quad (of which I am a proud owner and huge fan), maybe the first popular and successful 250mm frame (a 220 actually) that we can safely use as a reference, the FlyXcopter is slightly bigger.
Blackout Mini H Quad
Length: 20cm
width at center of frame: 4.5 cm, gets narrower at the ends
distance between motors: 18 cm
diagonal distance between motors: 22 cm (there is now the option of longer arms for a 26 cm diagonal distance)
FlyXcoper FlyX-Mini
Length: 24cm
width at center of frame: 5 cm, gets wider at the ends
distance between motors: 22 cm
diagonal distance between motors: 27.5 cm
This slightly bigger size contributes to an easy allocation of components inside the frame. For instance, while I found it difficult to fit the 4 ESCs within the core of a mini H Quad frame (they are more conveniently placed on the arms), I found it easy to place the ESCs inside the FlyXcopter frame, as you will see in the build pictures that follow.
The size of the FlyXcopter also would allow in principle to use 6 inches props instead of the classical 5 inches used for the 250 class, this provides flexibility in the choice of the electronics for this frame.
Electronics
For this build I selected a “classical” setup:
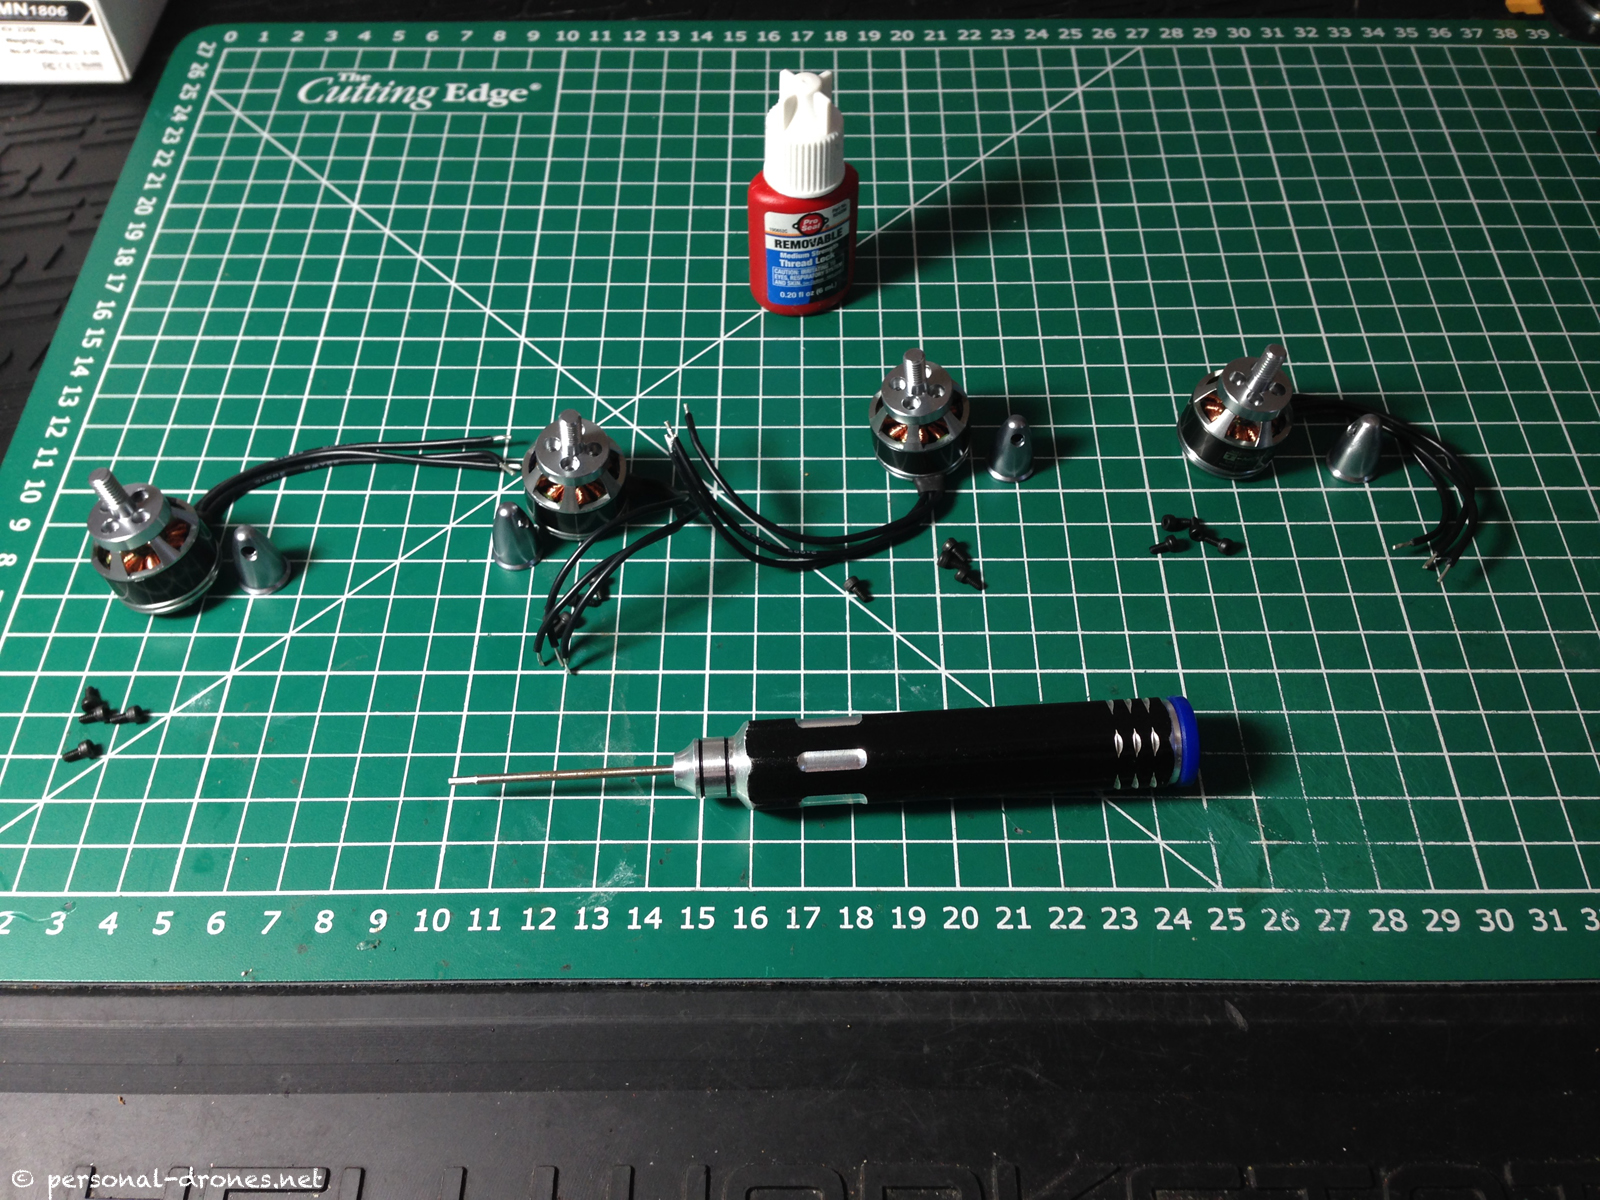
ESC: Tiger ESC 12A
Motors: 1806 2300KV Tiger motors
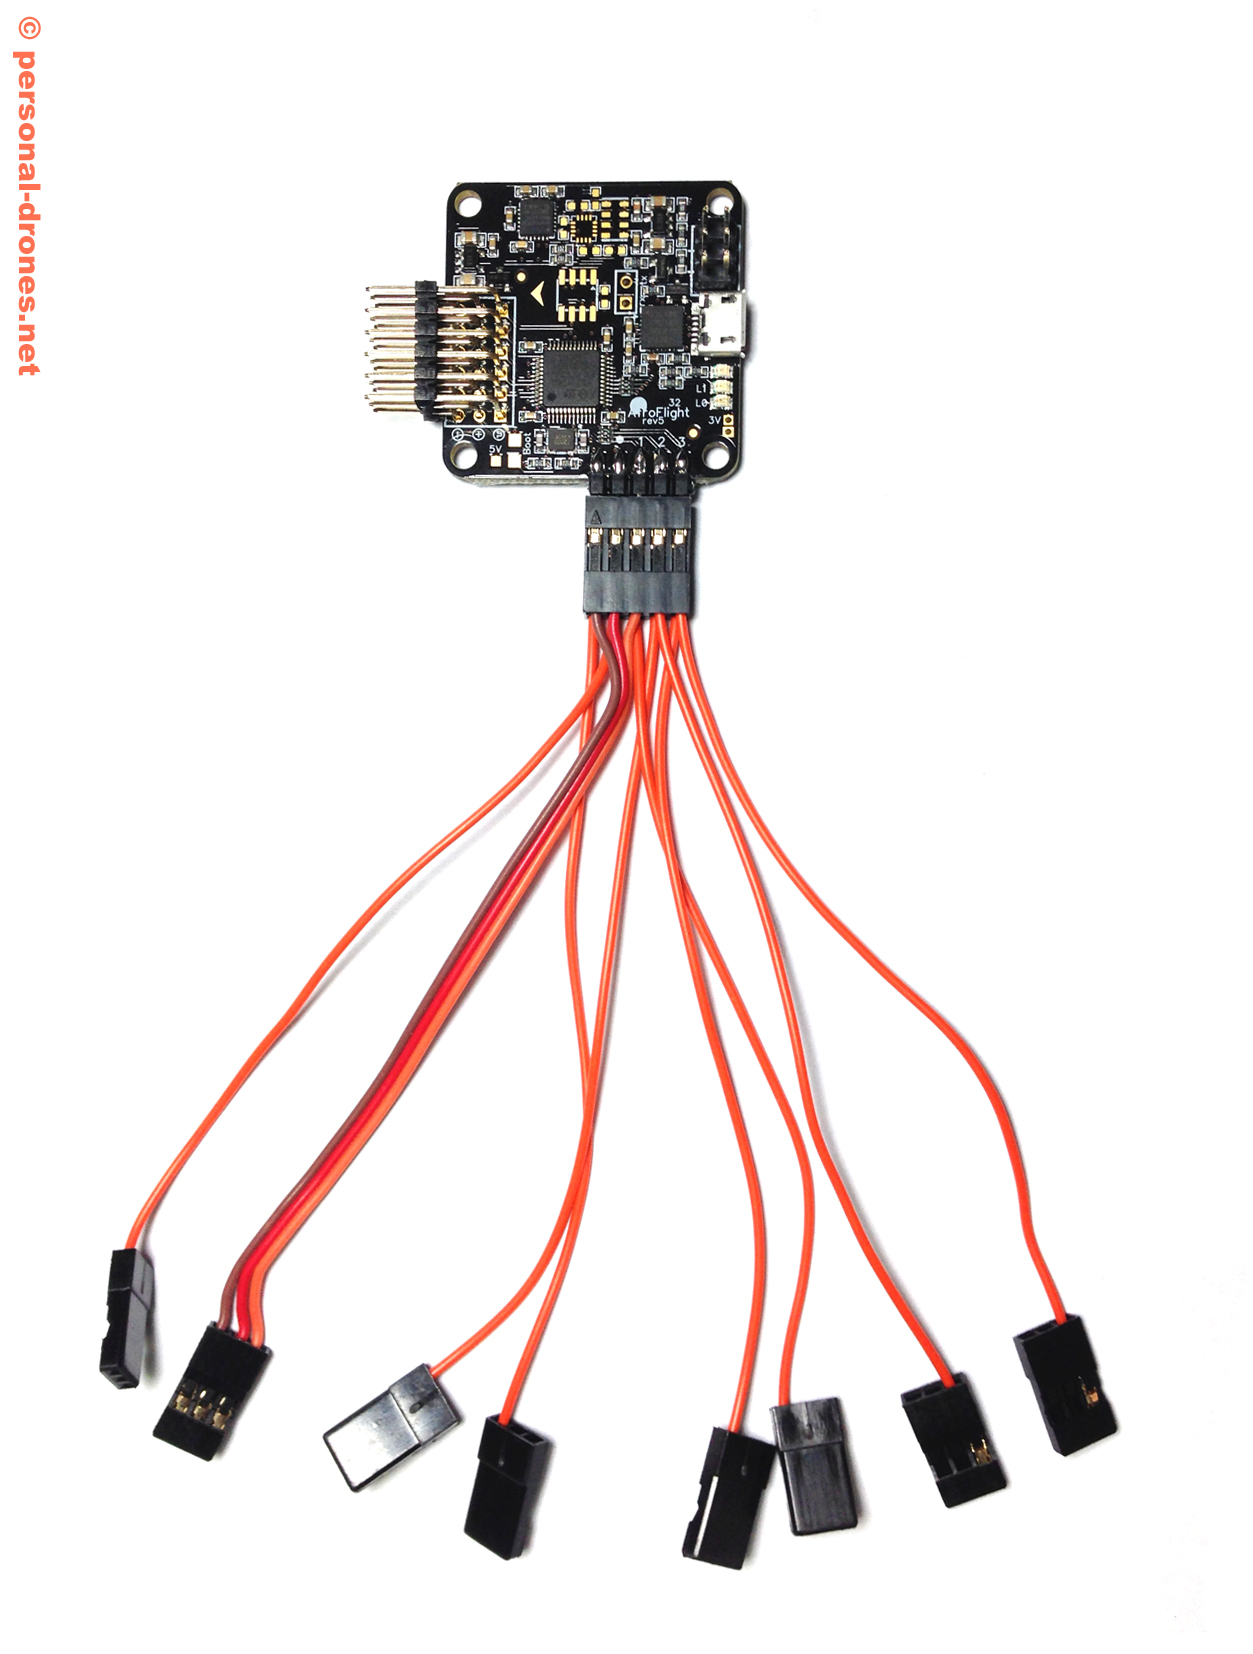
Flight controller: AcroNaze32 rev5
Propellers: Gemfan 5030

Assembly of FlyXcopter’s upper plate: Video and FPV System
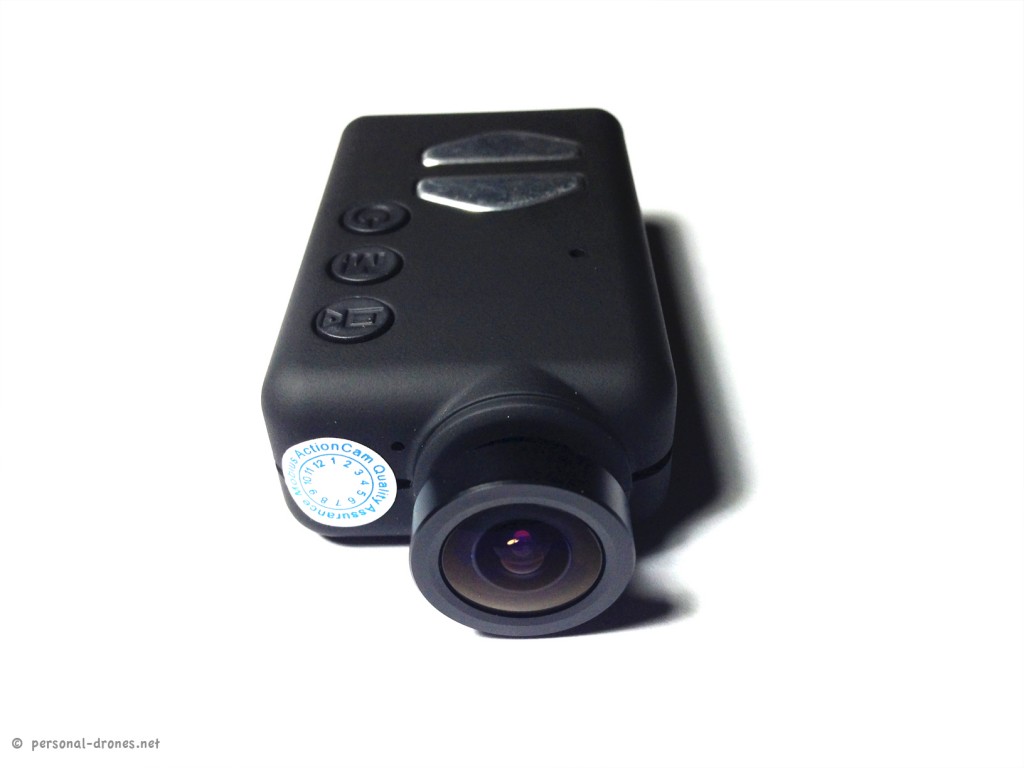
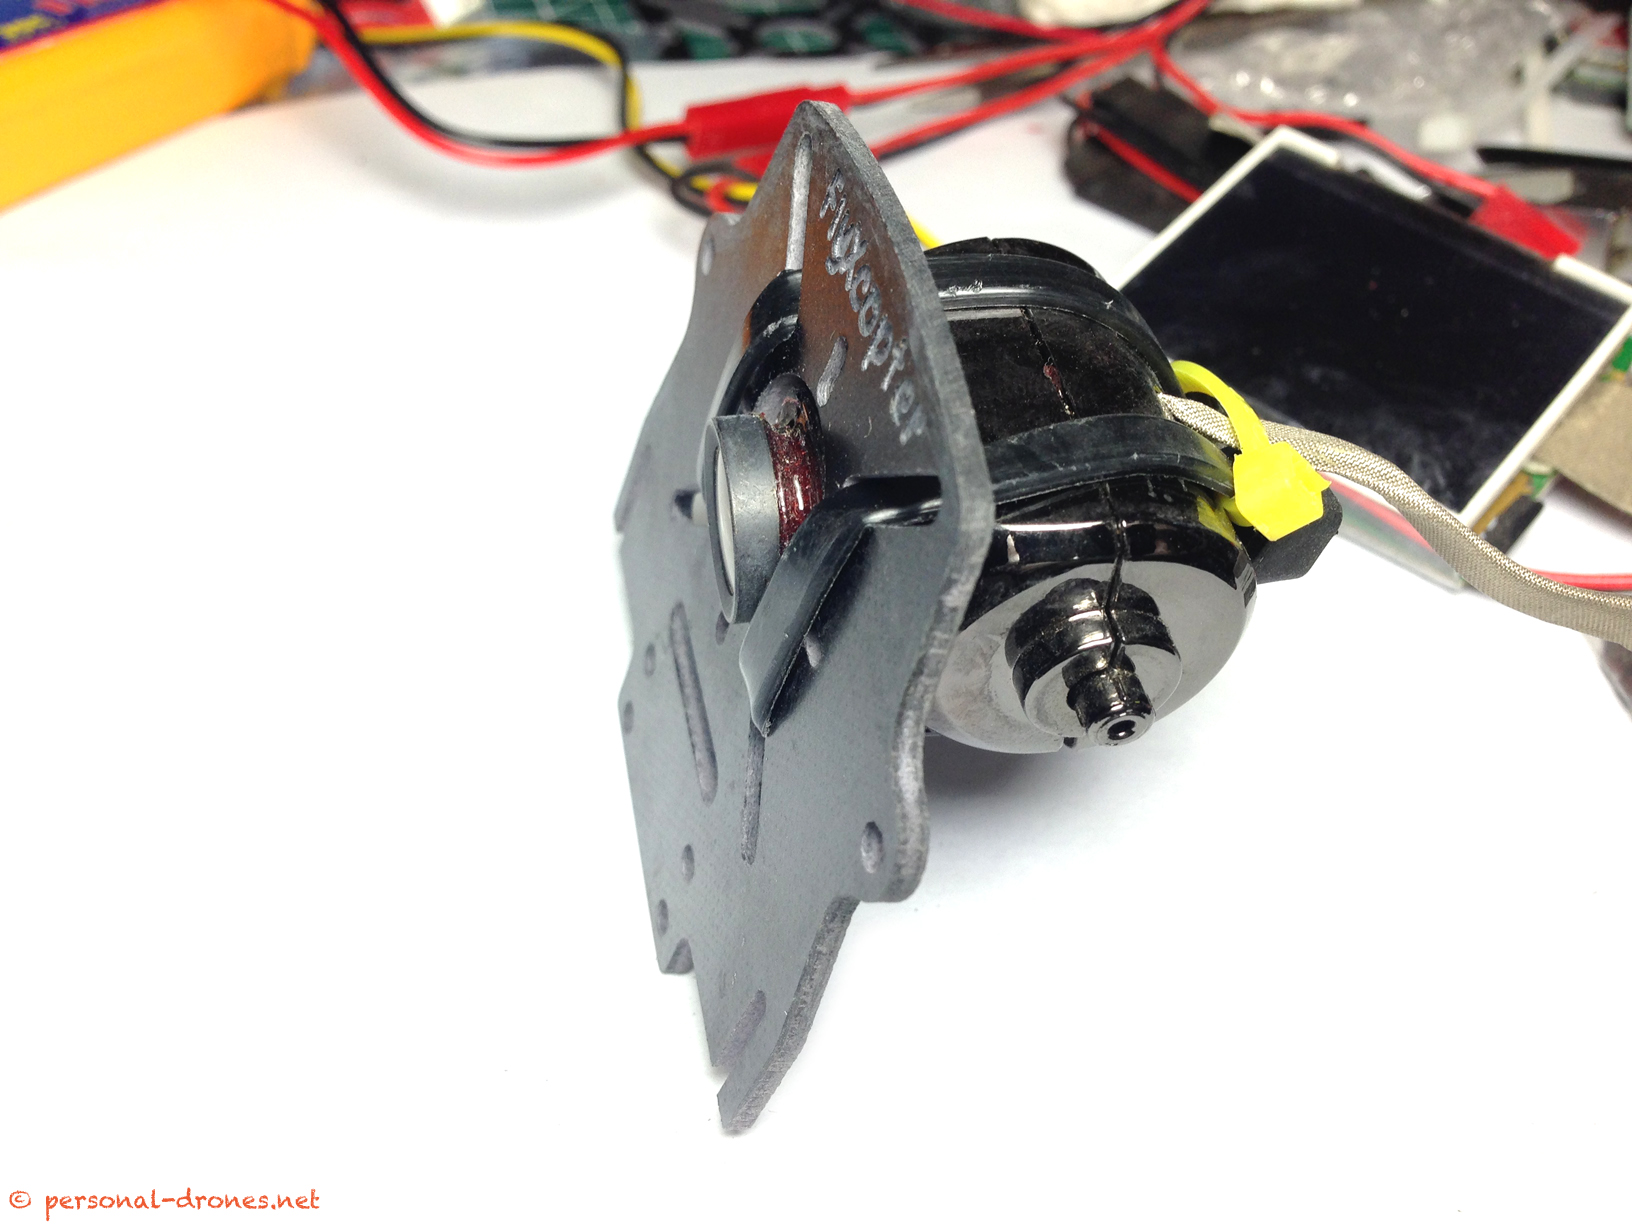
For the video/FPV system, I first started with a classical CCD camera, for which the FlyXcoper has a nice front mount:
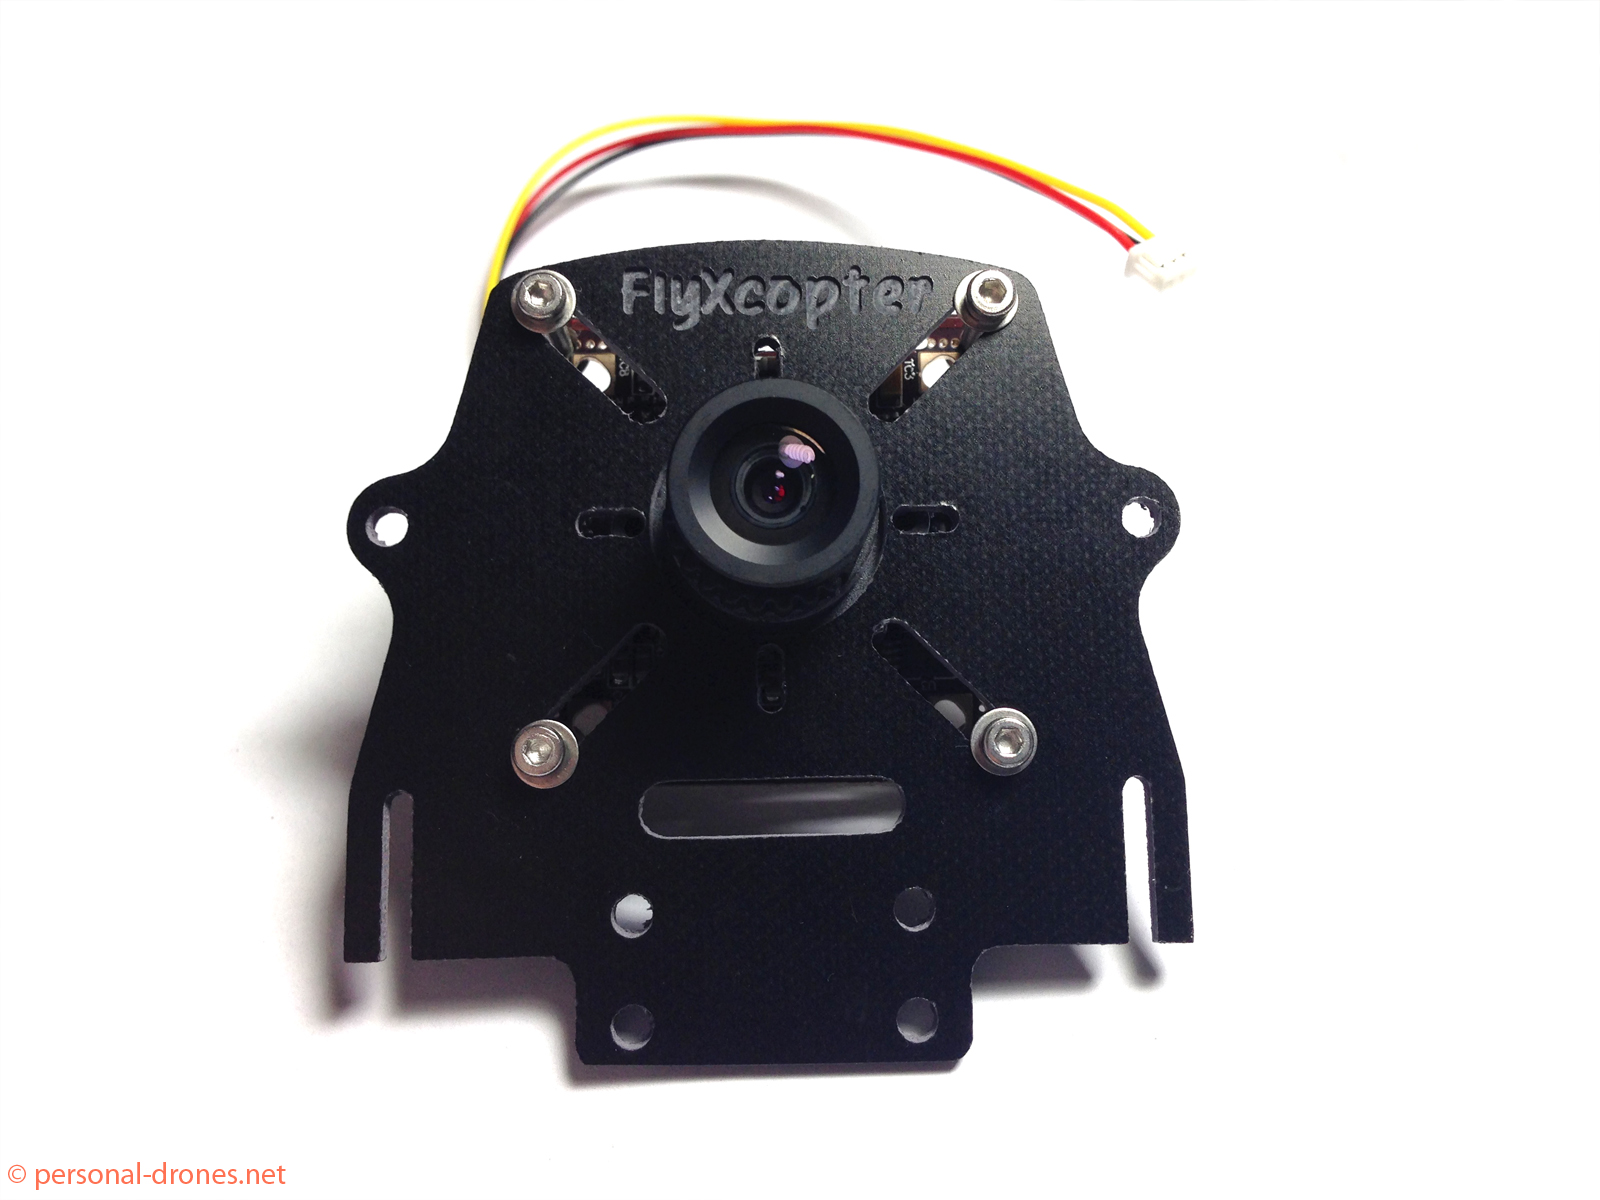
This front mount is maybe the single piece of the frame that contributes most to the FlyX-Mini distinctive look (the other being the design of the arms). It is designed so that it can be easily hooked up solidly to the upper frame plate.
However, as it already occurred to me in several other builds, I started thinking about the video recording problem. With a “plain” CCD camera you then need some way of recording video (because if there is no video, it did not really happen). These are the possibilities:
- adding an on board video recorder such as this one
- recording the video from the “downlink”, at the ground. This makes for a quite lighter quadcopter, but the video quality will not be top, and will not be HD for sure. It also complicates the setup of the ground station.
- adding a second HD camera with recording possibilities, such as for instance a Mobius camera. The Mobius can also be used as FPV camera by itself, see here for details on using the Mobius camera for FPV.
I wanted to keep things as simple as possible, and opted for a different type of camera, the HoryzonHD V3 by FoxtechFPV. This has the merit of being a “native” camera for FPV, this is what the camera was designed for. It can output video to a transmitter while recording HD video at the same time. It can, in principle, be controlled through the radio (start/stop recording, taking photos), although this requires a particular setup that I will not address here.
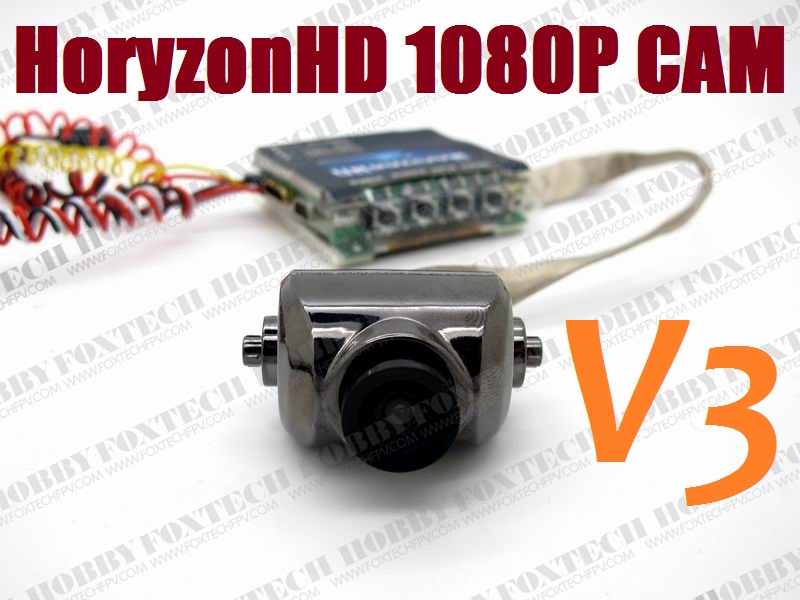
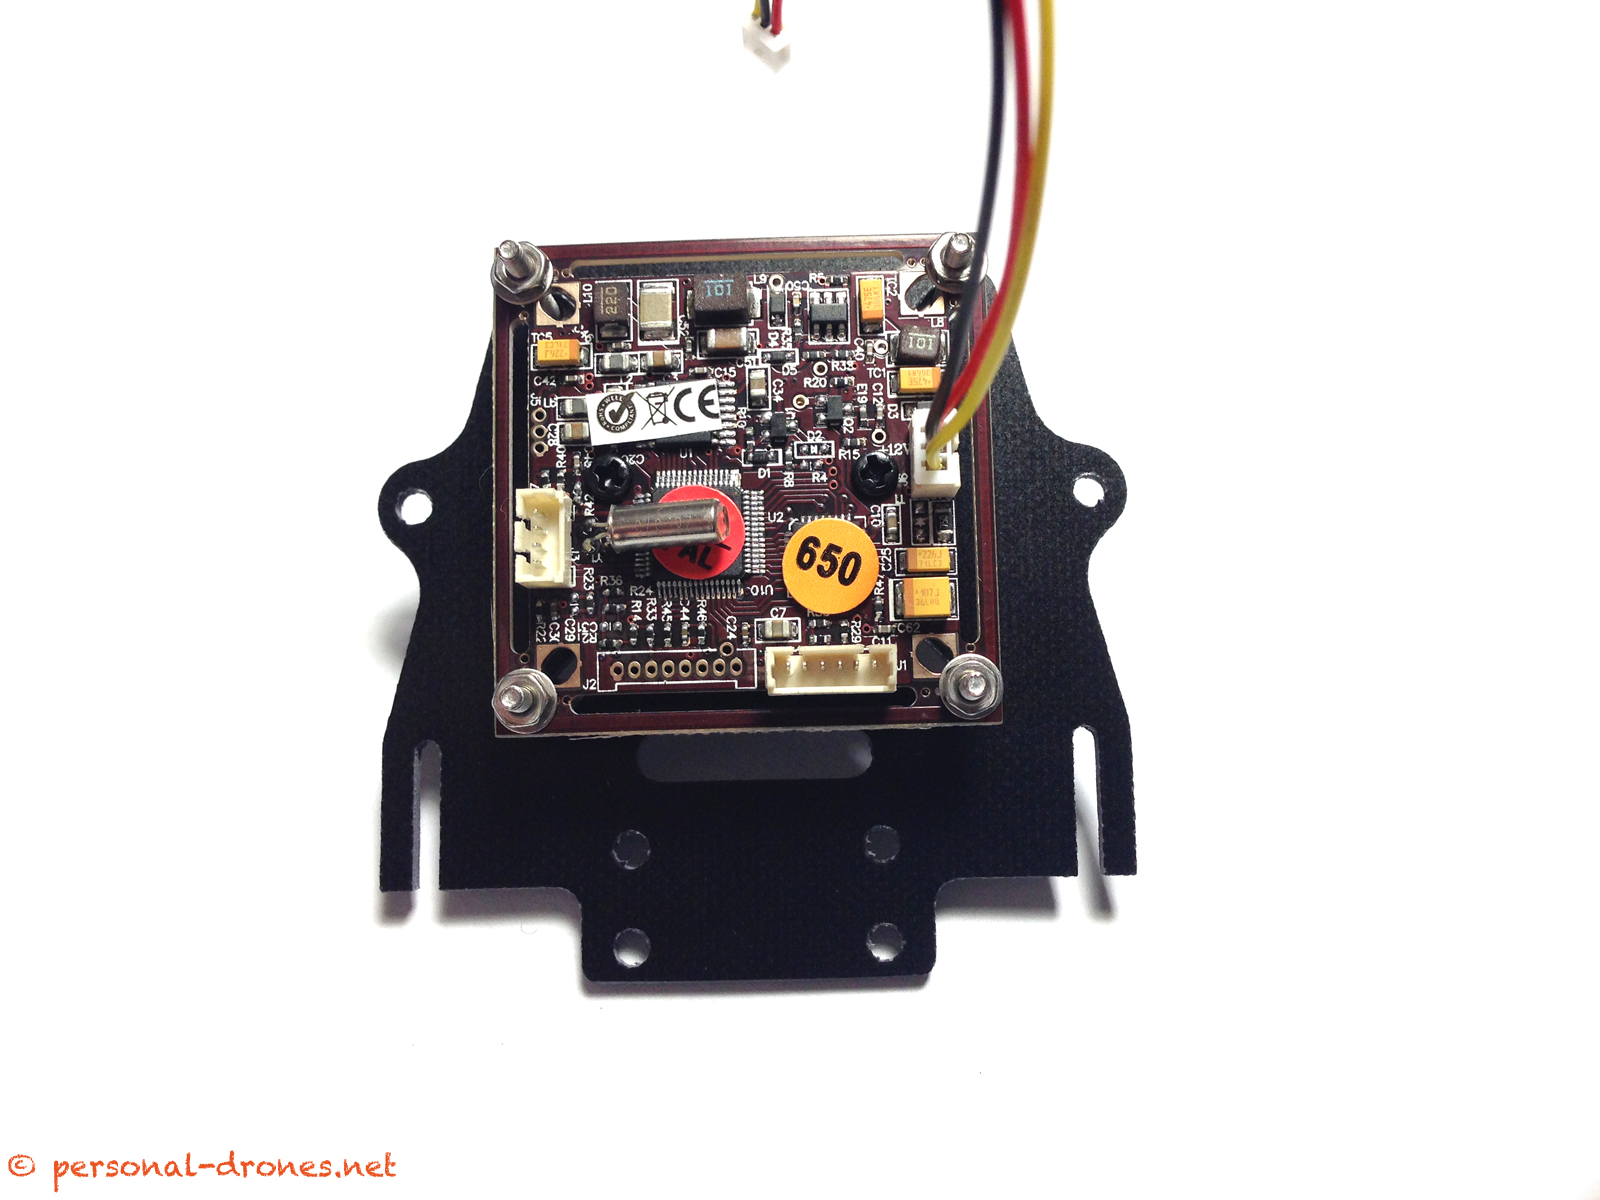
The camera has, well, the camera itself, which is hard wired to a module with an onboard LCD screen, where the magic happens. The wiring of the module is relatively straightforward. Leaving alone the remote control part, we have two power wires, positive (red) and ground (black, gnd), a video signal wire (yellow) and a video ground wire (black). Back to the wiring in a moment.
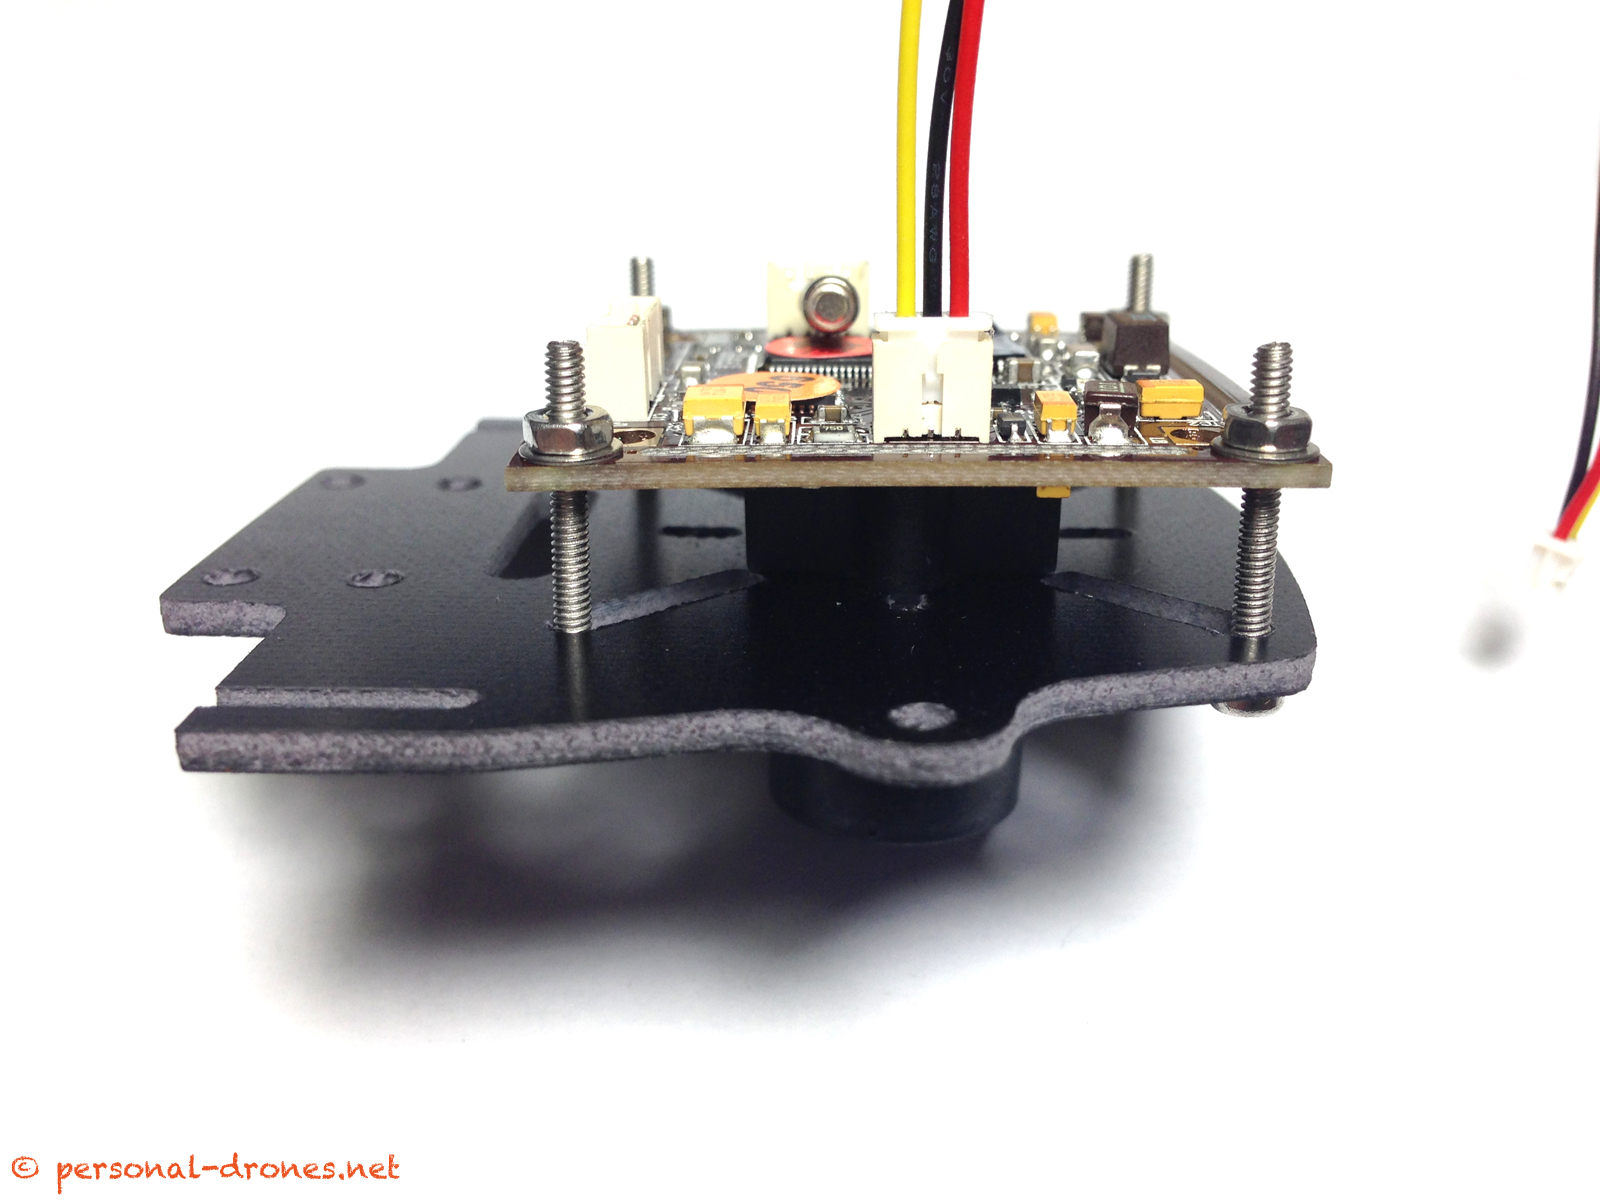
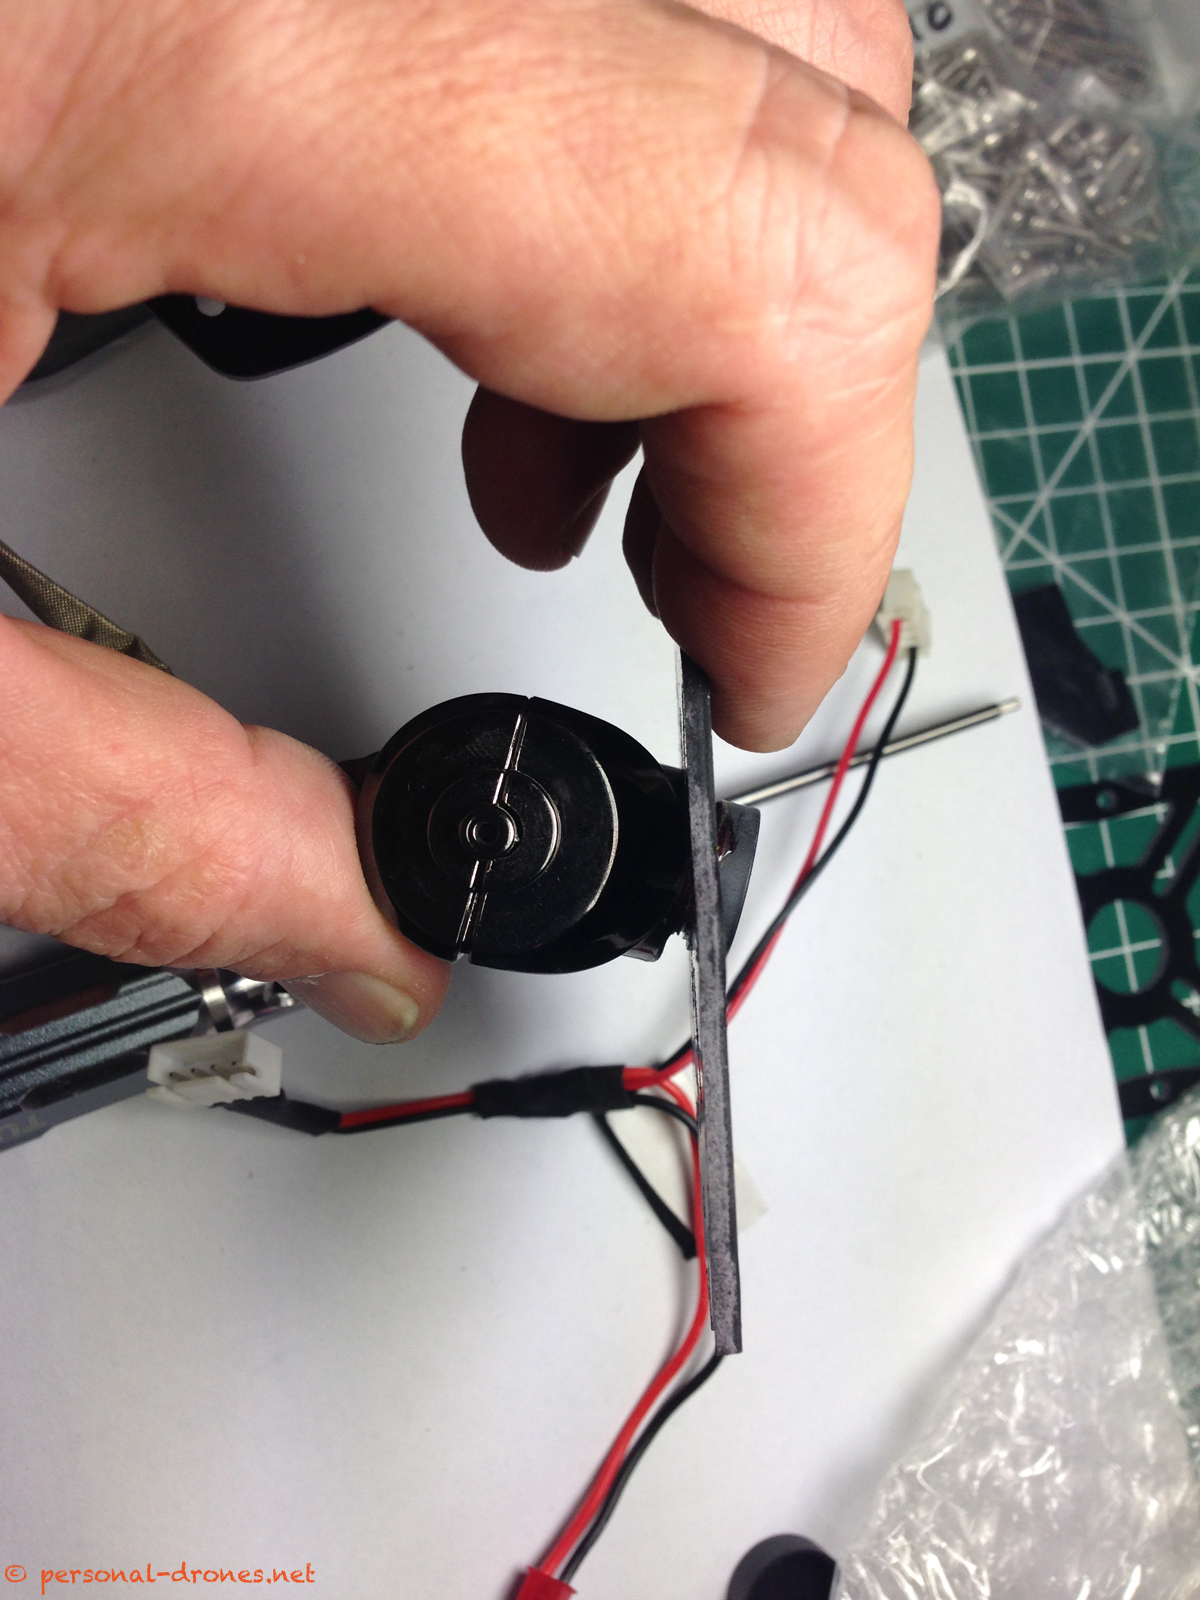
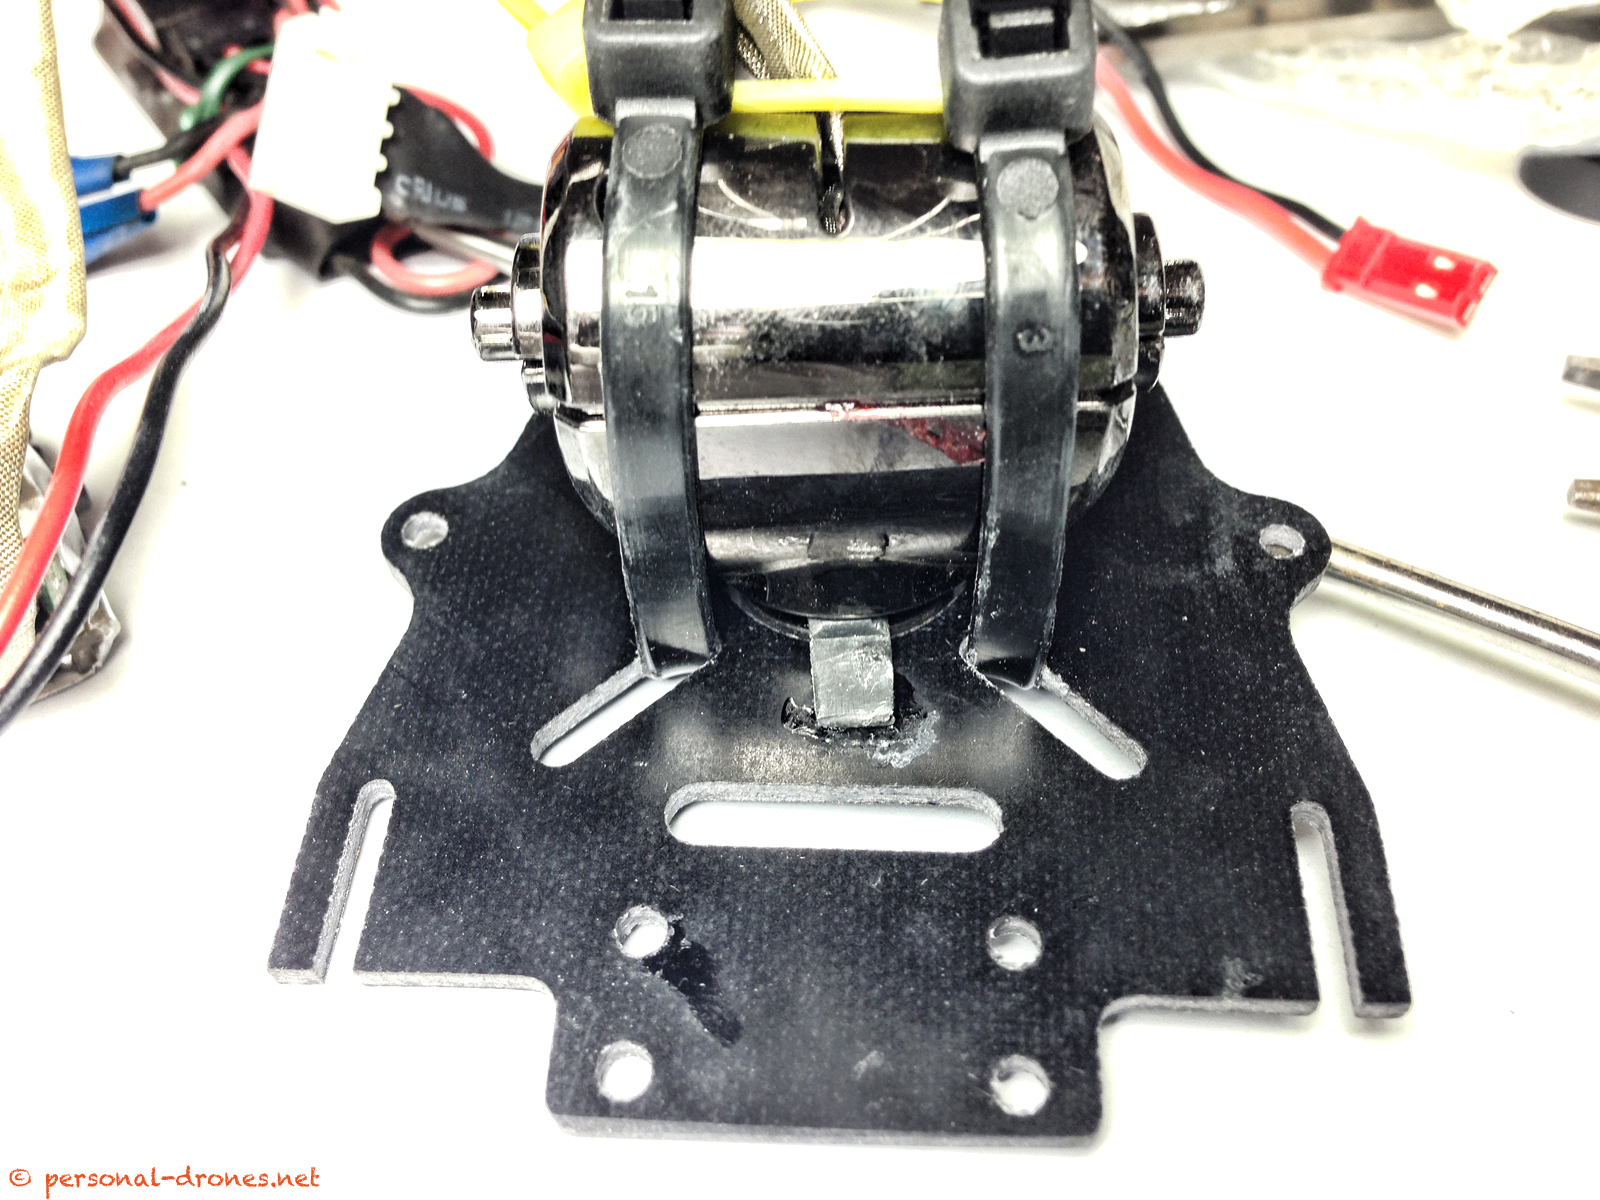
Hooking the camera to the front piece was relatively easy as you can see in the following pictures, although the shape of the camera itself does not really help. I would love to see a version of this camera with a more “friendly” shape.
To help keeping the camera at an angle, I glued a little piece of plastic piece to the camera mount, see the second of the following pictures.
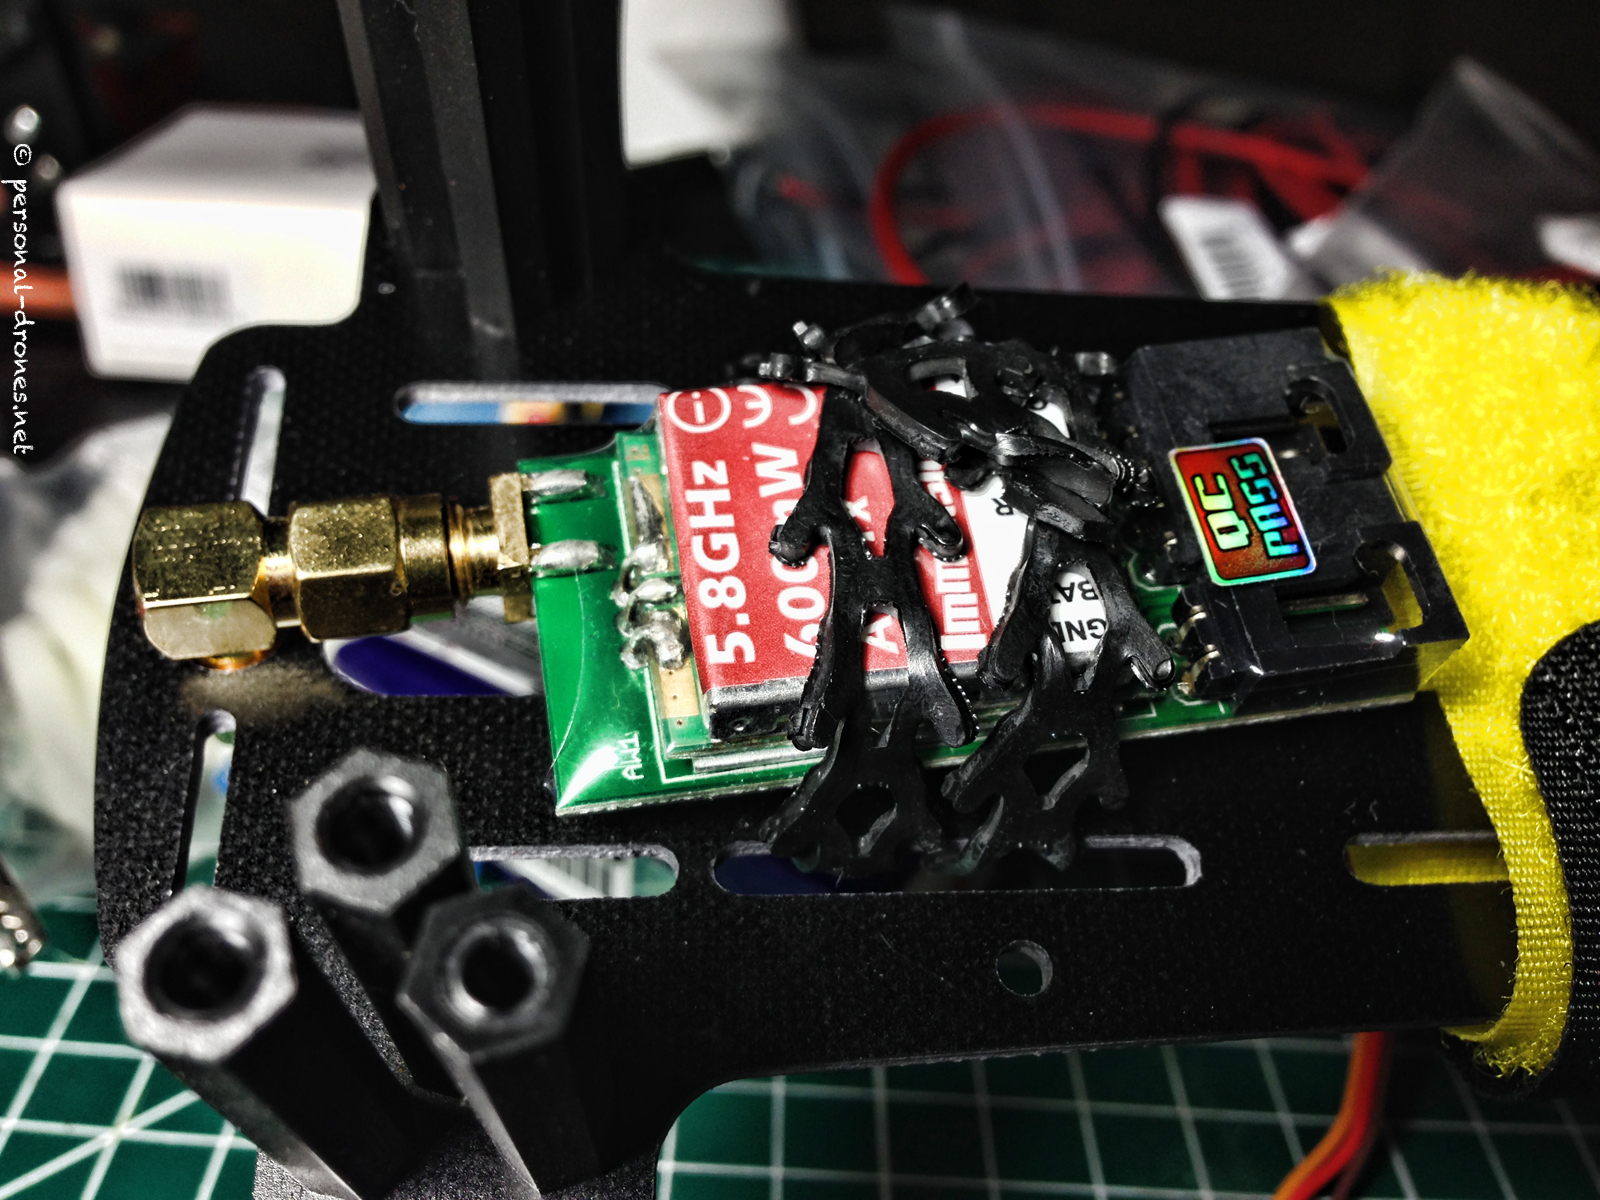
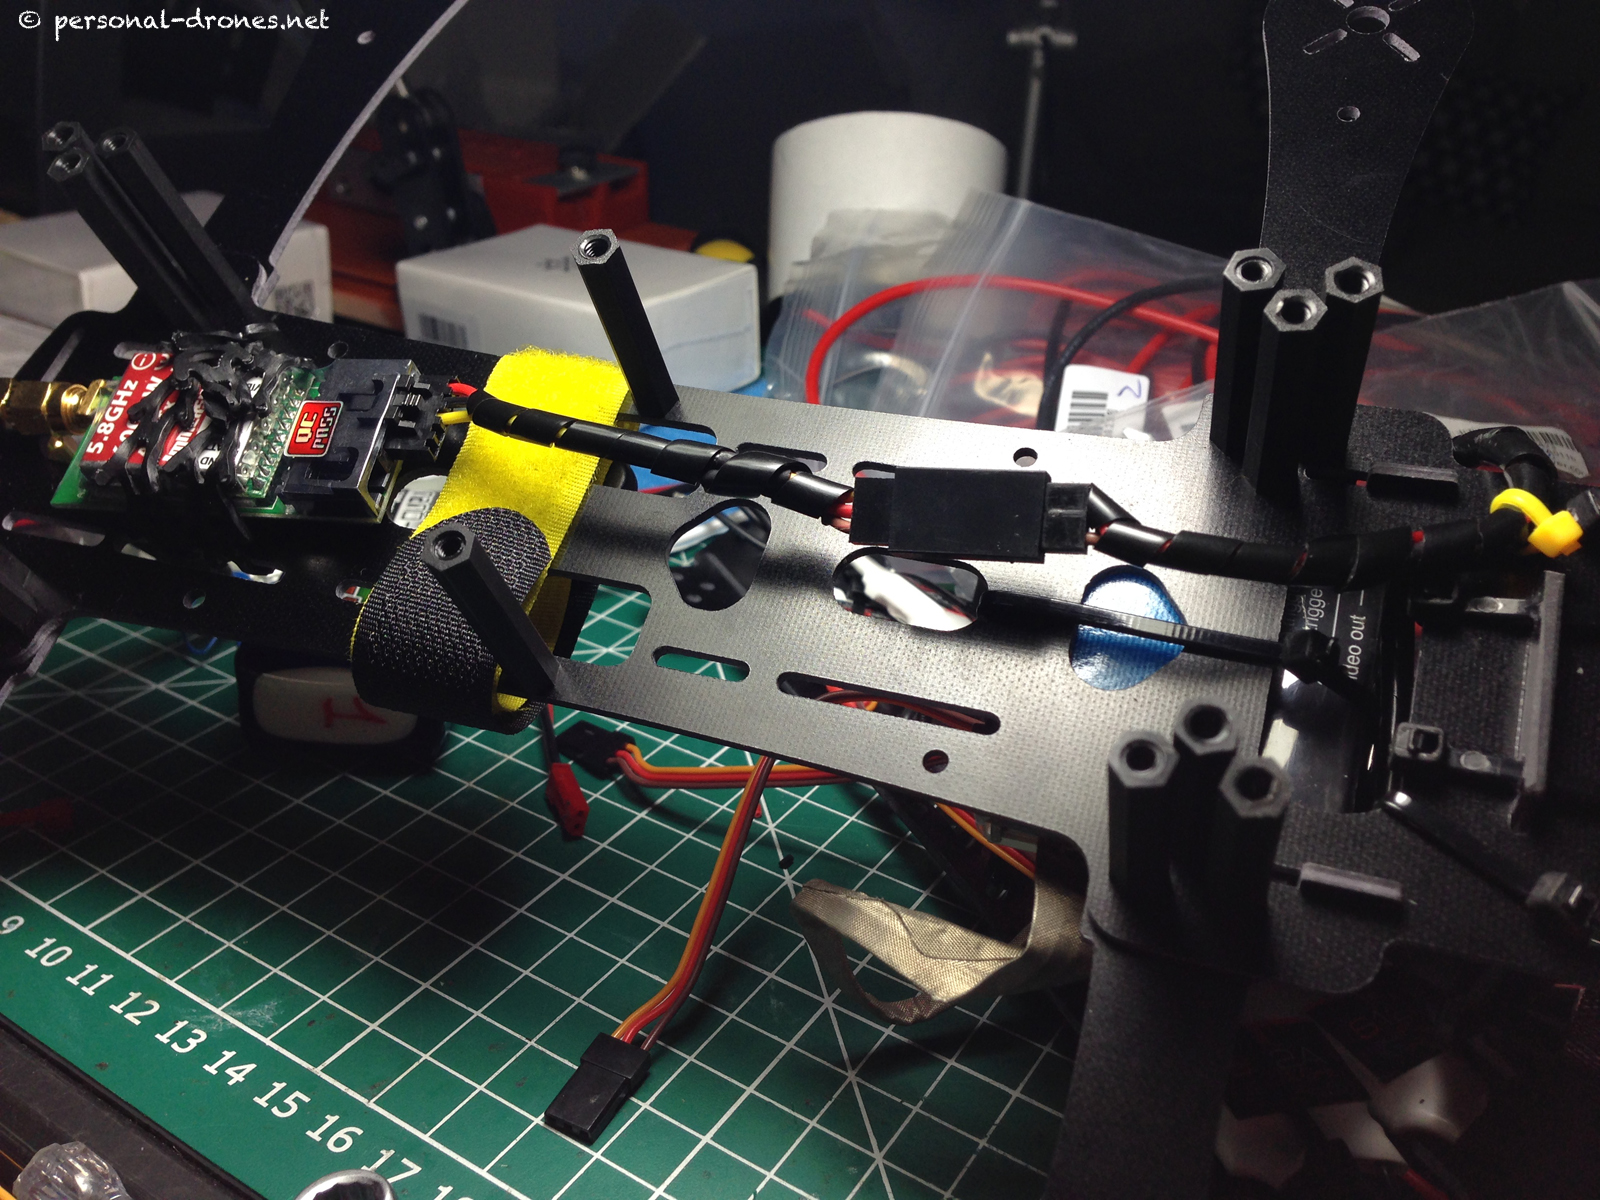
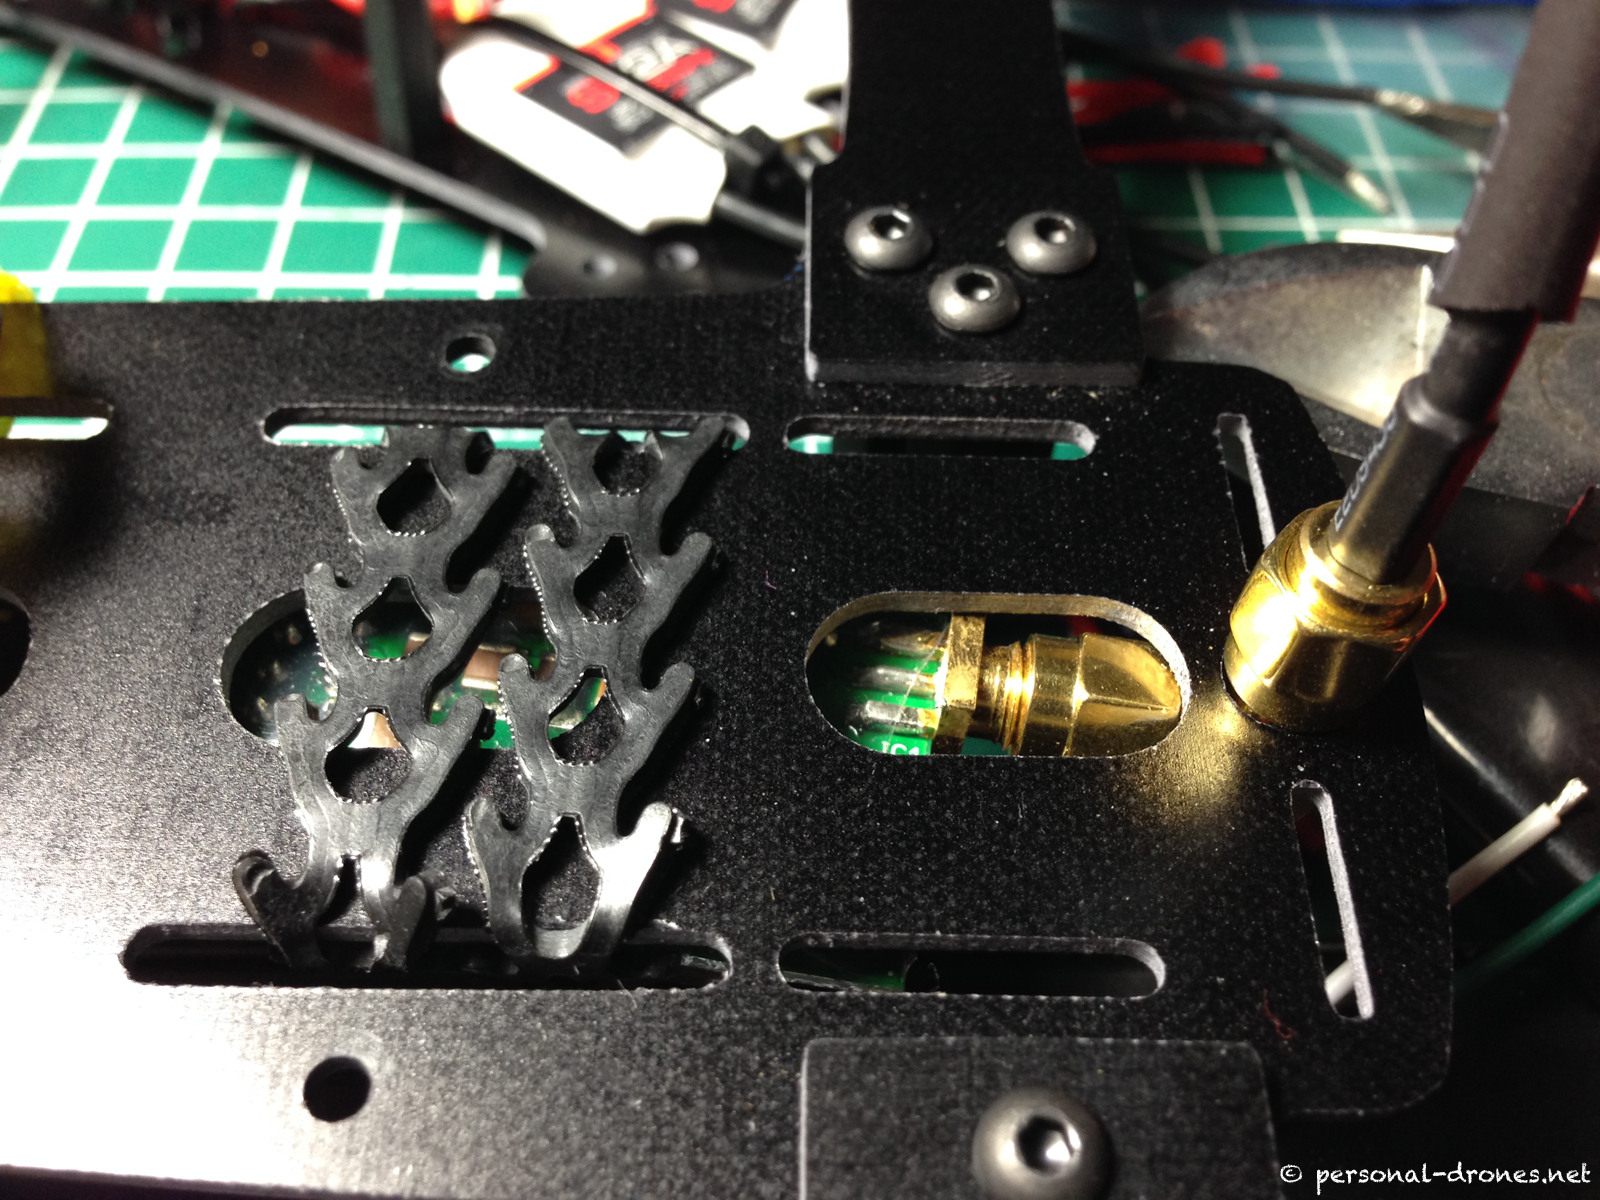
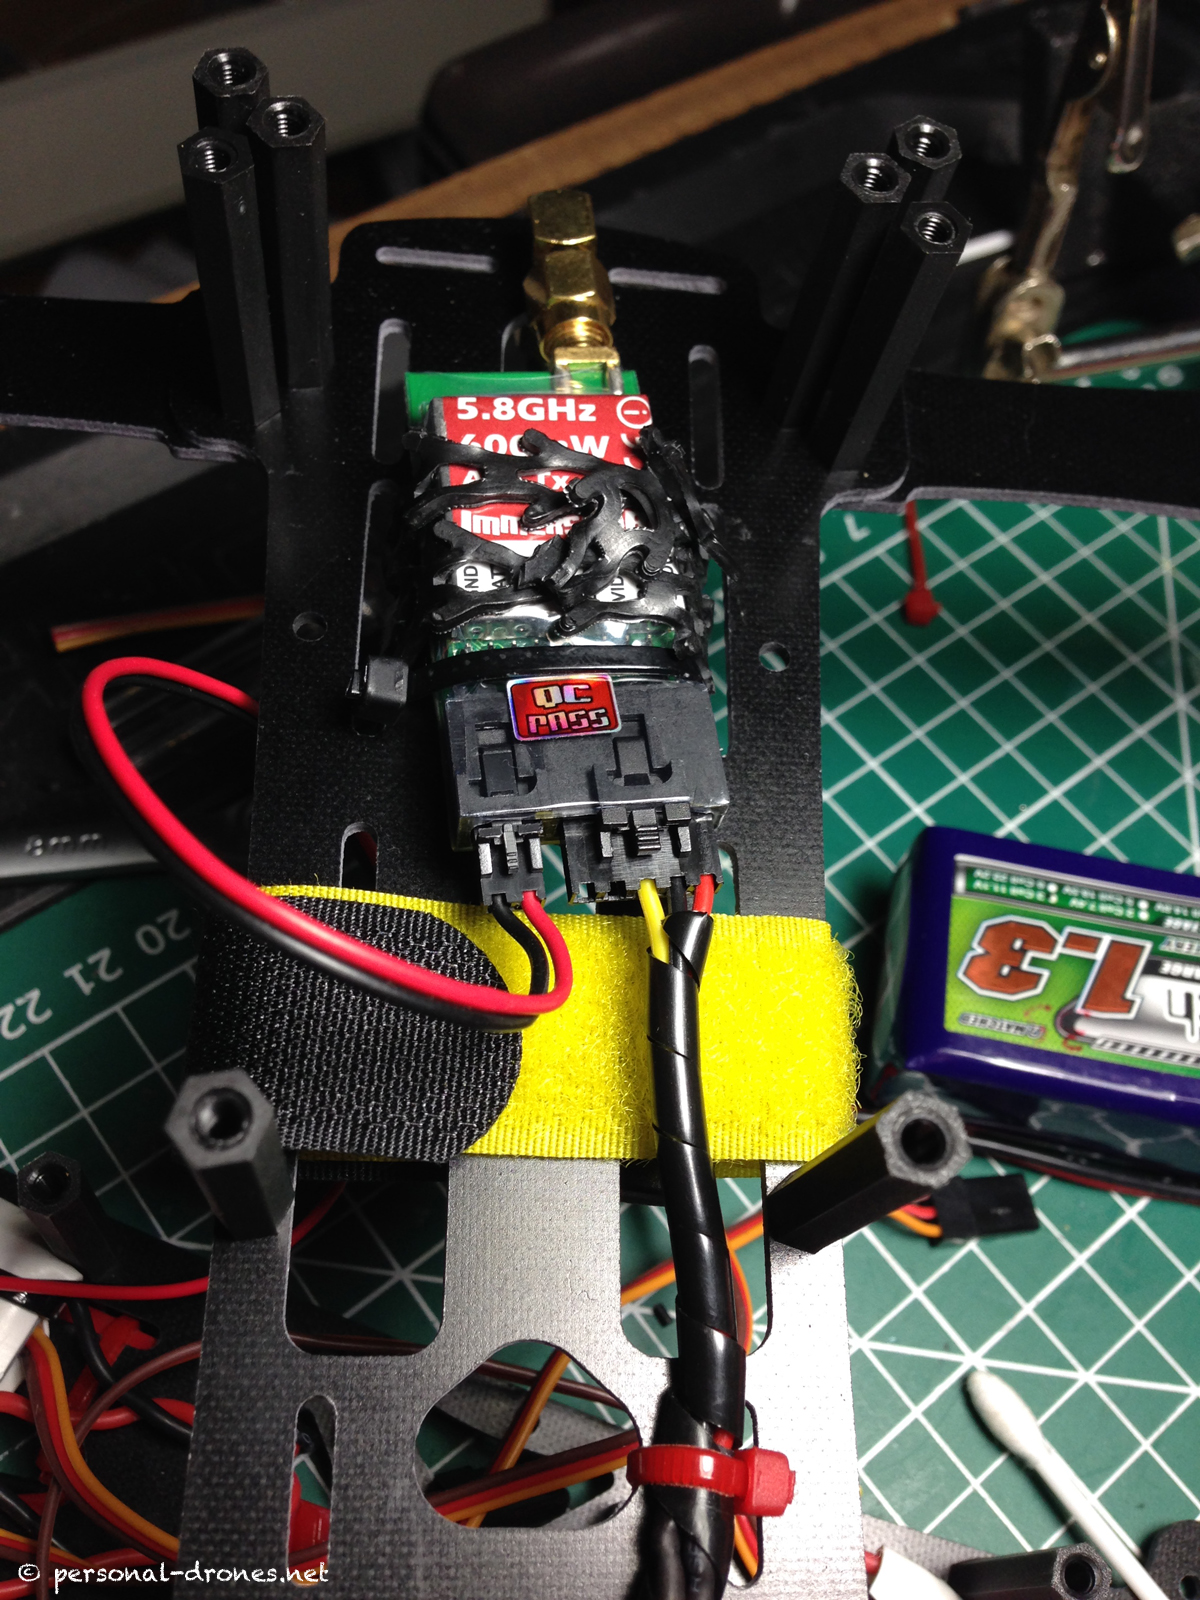
I will power the camera with 5 clean Volts directly from an ImmersionRC 600mW video transmitter, thereby skipping the requirement for the somewhat bulky power module that comes with the Horyzon camera, and allowing for a much simpler and cleaner setup. See how the transmitter was located on the other side of the same plate that hosts the camera. There is a very convenient hole at the very end of this plate of the FlyXcopter frame that is perfect for the video antenna to pass through by using a 90° SMA connector:
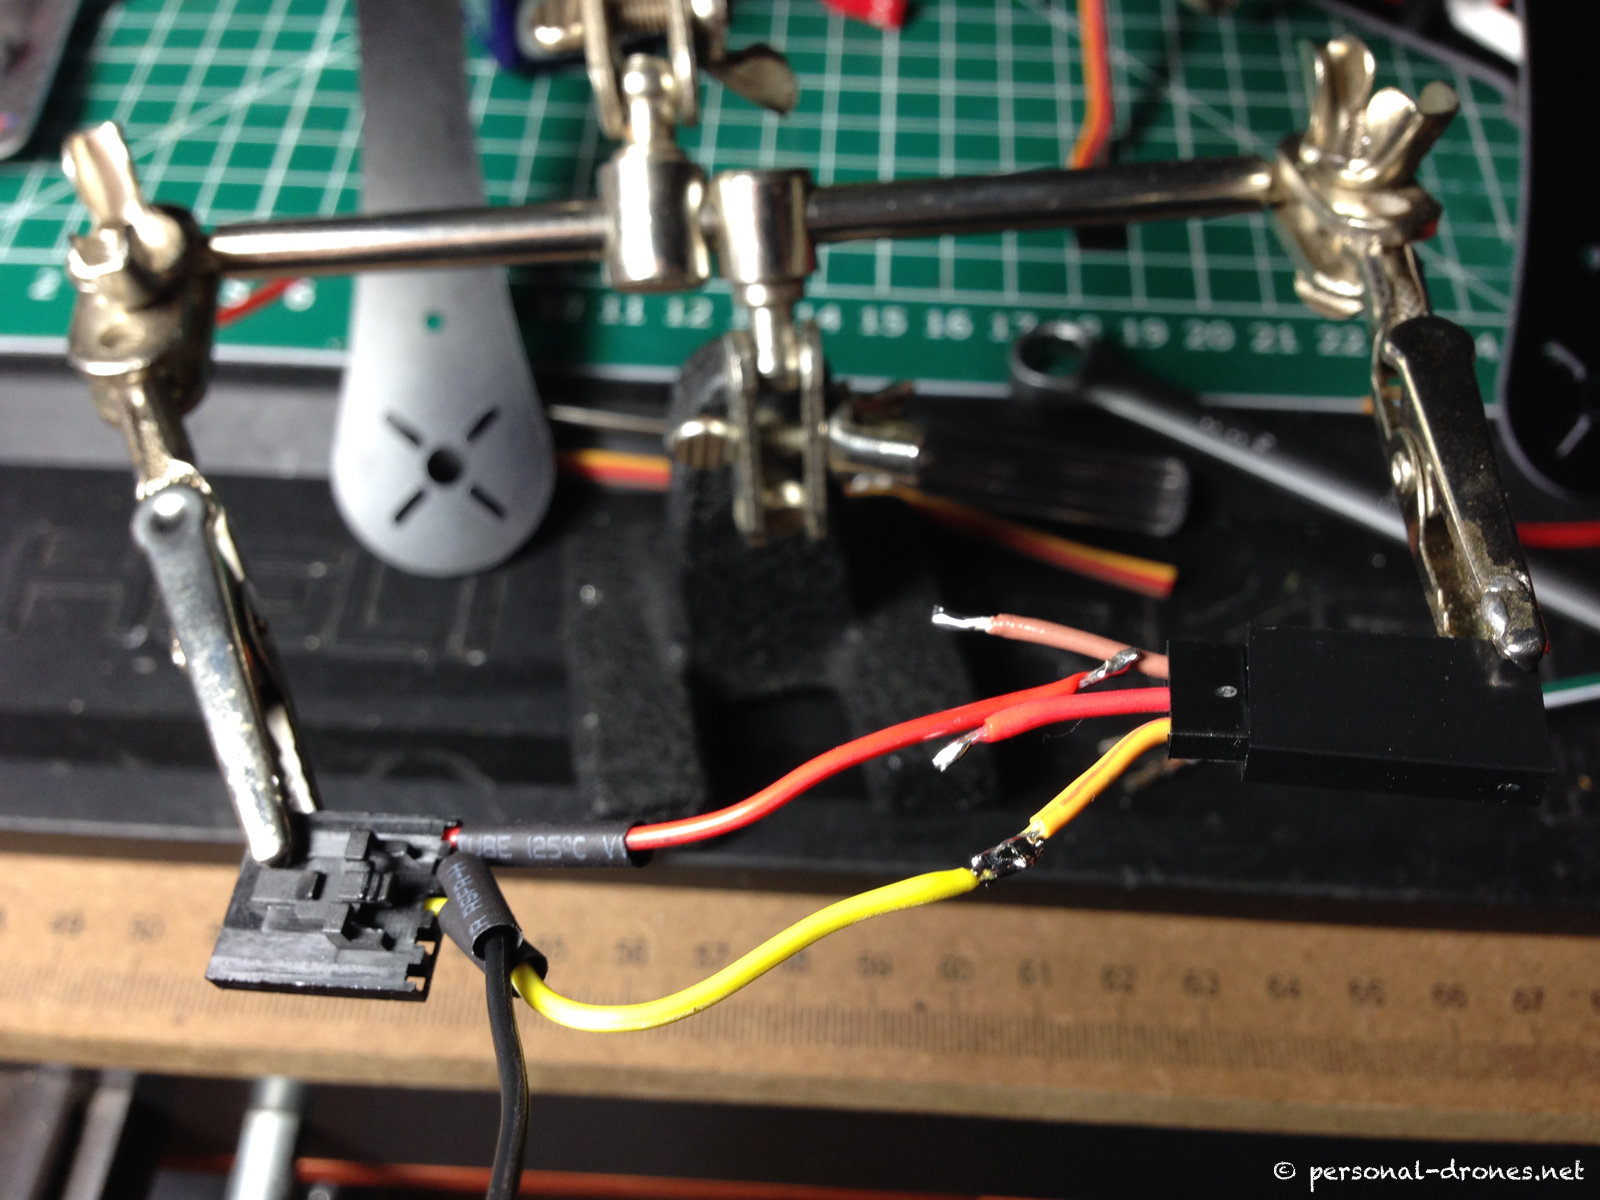
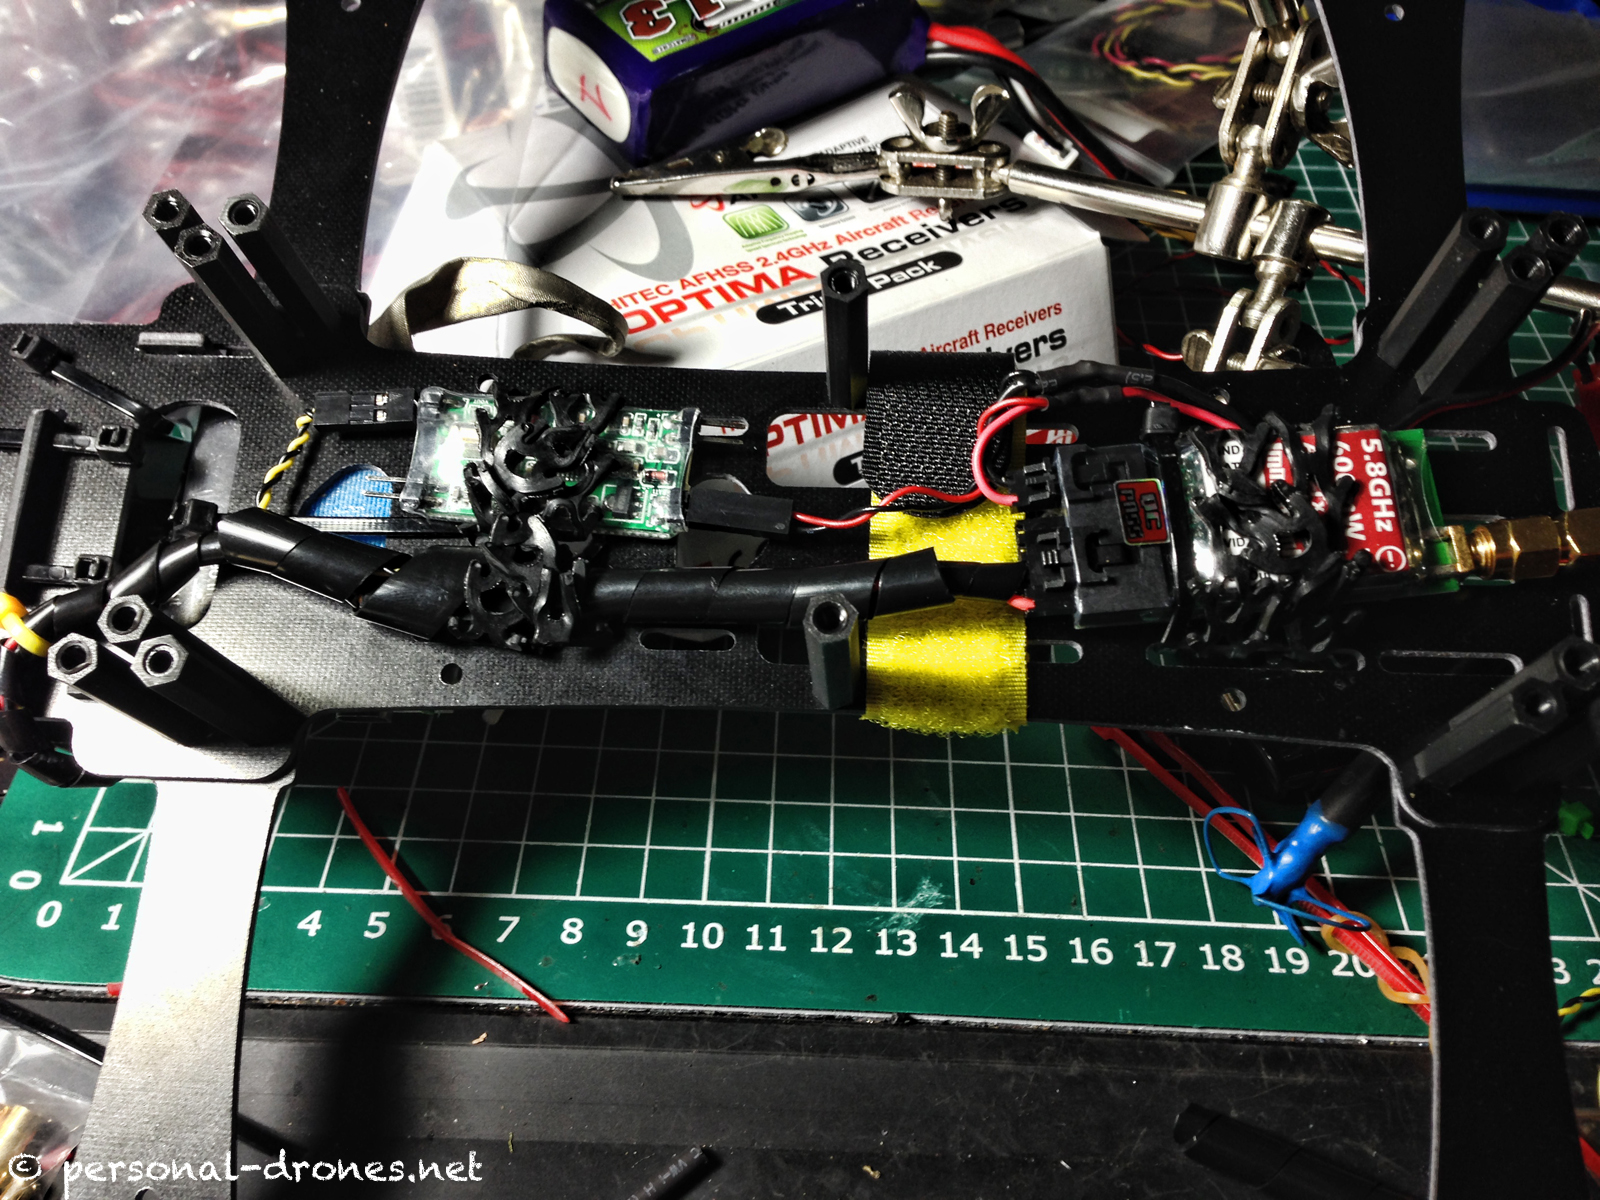
For the wiring, I will have a single video/power cable running from the camera, located to the front of the quad, upper part of upper plate, to the transmitter, located at the tail of the quad on the lower (inner) part of the upper plate. For this cable, the gnd of power and video from the camera module will be soldered together in a single ground cable (black). Then we have the power wire (red) and the video wire (yellow). So we have a 3 wires cable coming out of the camera module, which I equipped with a simple male servo connector.
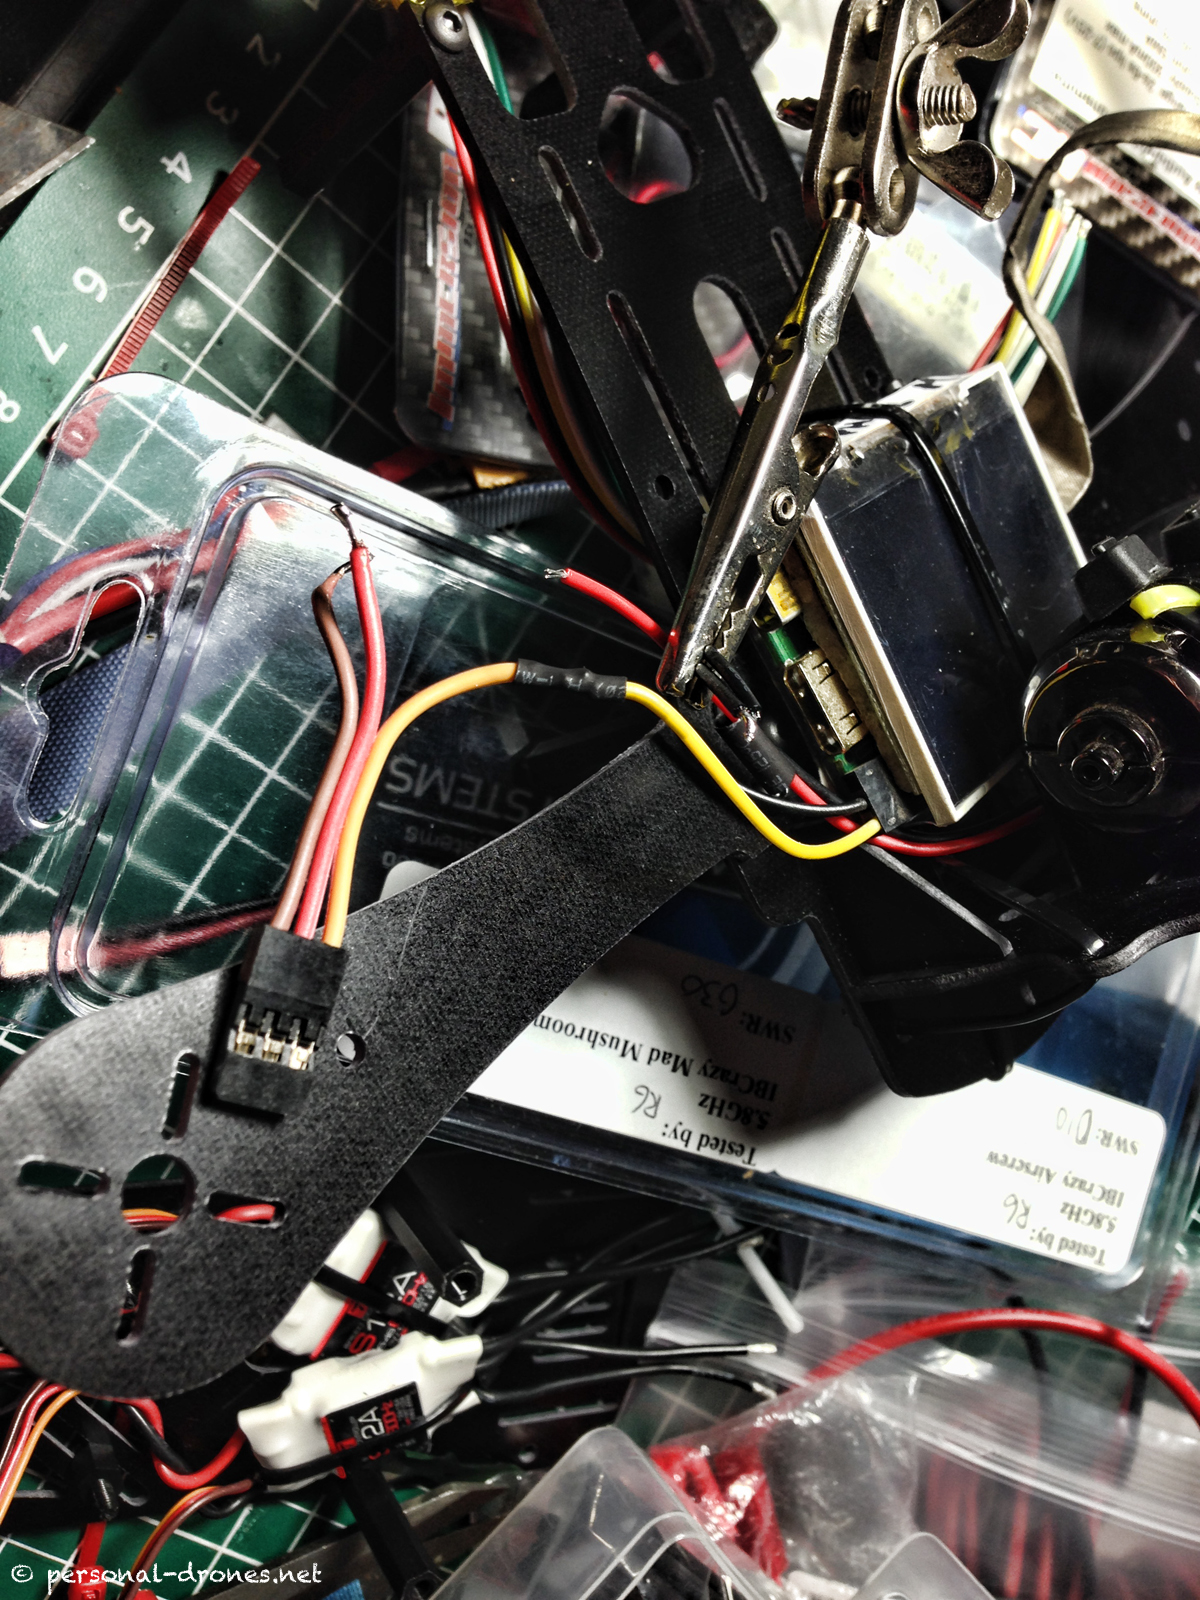
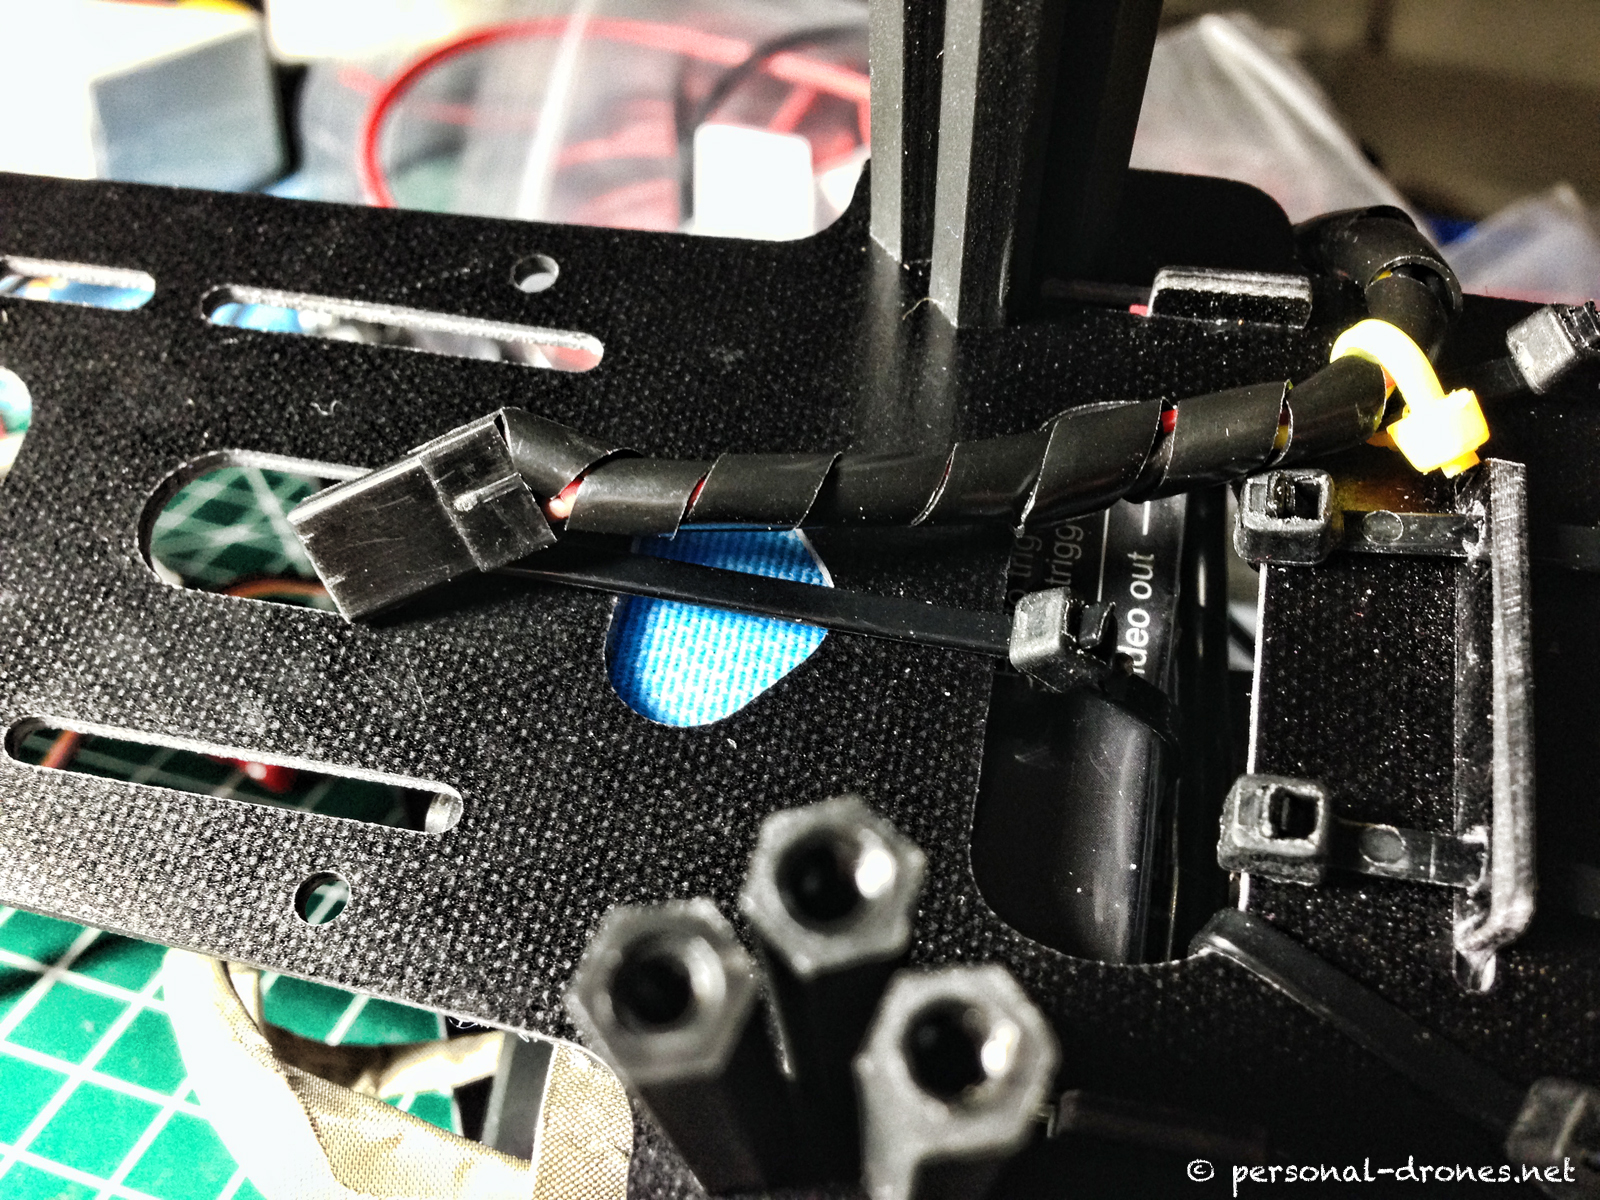
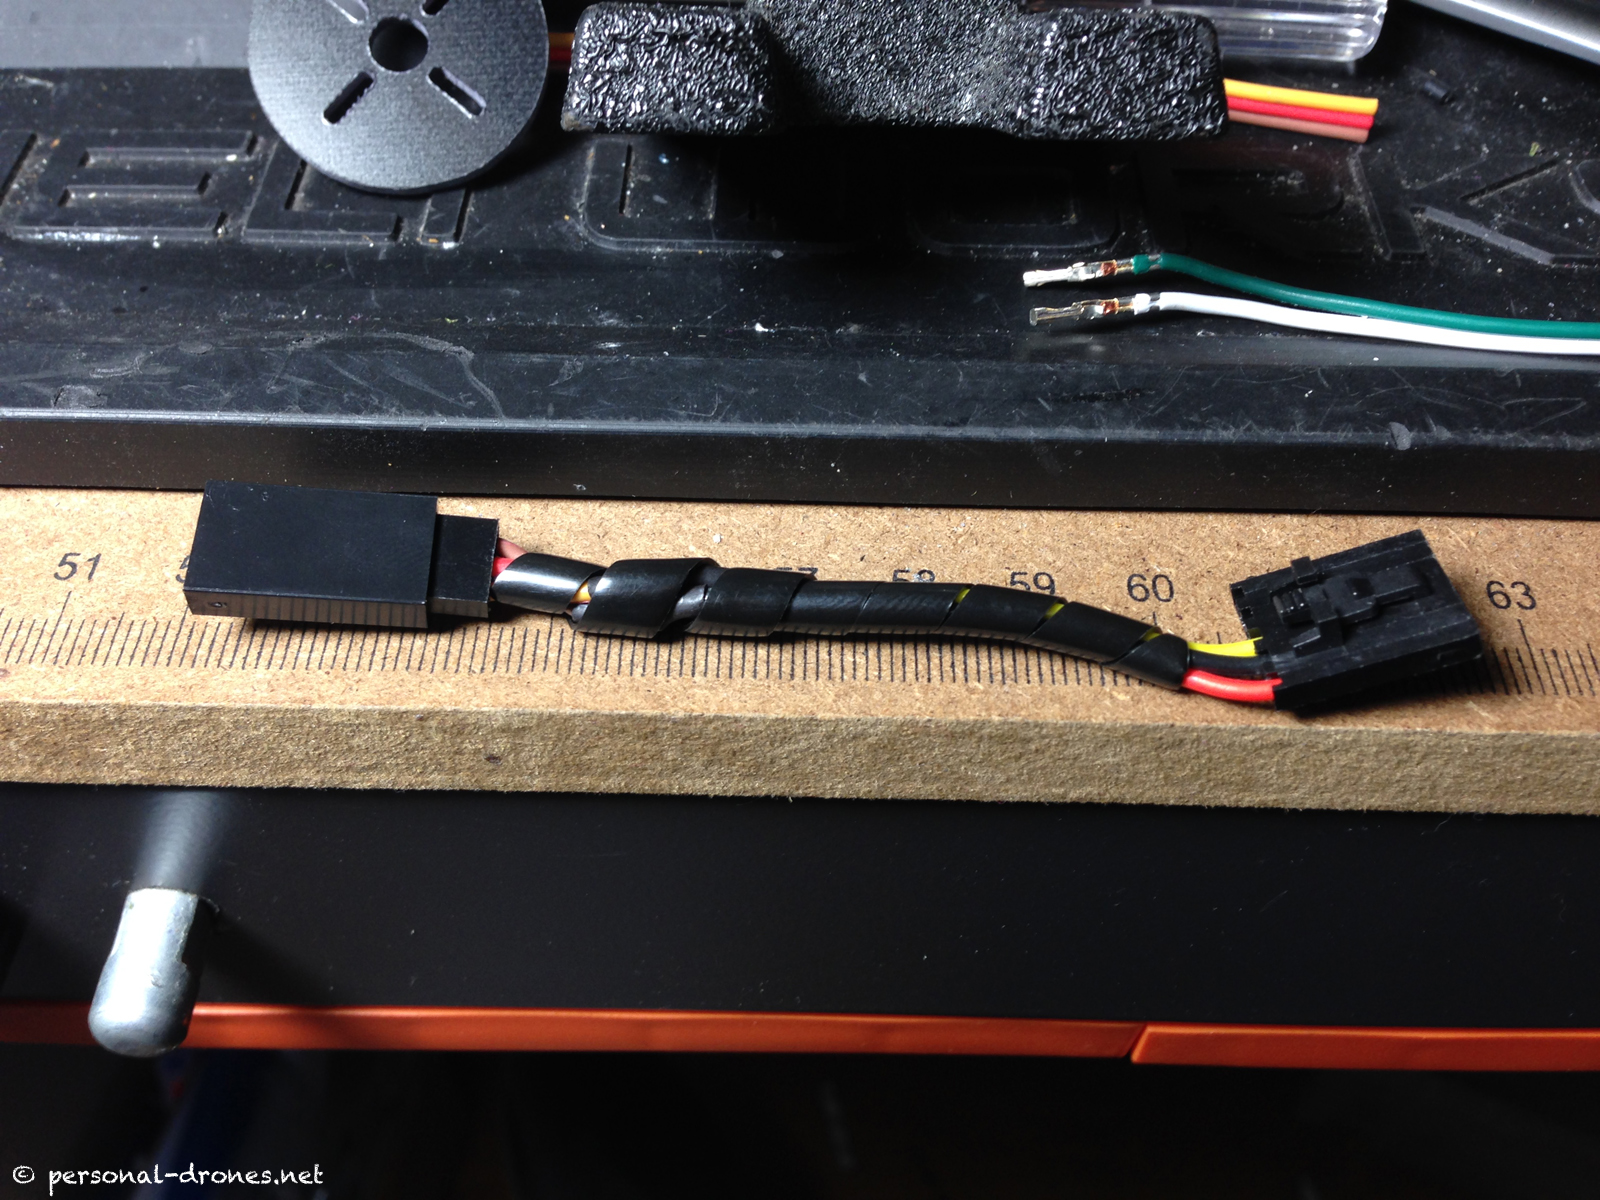
Here’s how the cable looks like after being wrapped in plastic cable wrap and tightened to the lower part of the plate (opposite of where the camera sits:
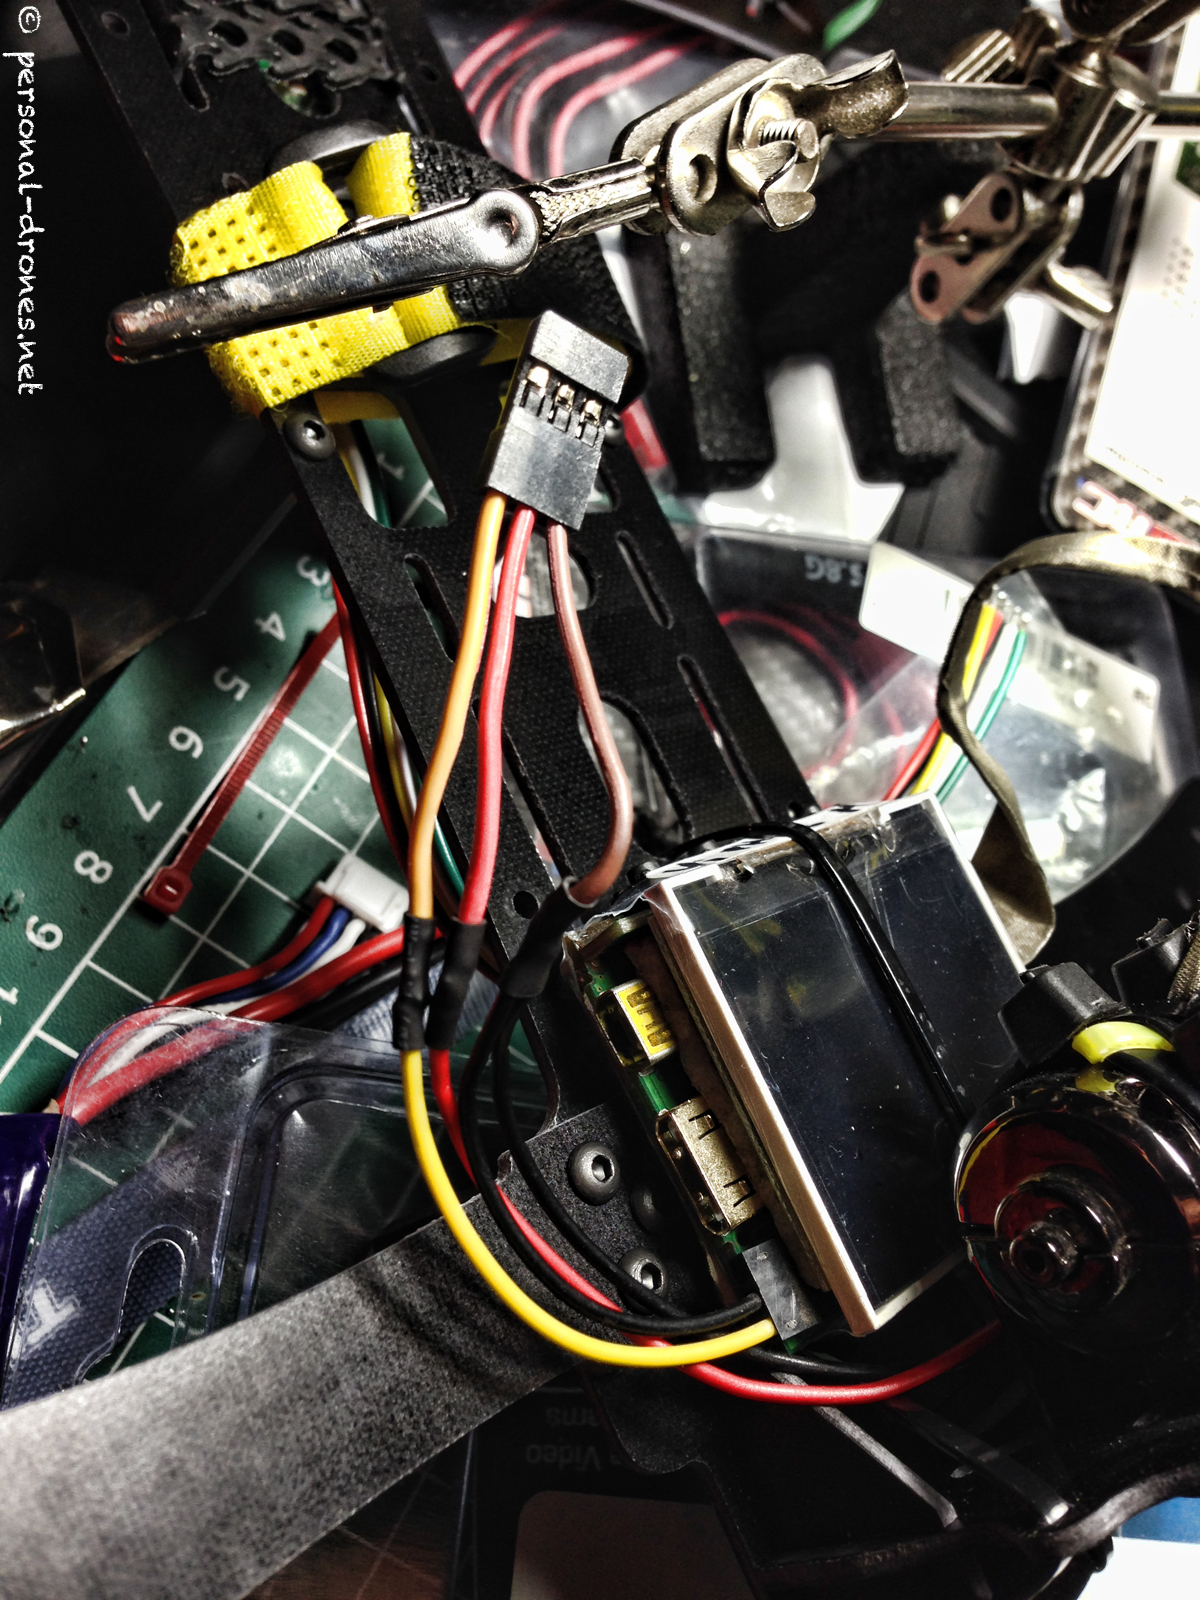
The cable continues with a female servo connector and the same 3 wires running now to the video transmitter.
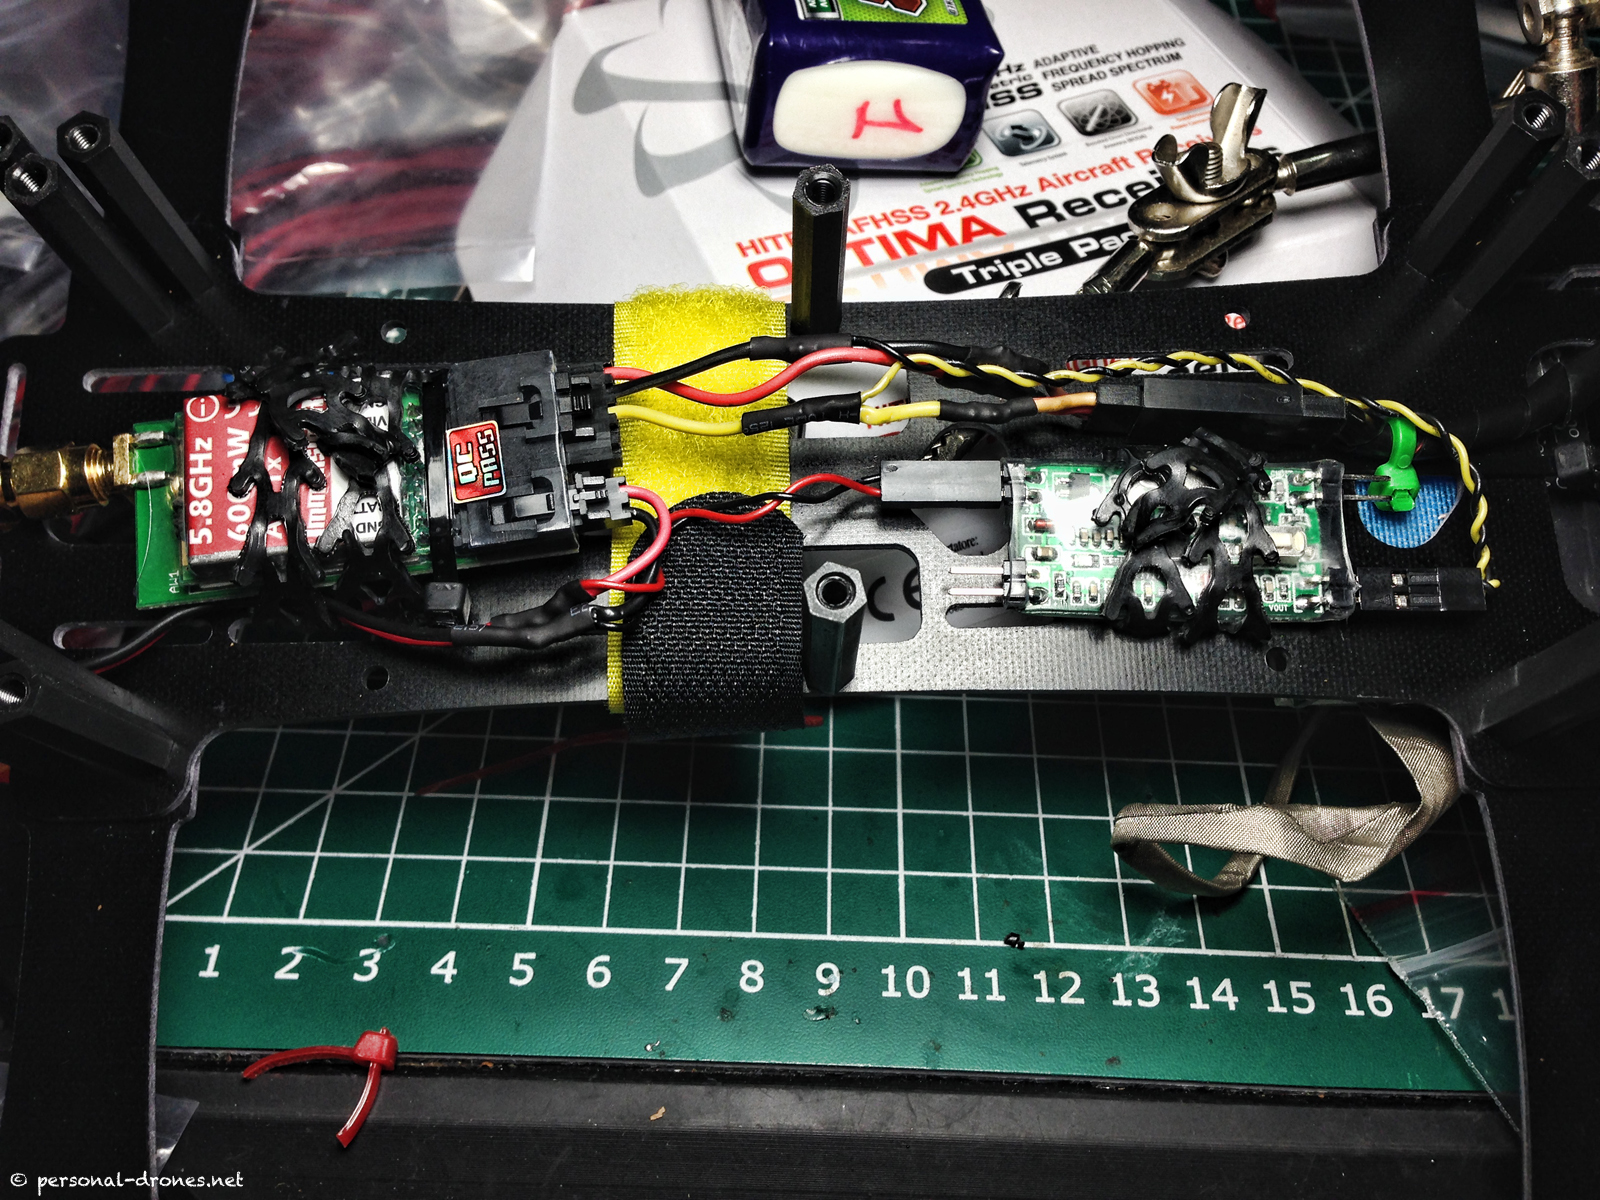
Here’s the full system on the lower part of the upper plate:
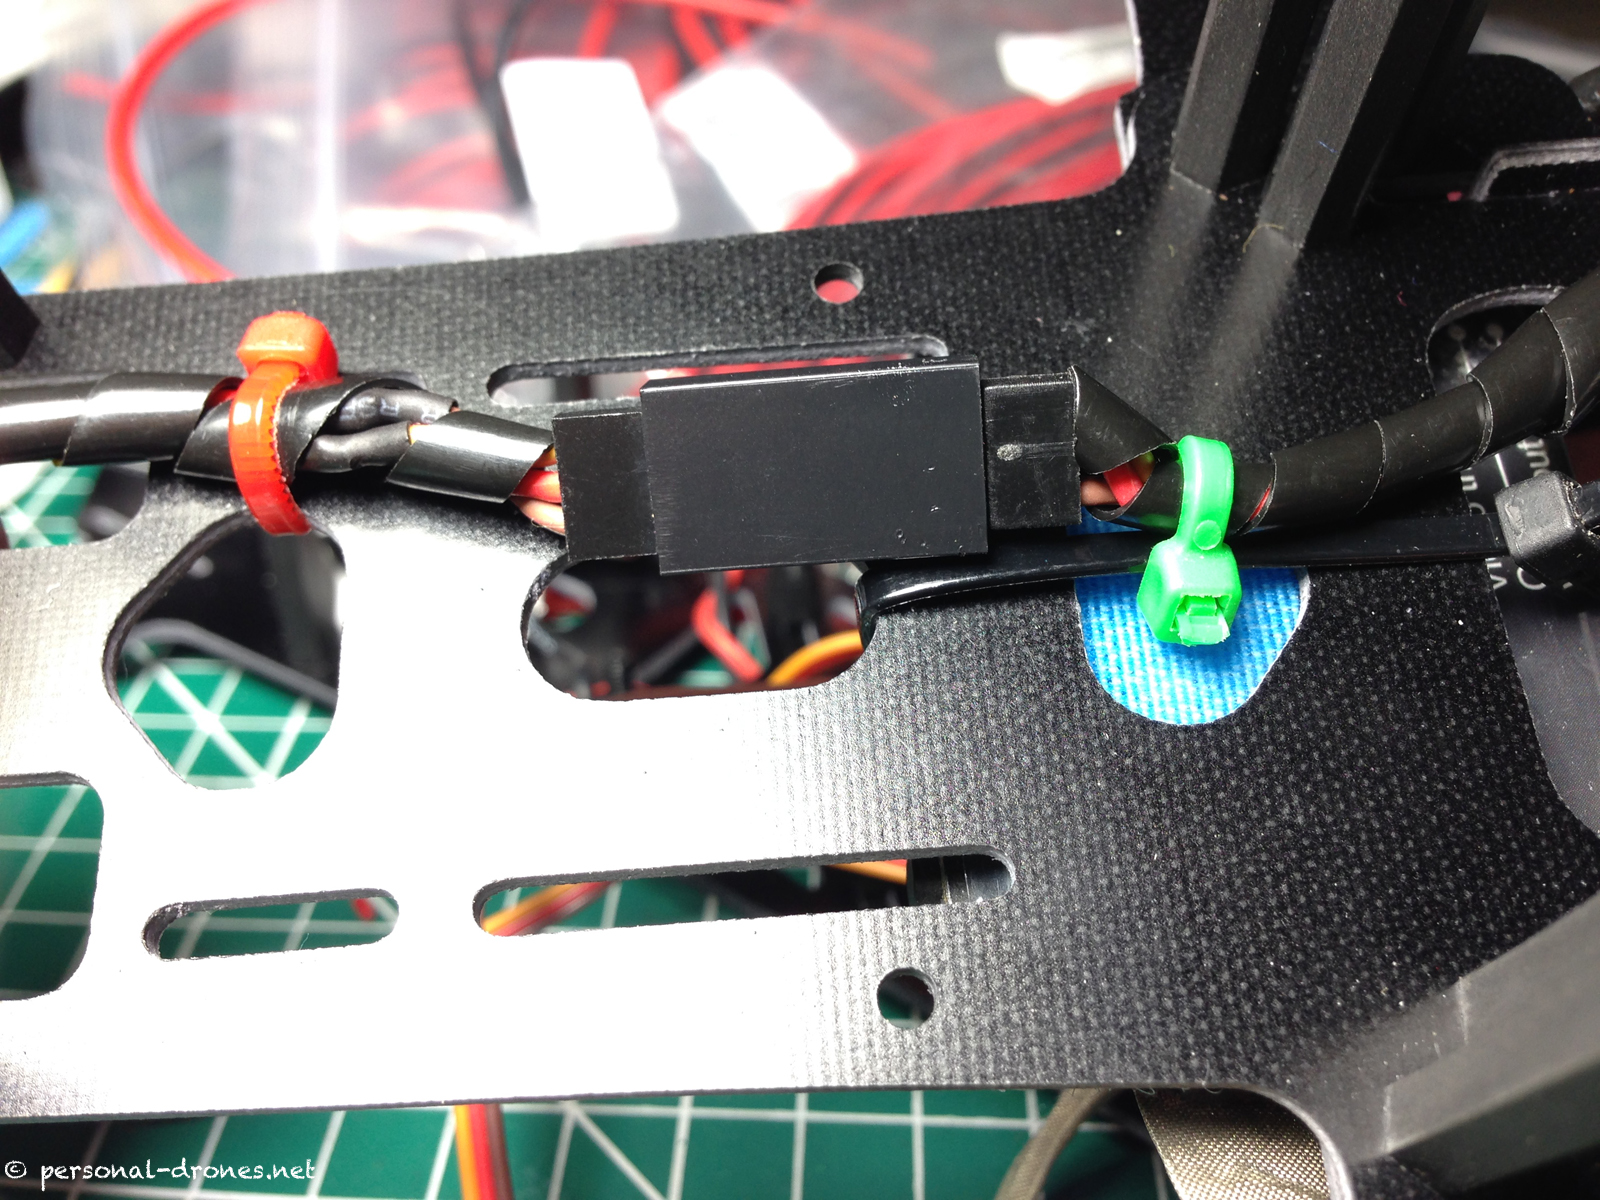
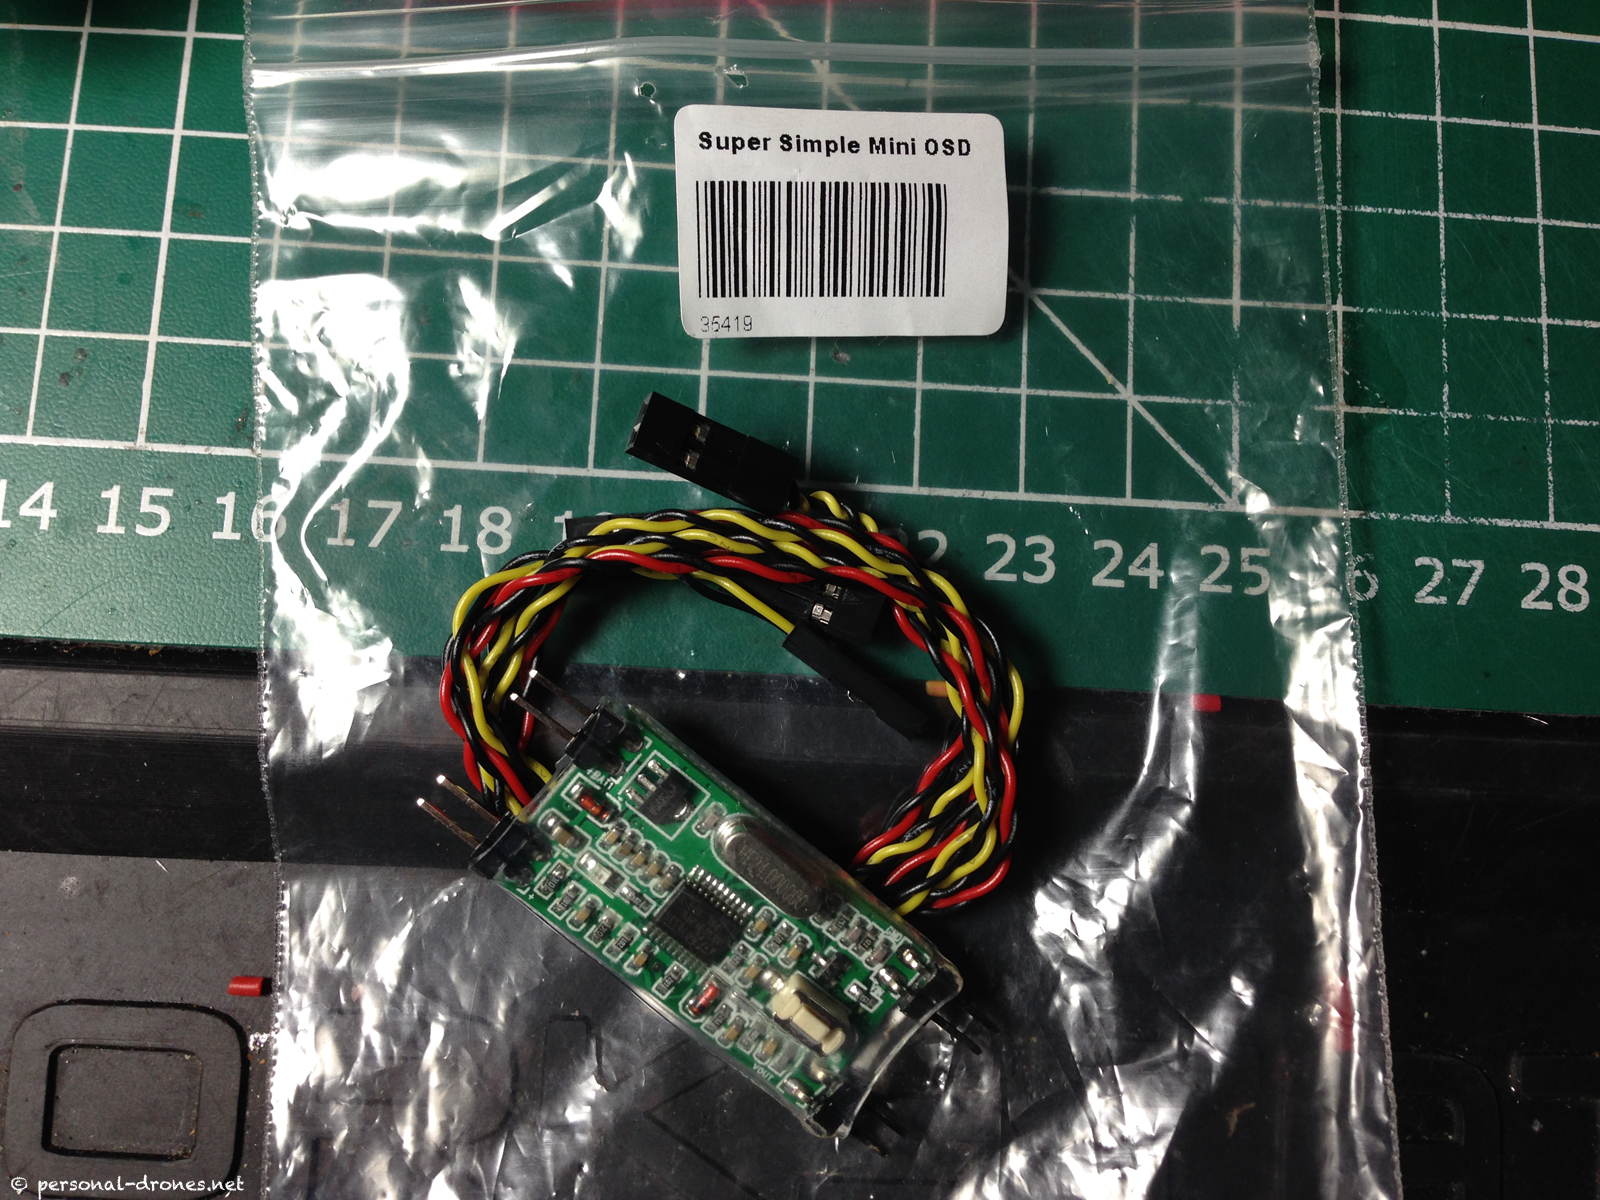
Adding a Mini OSD to the FPV system
After wiring all the FPV system as shown above, I of course realized I did forgot a little component that I had planned to add: a mini OSD. This is a little module that you can hook to the battery power on one side and to the video cable that runs from the camera to the transmitter on the other side. The module will display, right on the video feed, the voltage of the battery. This is very handy while flying FPV as it lets the pilot be aware of battery charge at all times.
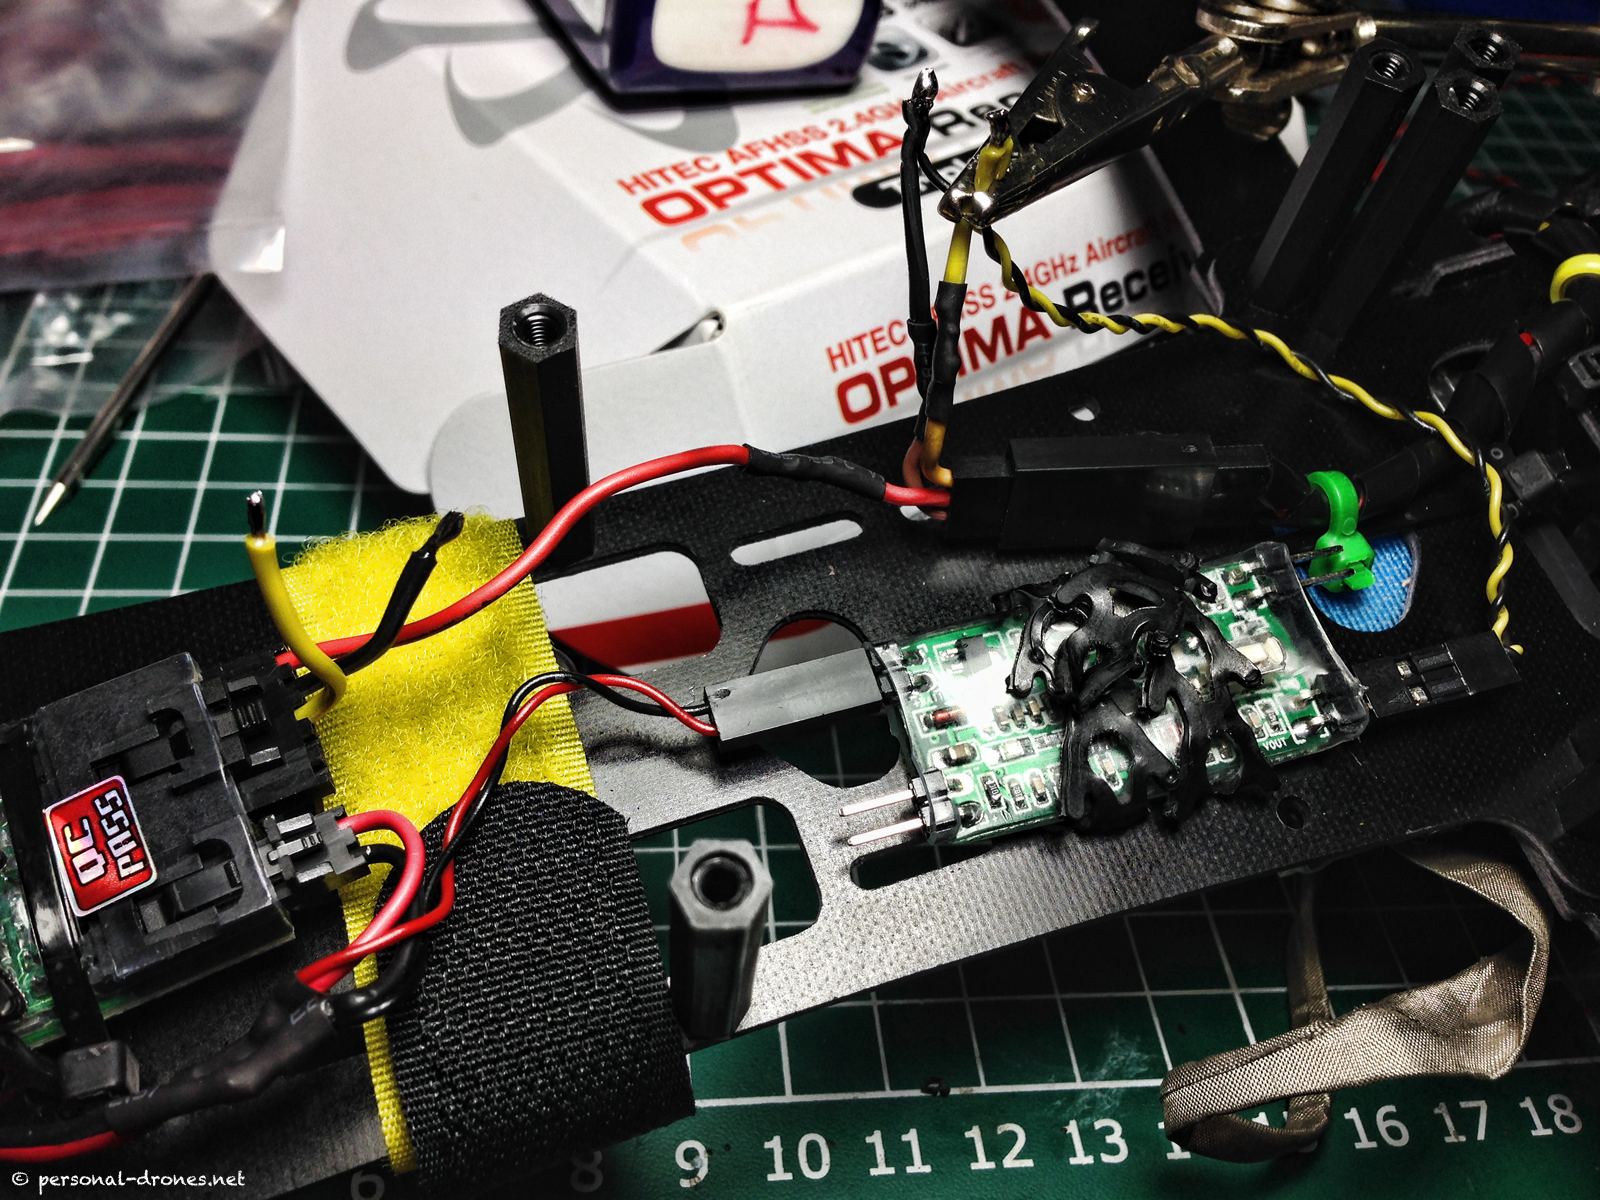
In order to add the mini OSD I tapped on the video transmitter power wire, which powers all the upper plate with the FPV equipment, for the OSD battery input. And I tapped into the FPV cable I described above, to add the OSD output to the video feed.
Assembly of FlyXcopter’s lower plate: Electronics and flight controller
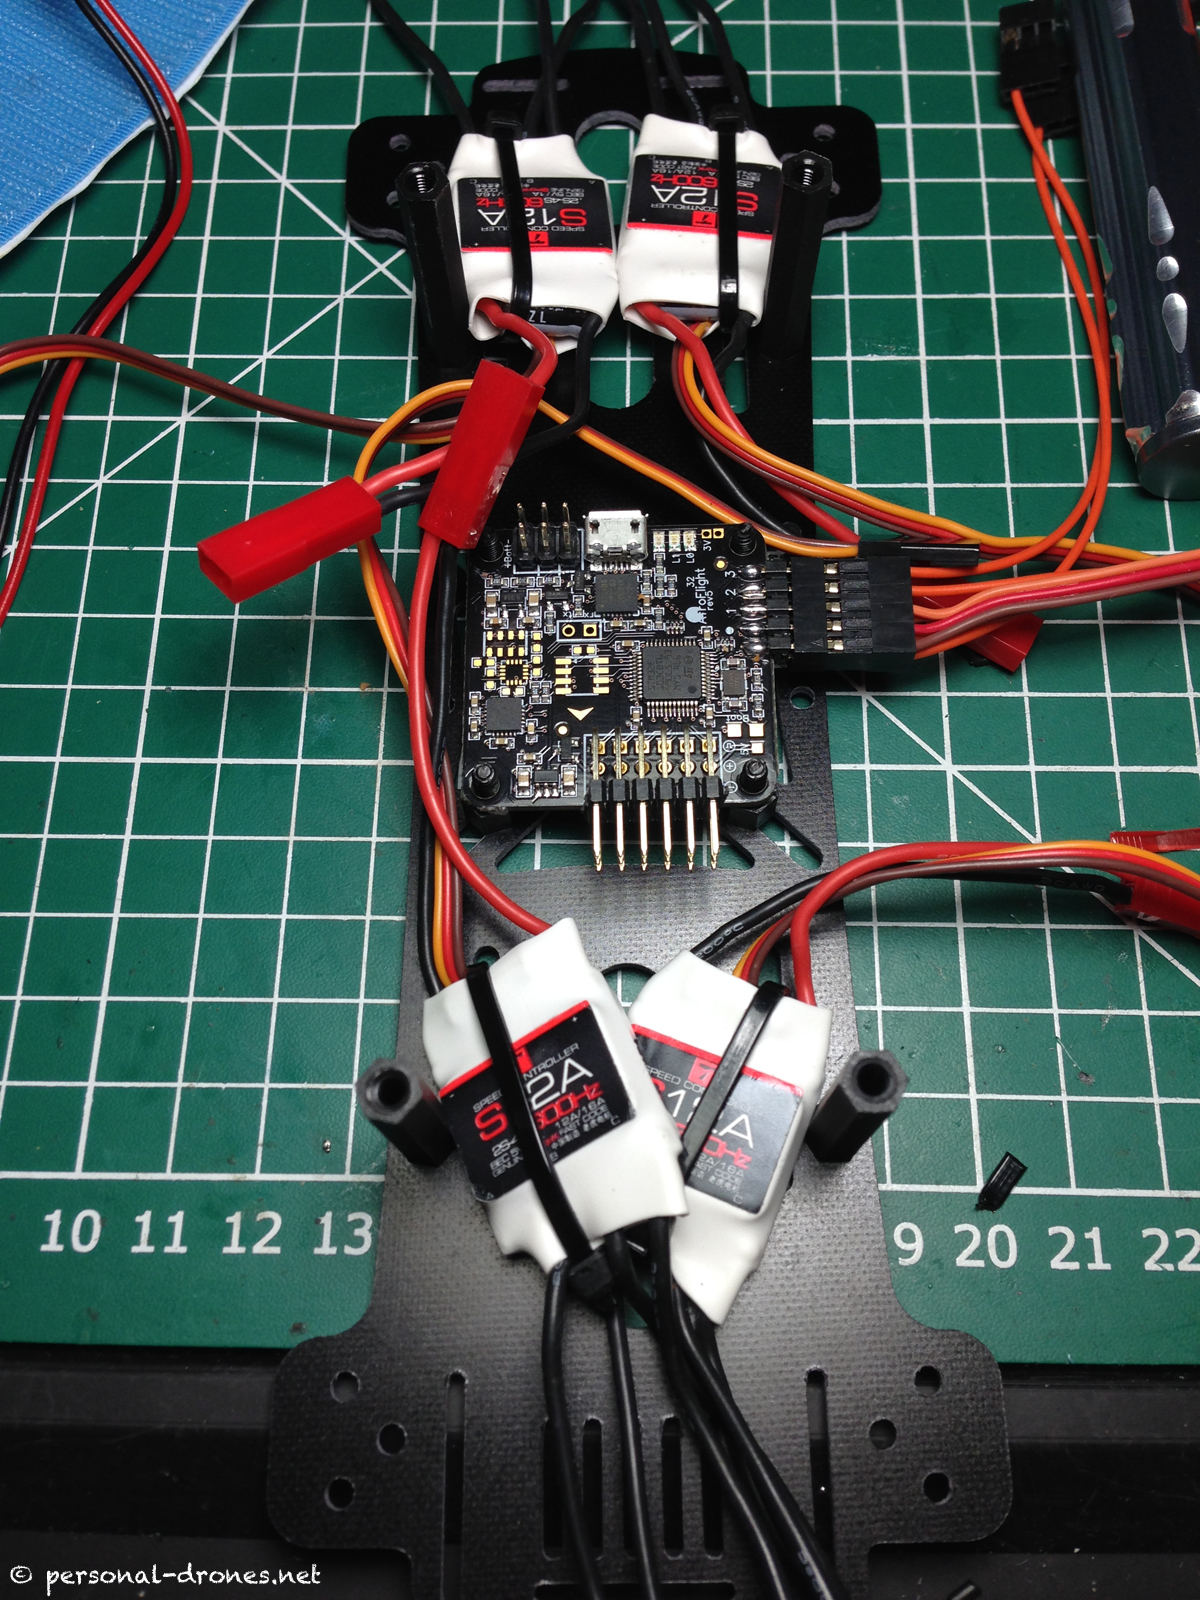
After assembly of the FPV system on the upper plate, I moved to the electronics and power distribution system, to be assembled on the lower plate. I realized that unlike other builds I made up to now, for the first time I could think about placing the ESCs of a mini quadcopter within the frame itself, for the size reasons discussed above. Not that it makes a astonishing difference to put the ESCs within the frame or on the arms, however it makes for a more compact and clean build, that leaves the shape and profile of the frame intact, as designed by the creator. Since it is indeed a sexy design, it is nice to be able to keep the ESCs (and all the rest) “out of the way”.
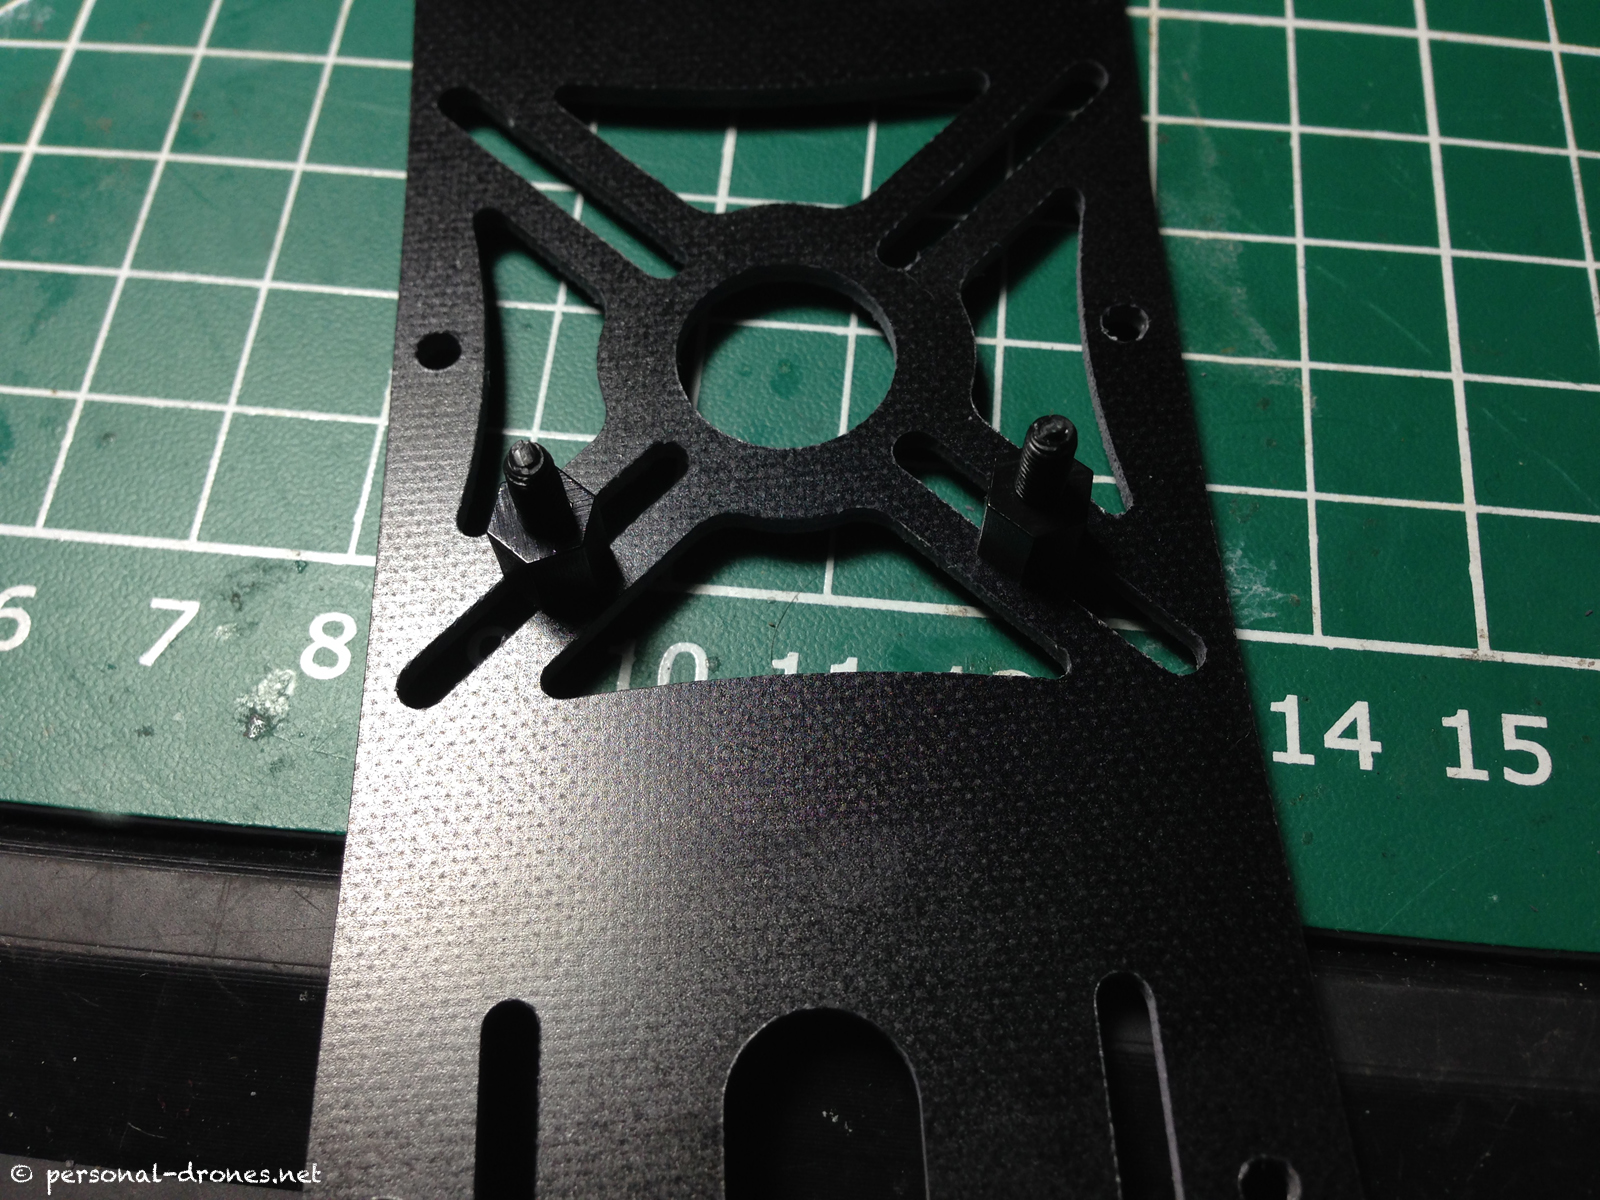
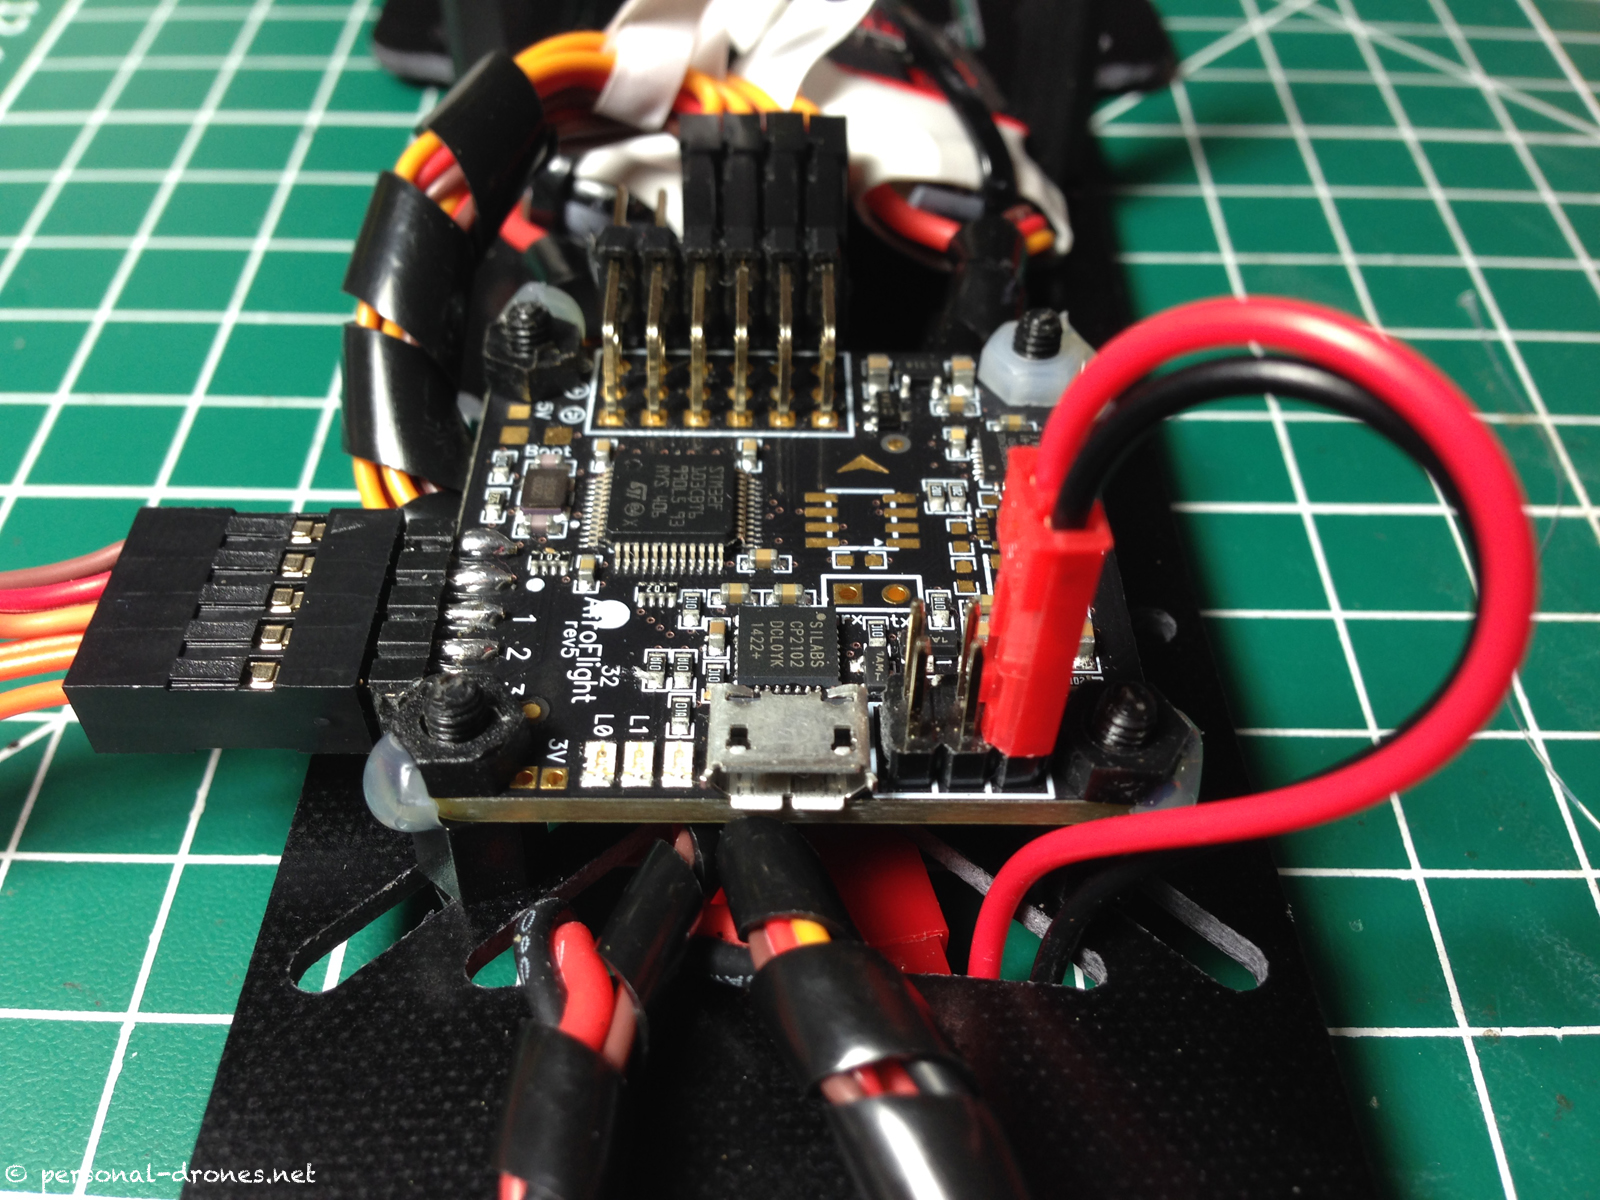
Like the camera mount, the flight controller mount does not have predetermined holes for different controller’s sizes, but rather 4 slits that can accomodate various sizes. This is a rather convenient and flexible solution. We will see this same choice again for the motor mounts.
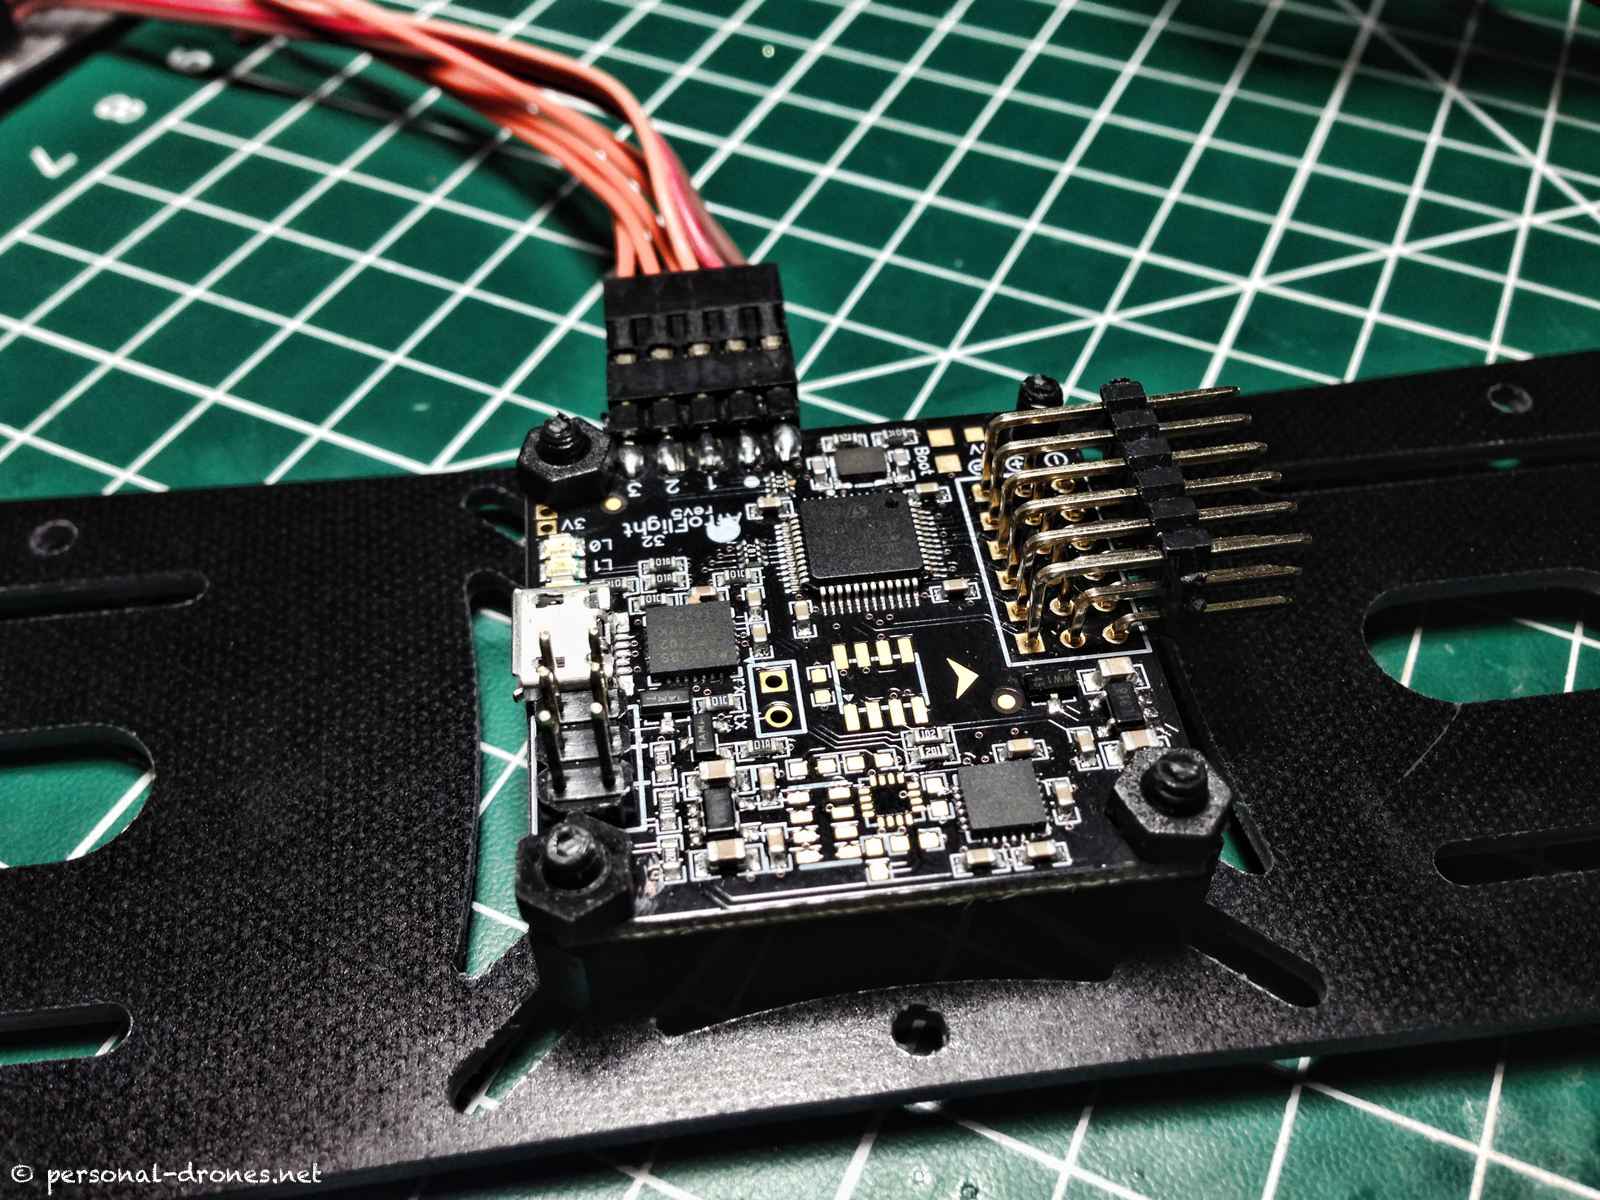
The flight controller was actually taken off and then put back on after the ESC and the power system were in place.
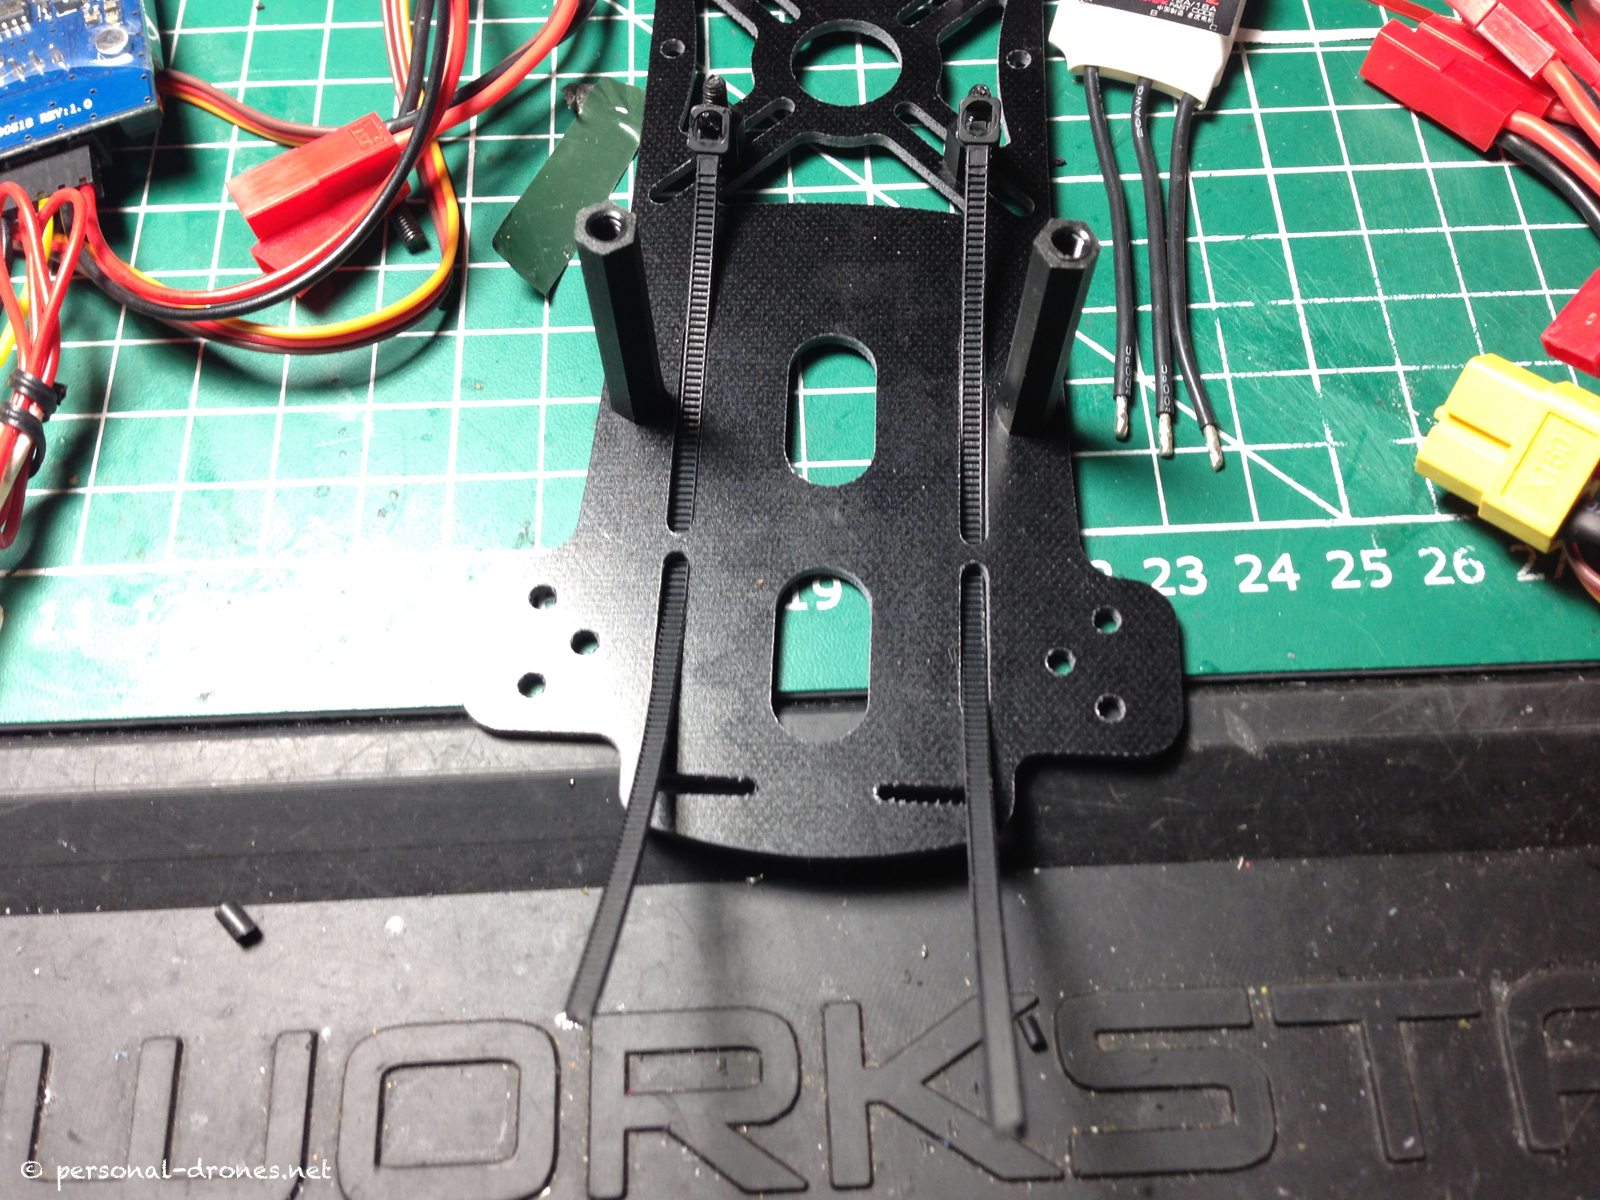
Preparing to place the two ESC on the back:
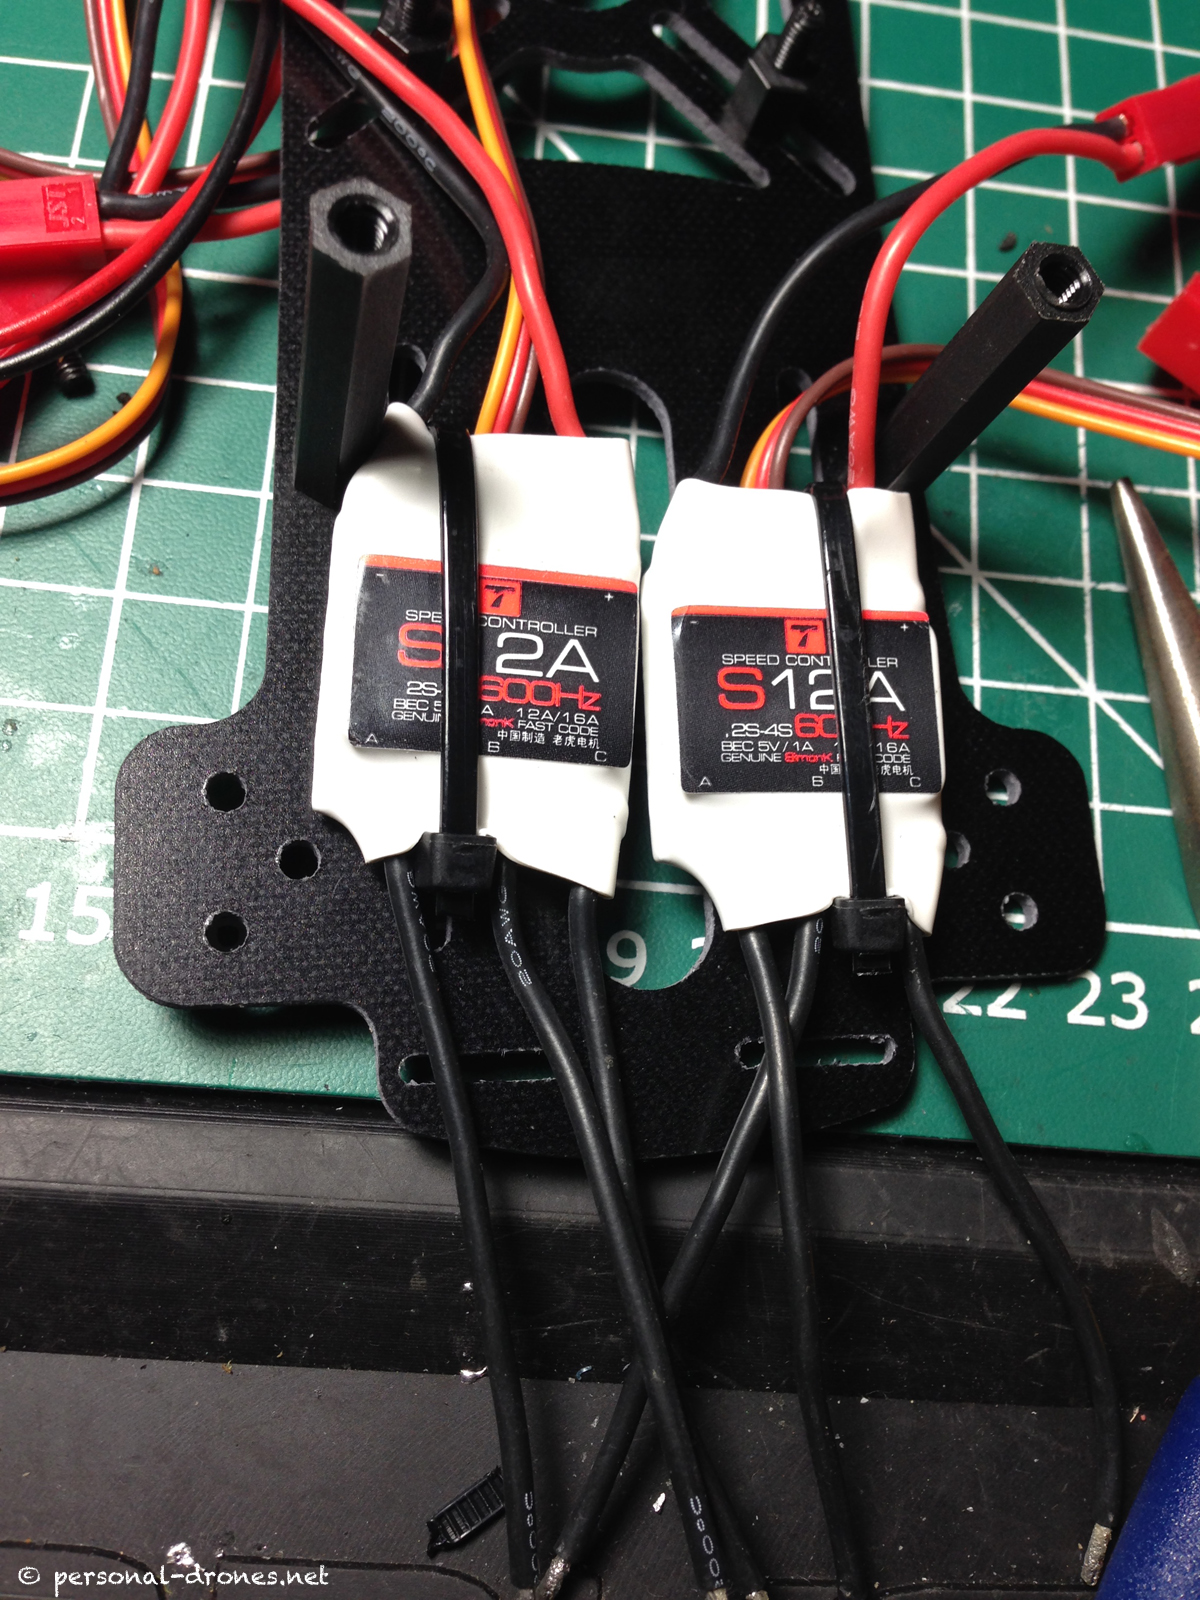
On the front the space is slightly tighter, also because I wanted to leave some free space at the very front of the quad for a possible second camera. This is the final placement of the four ESCs:
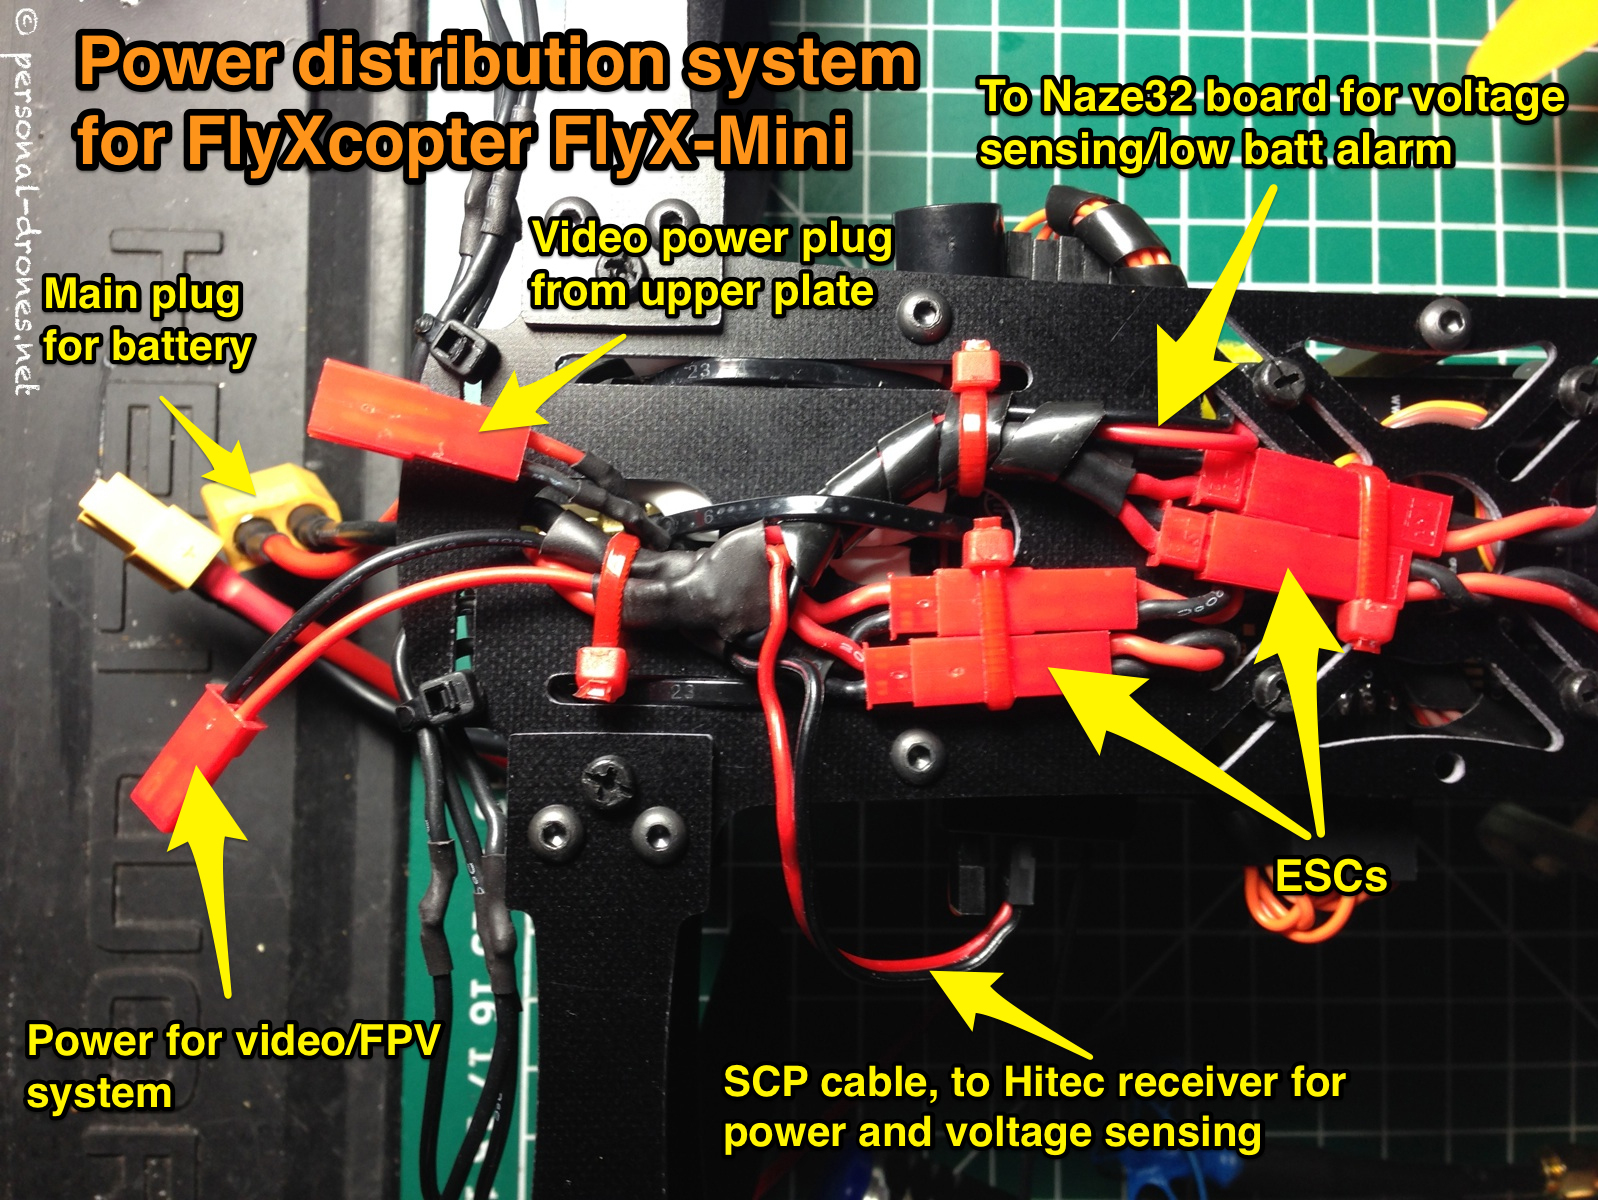
Building the power distribution system
We can now start to build a custom power distribution system for this build. Here’s what we will need to have powered for this particular build:
- 4 ESC
- SCP cable for the Hitec Optima 7 receiver. This cable powers the receiver and allow the receiver to sense the battery voltage and send it to the radio. This is an embedded telemetry system used by the Aurora 9 radio I am using
- JST plug (male) to power the video system on the upper plate
- JST plug (male) to be plugged in the Naze board for voltage monitoring and activation of the low battery alarm
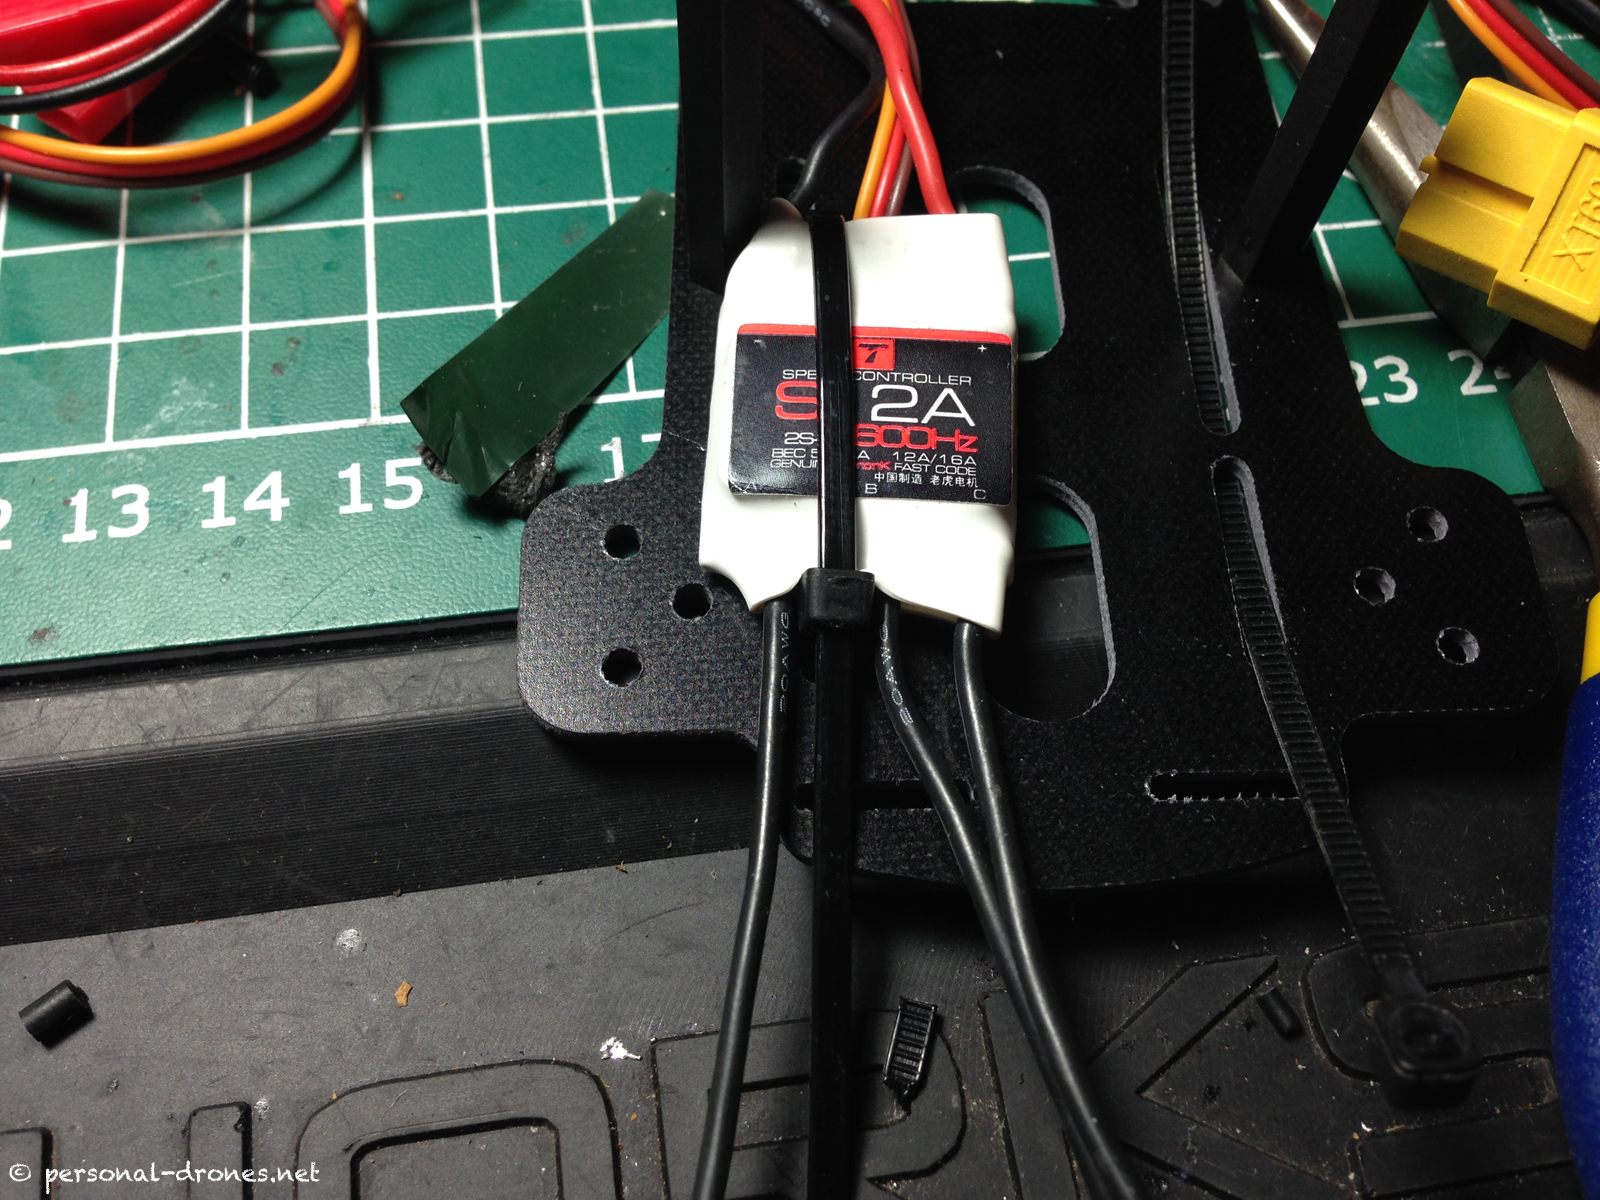
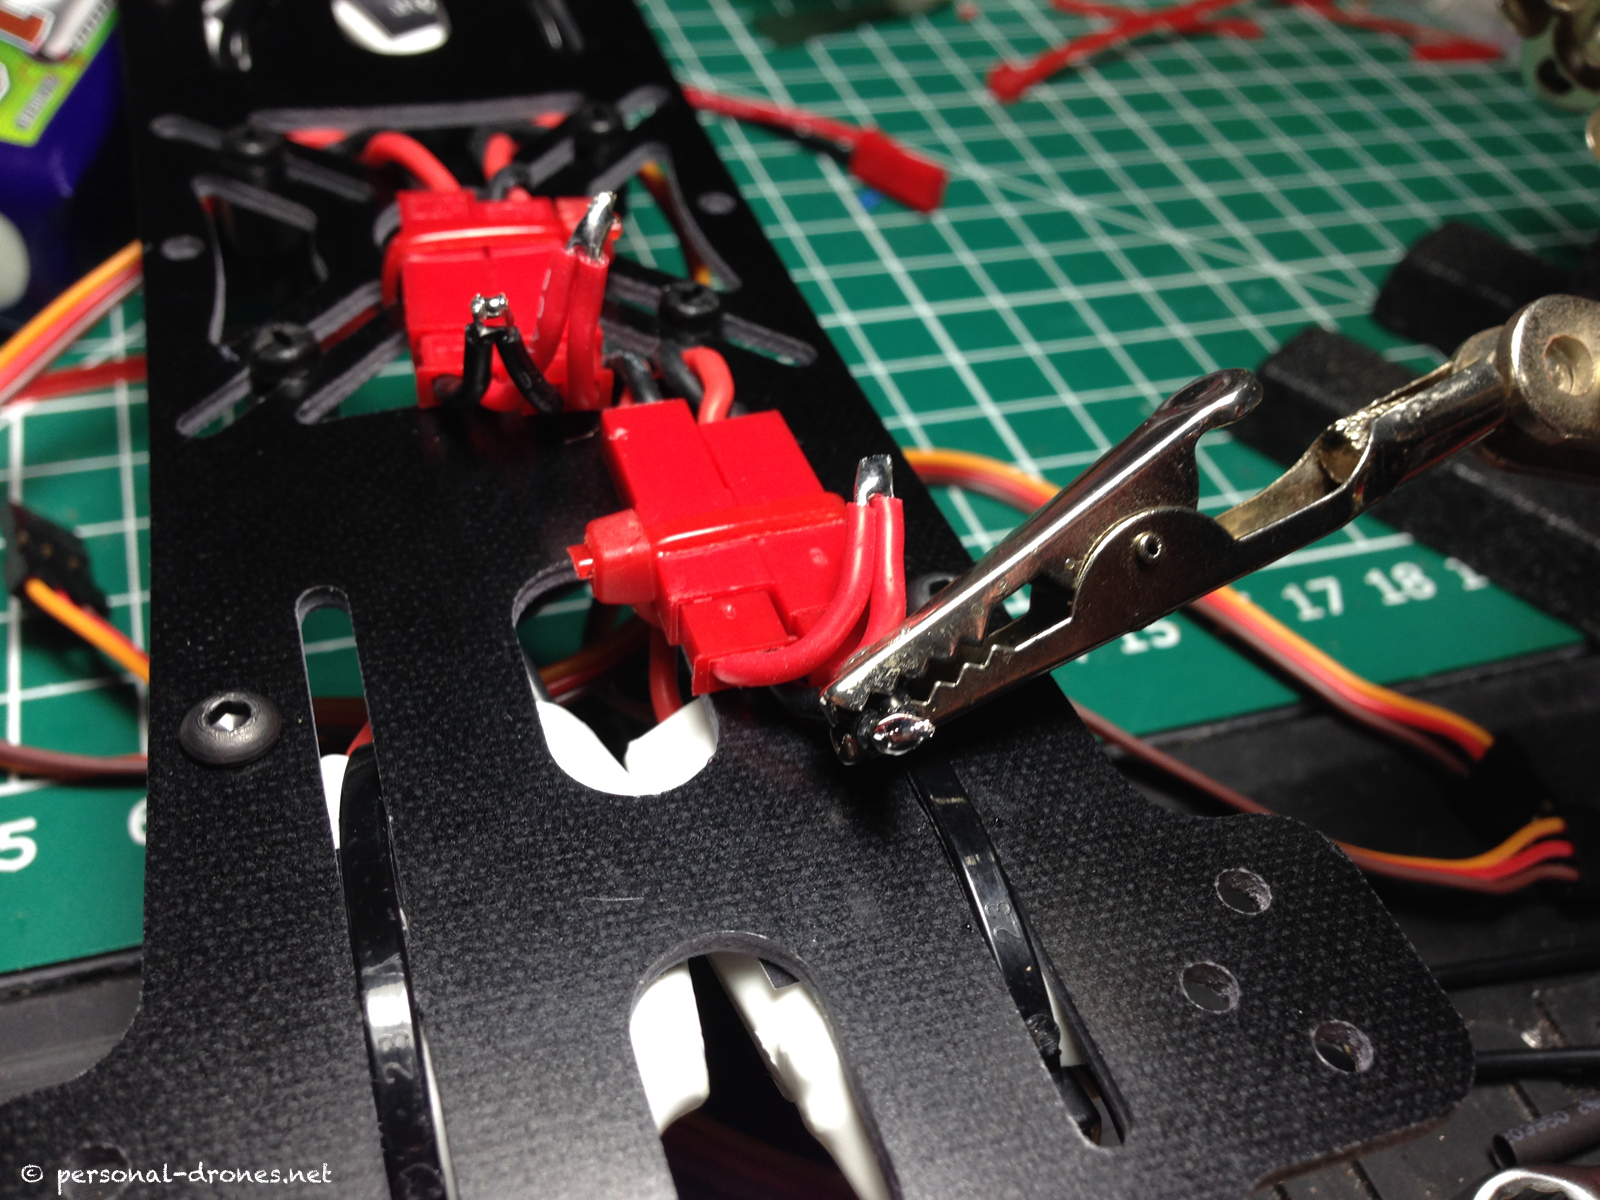
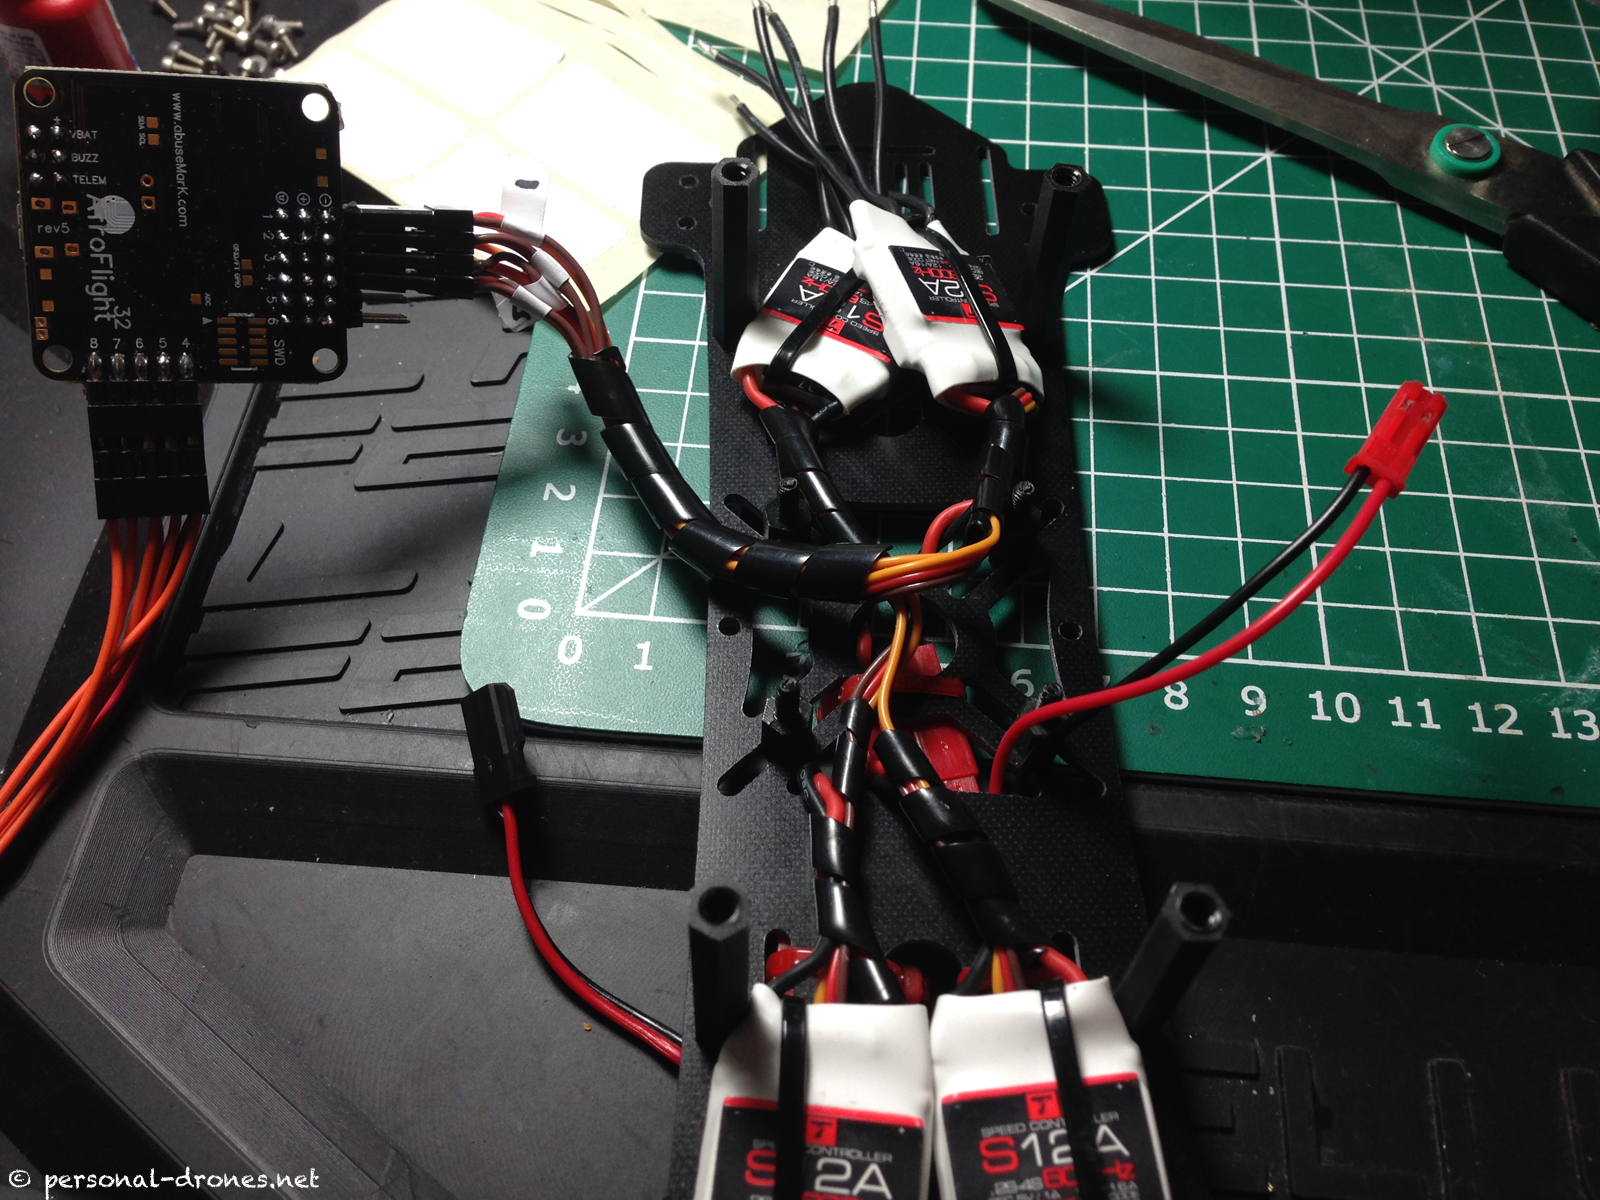
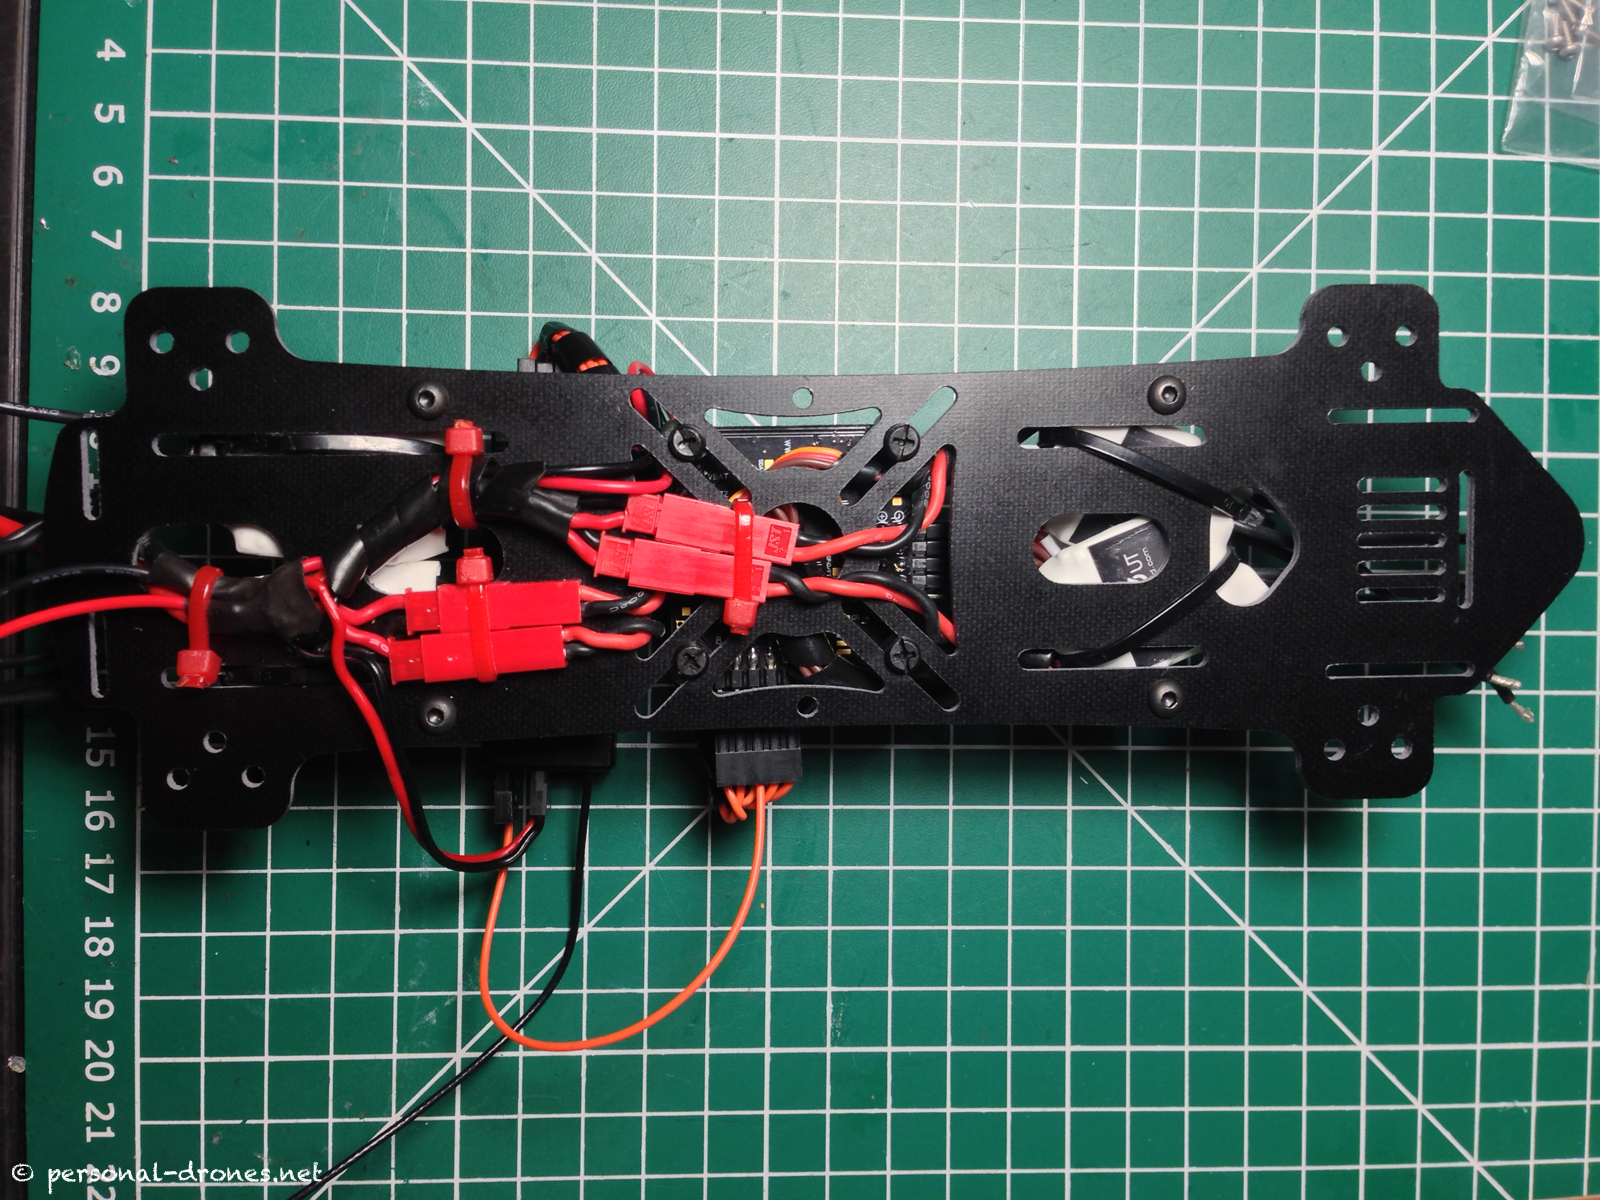
Since the Tiger ESC come pre-wired with female JST connectors, I decided to keep those (it makes it simpler to replace an ESC if required) and started by hooking a 20AWG wired male JST plug to each female JST from the ESC (the ESC power wires themselves are 20AWG), and securing everything to the frame:
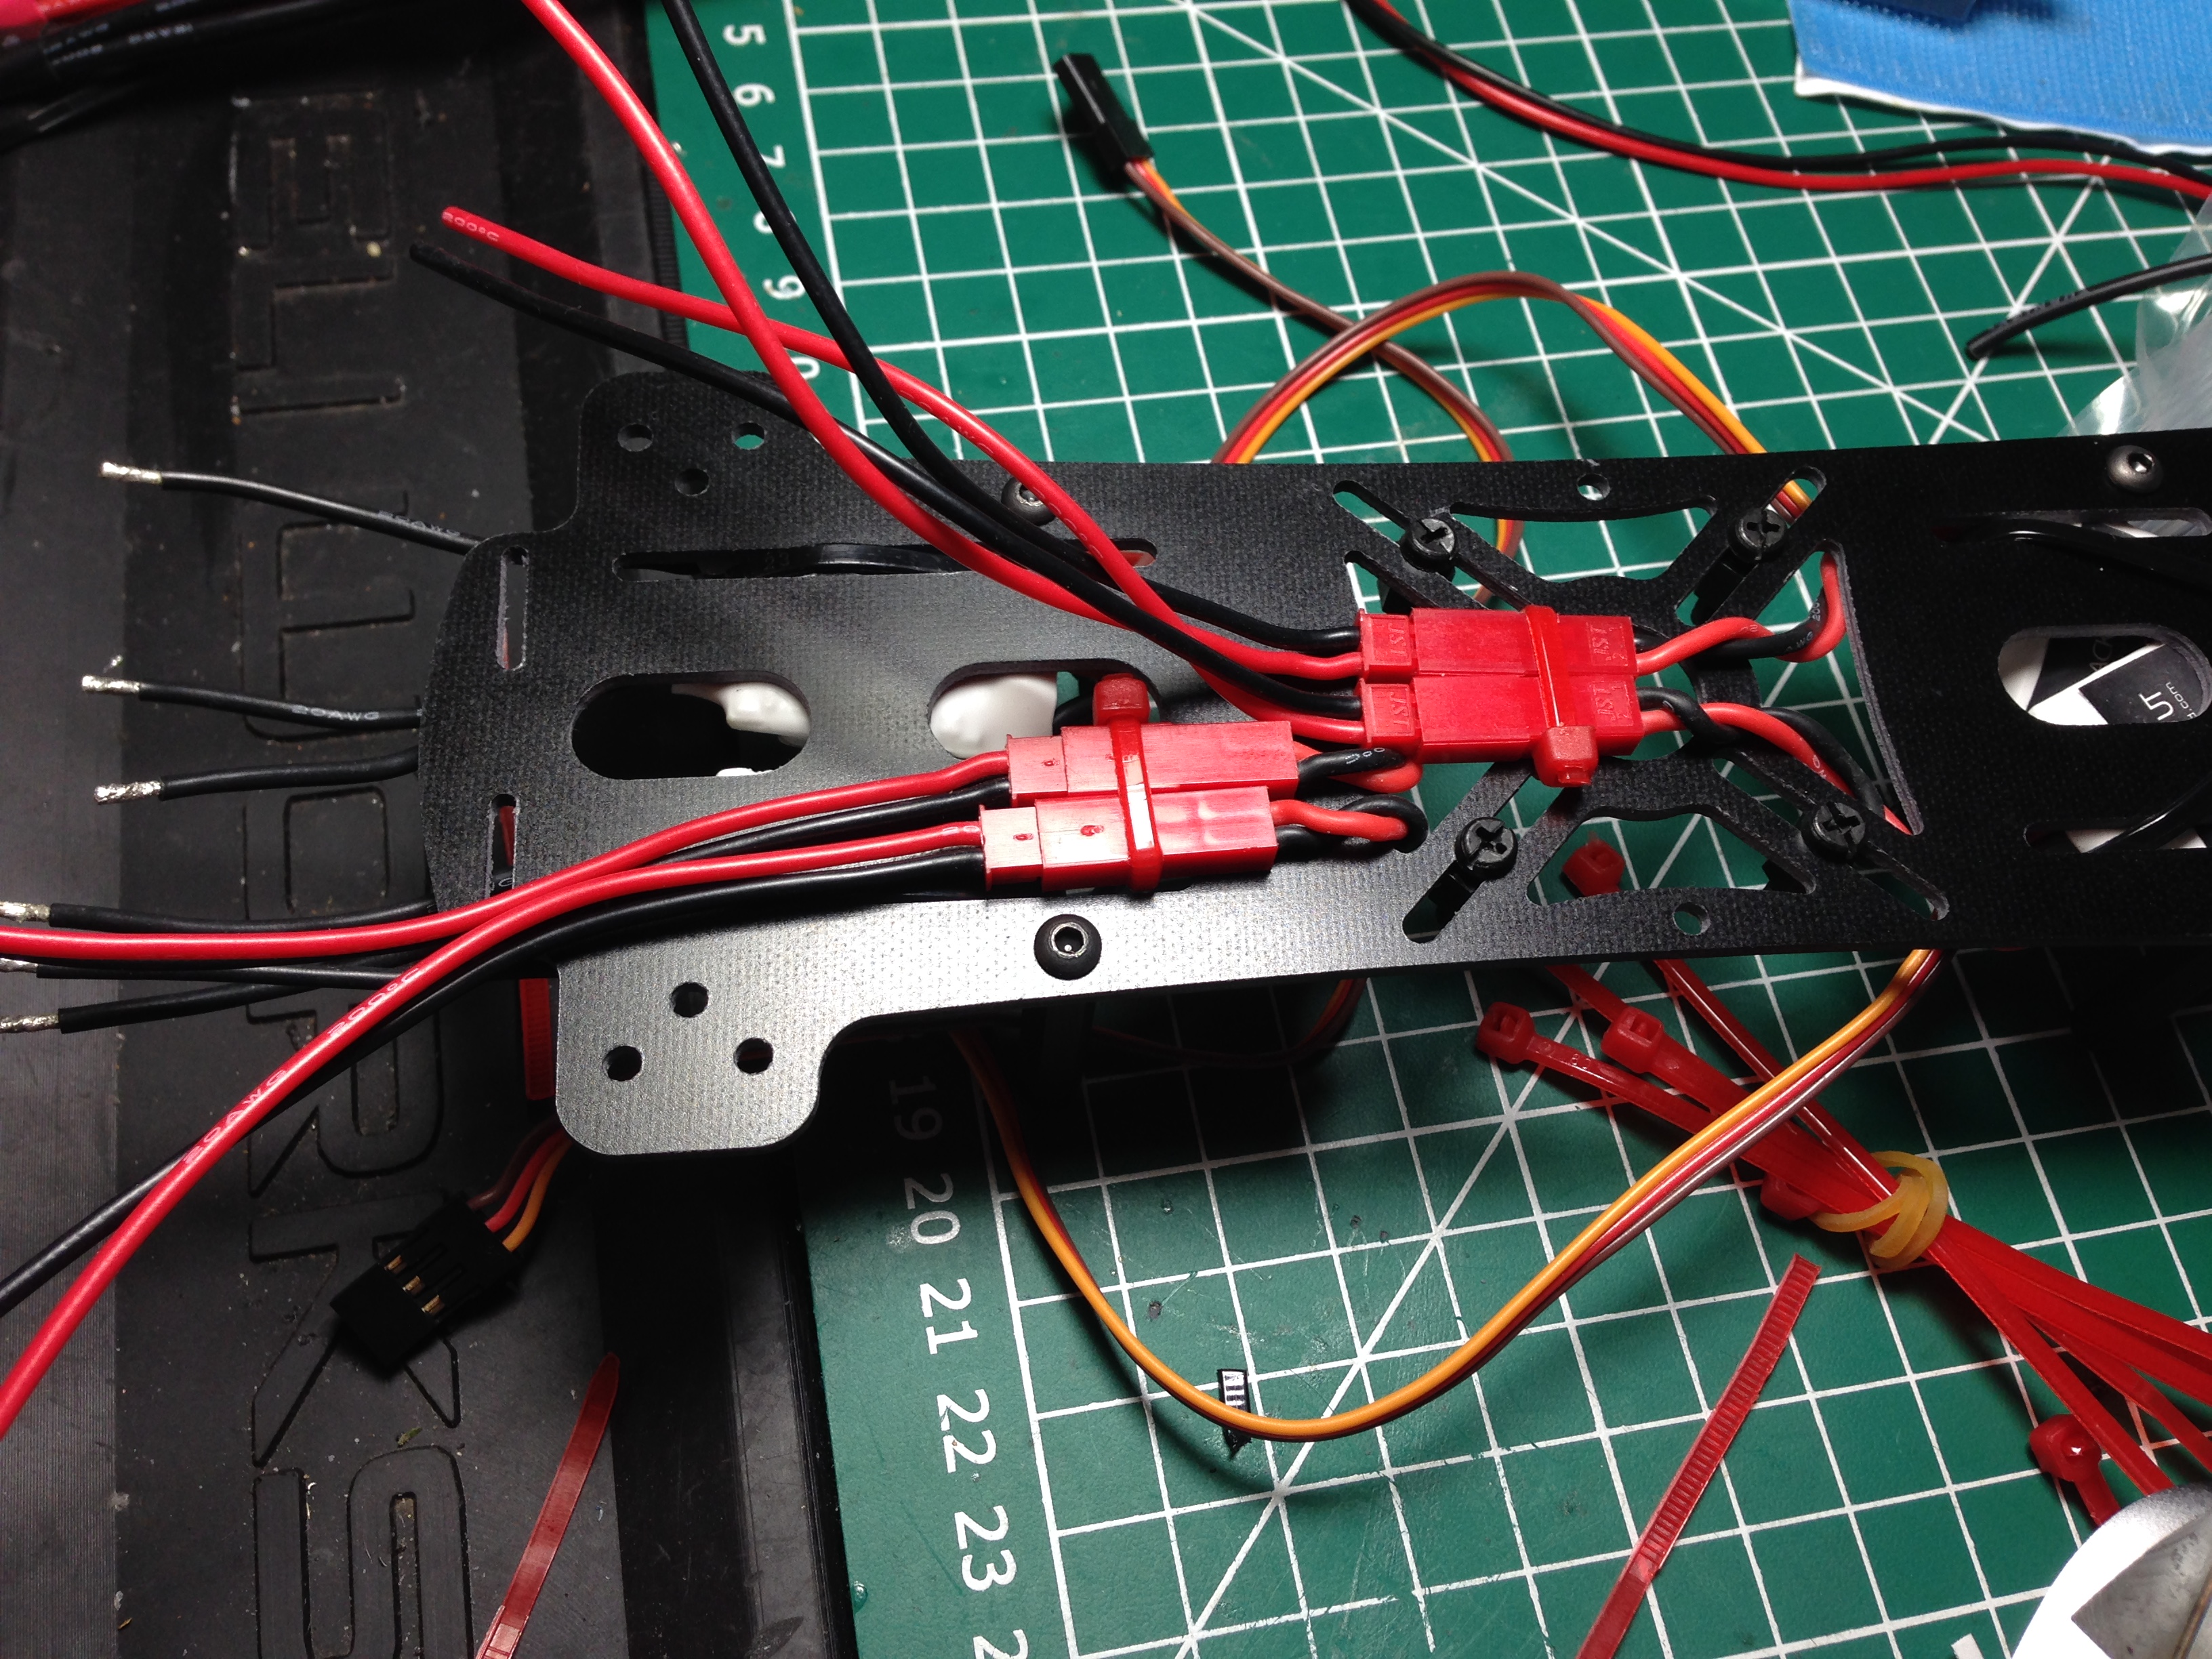
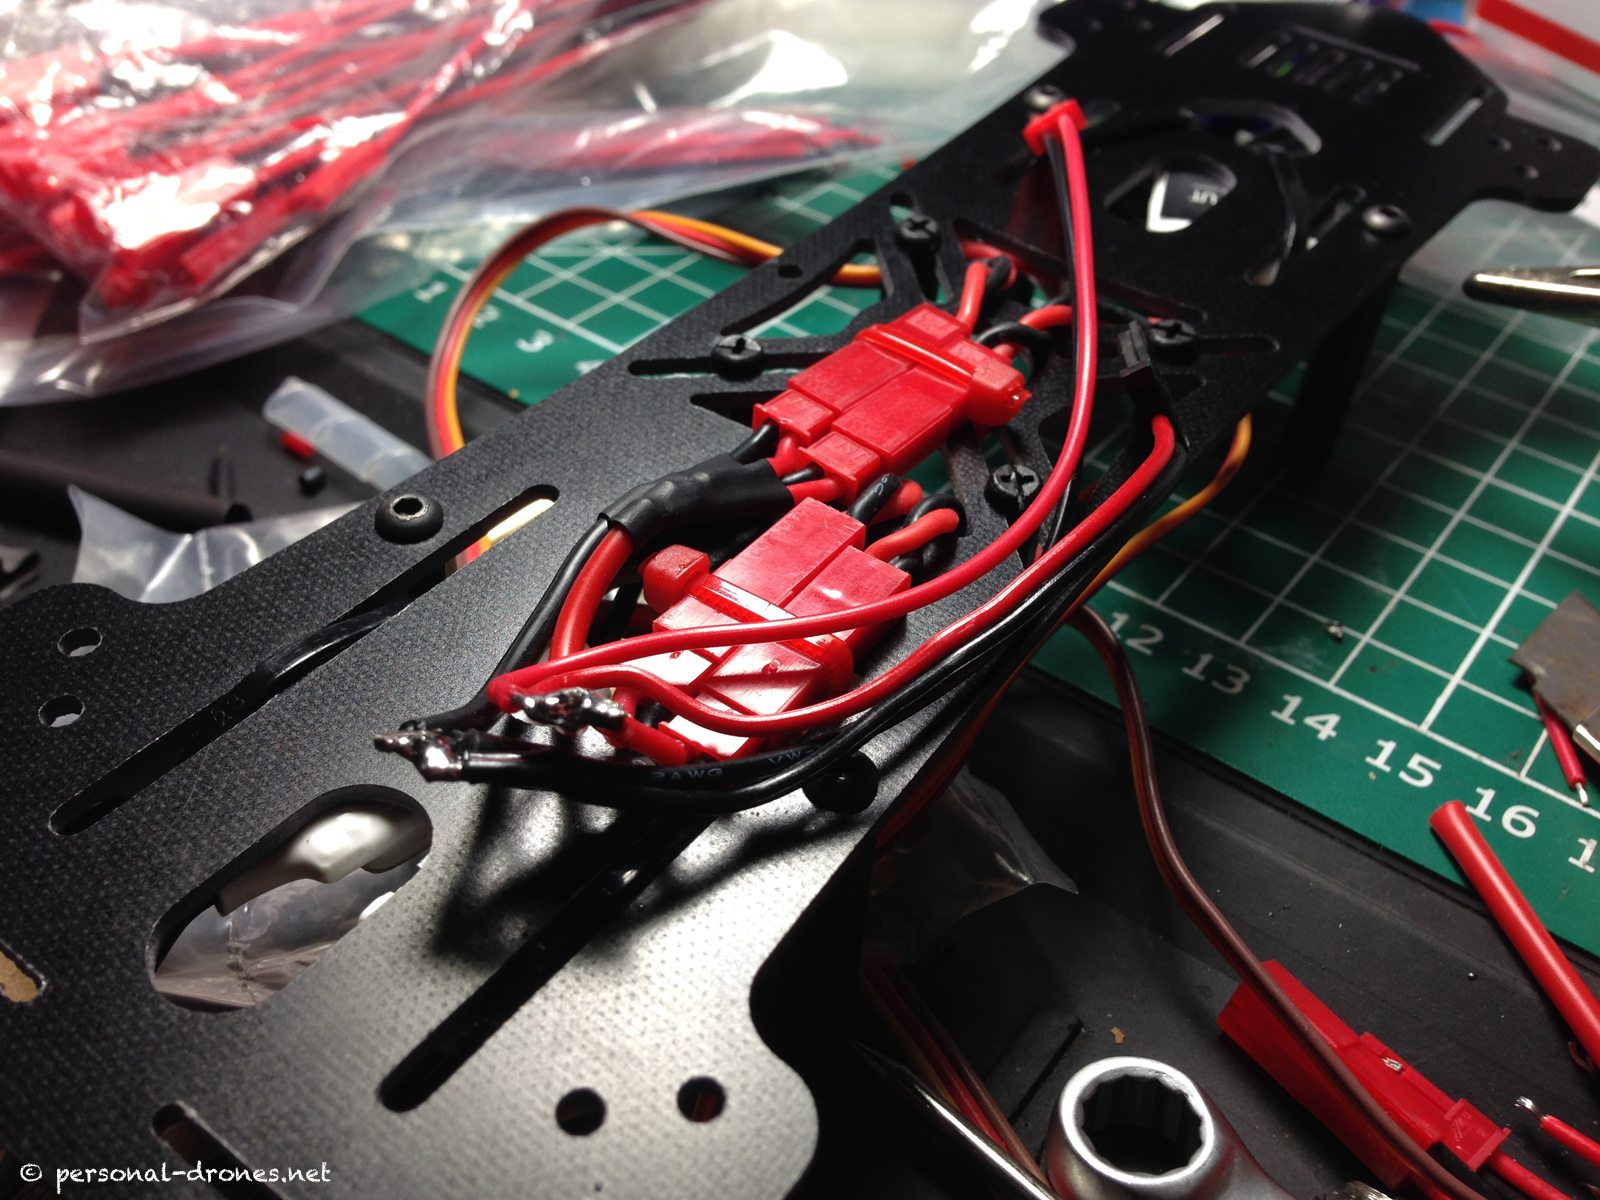
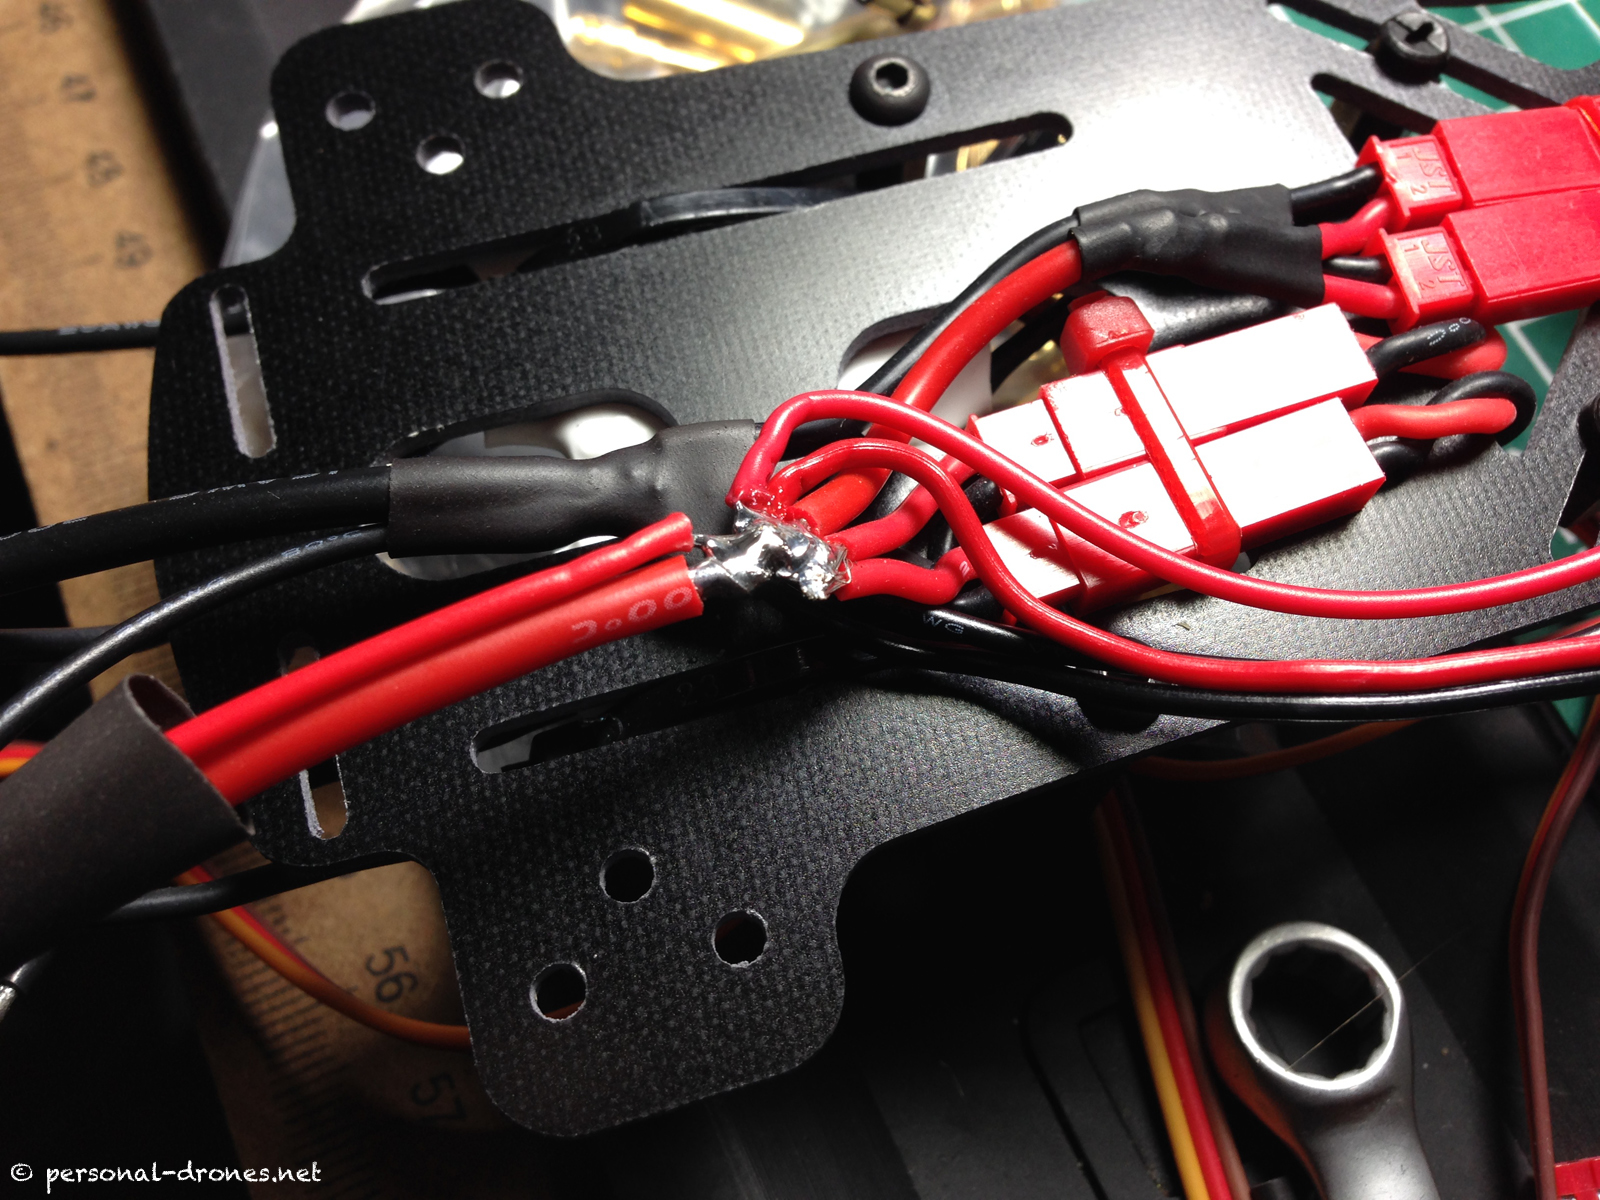
I then did cut the wires very short and soldered, for each ESC couple, the two black and the two red wires:


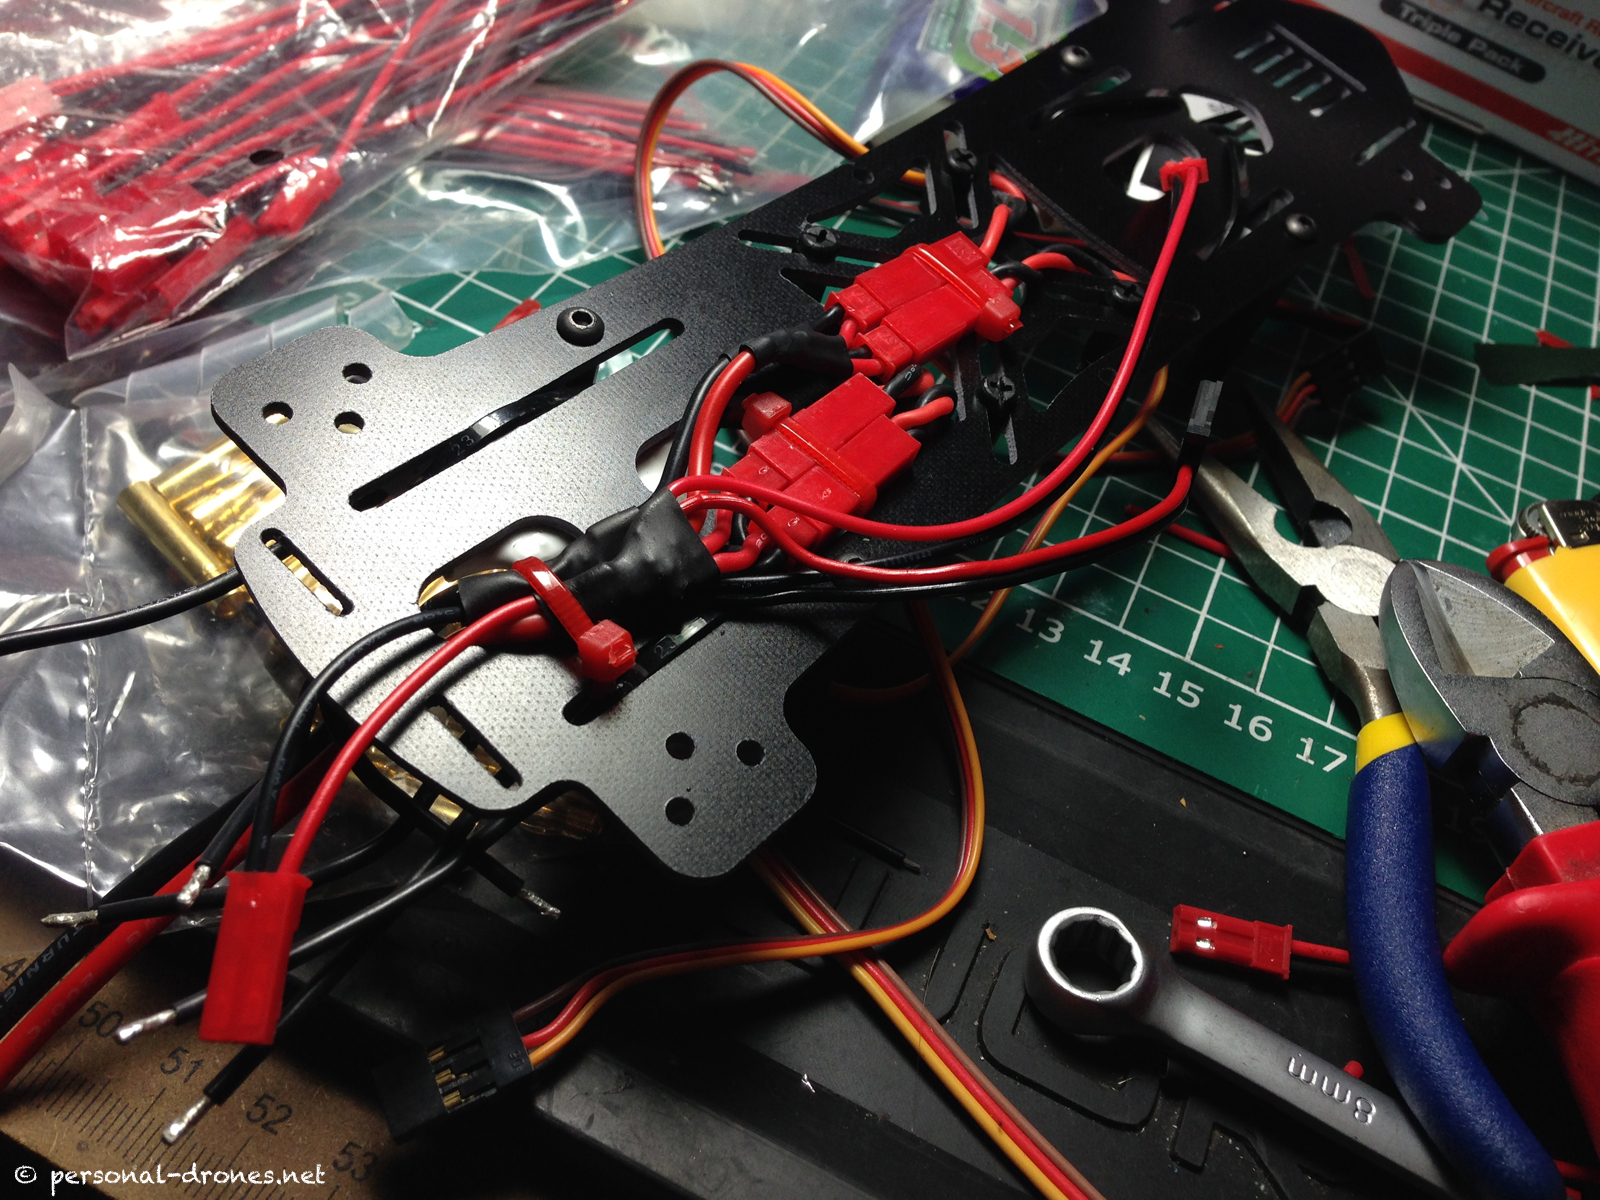
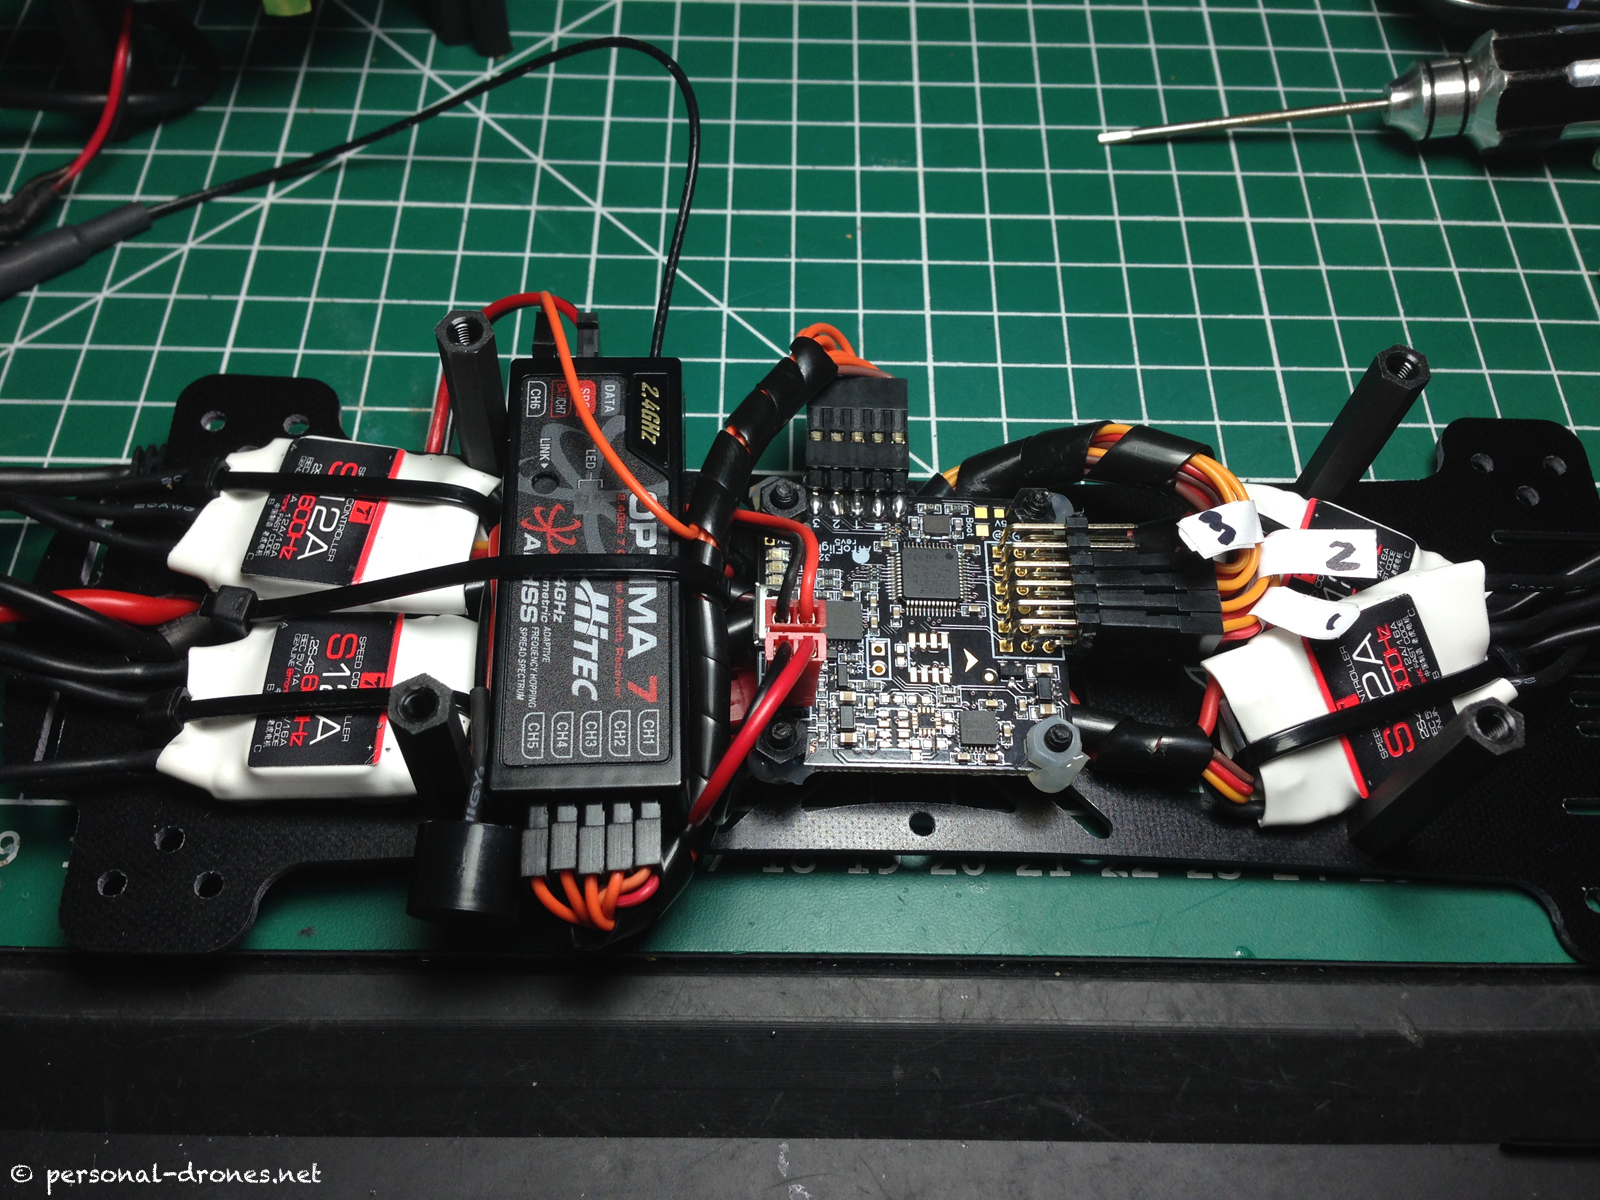
We can now add the receiver to finish the lower plate job:
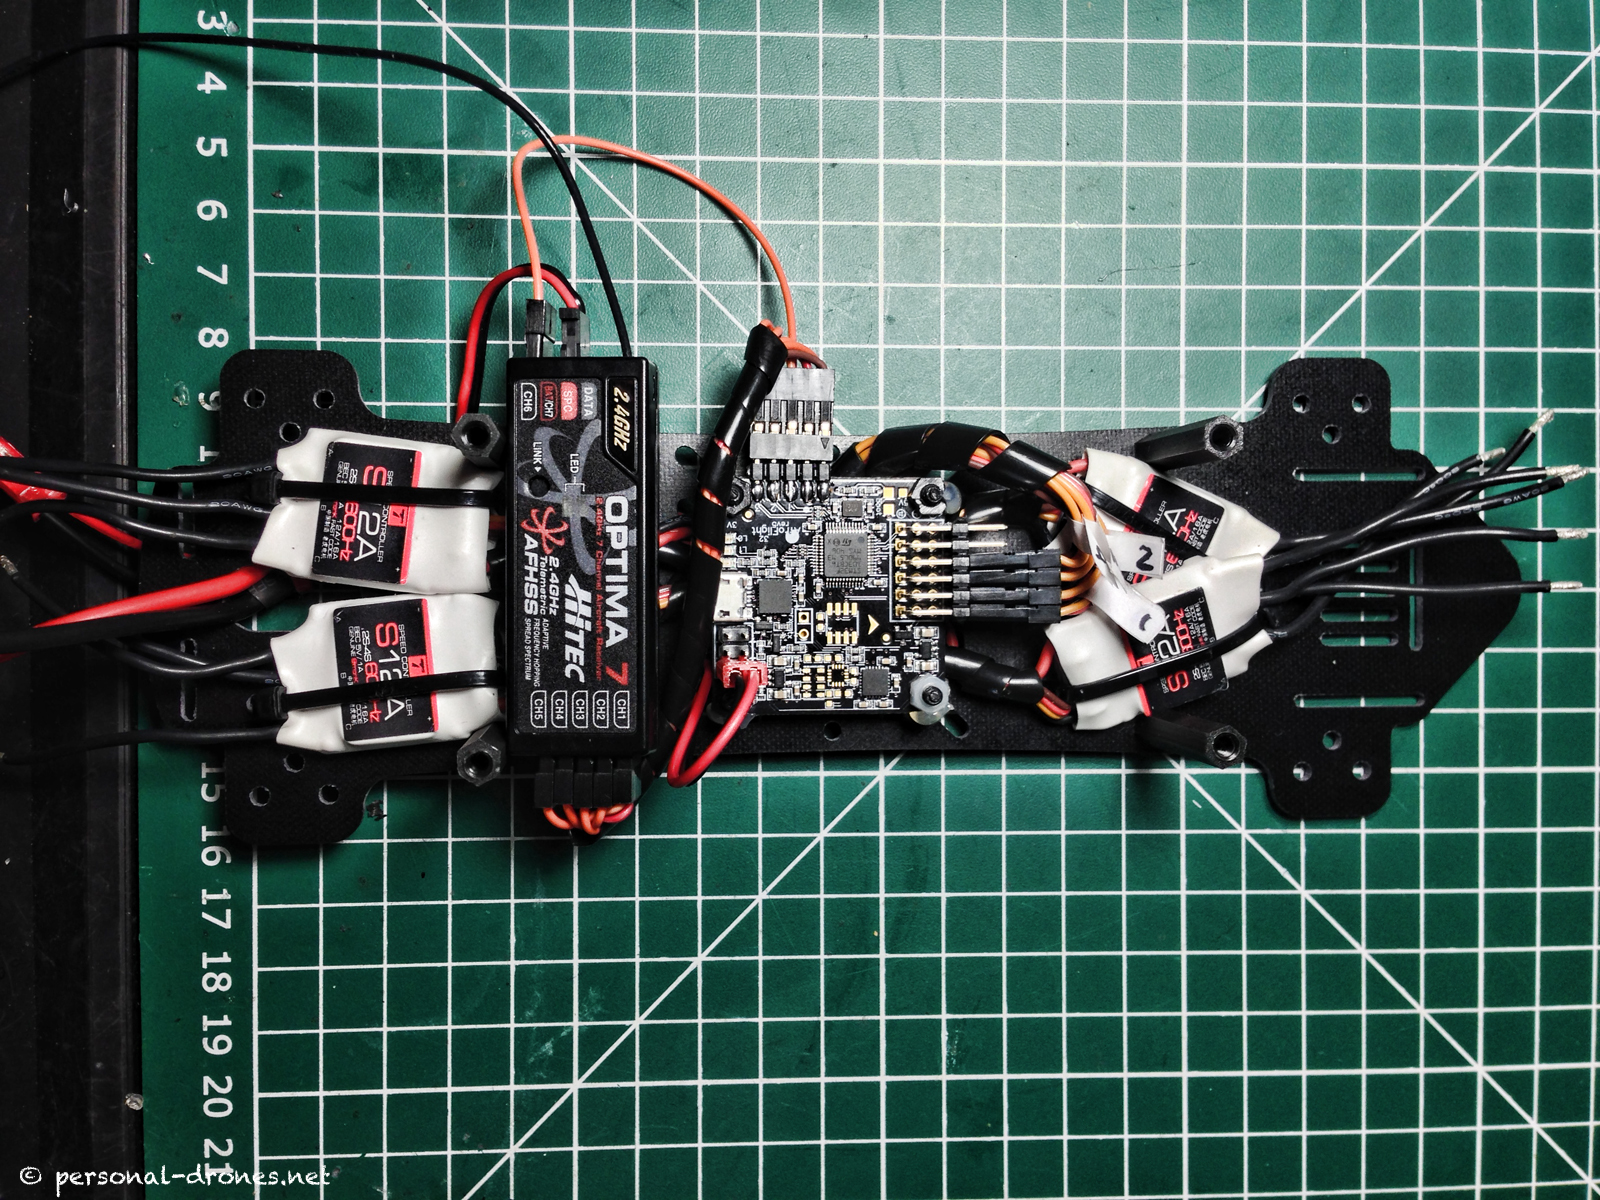
Here’s the plate final assembly. Note that a buzzer is now hooked up to the Naze Board, in addition to the cable for voltage monitoring:
So at this stage, we have a FlyXcopter’s upper plate with the video/FPV equipment, and a lower plate with the electronics and the power distribution system. Basically a sandwich ready to be assembled, let’s summarize:

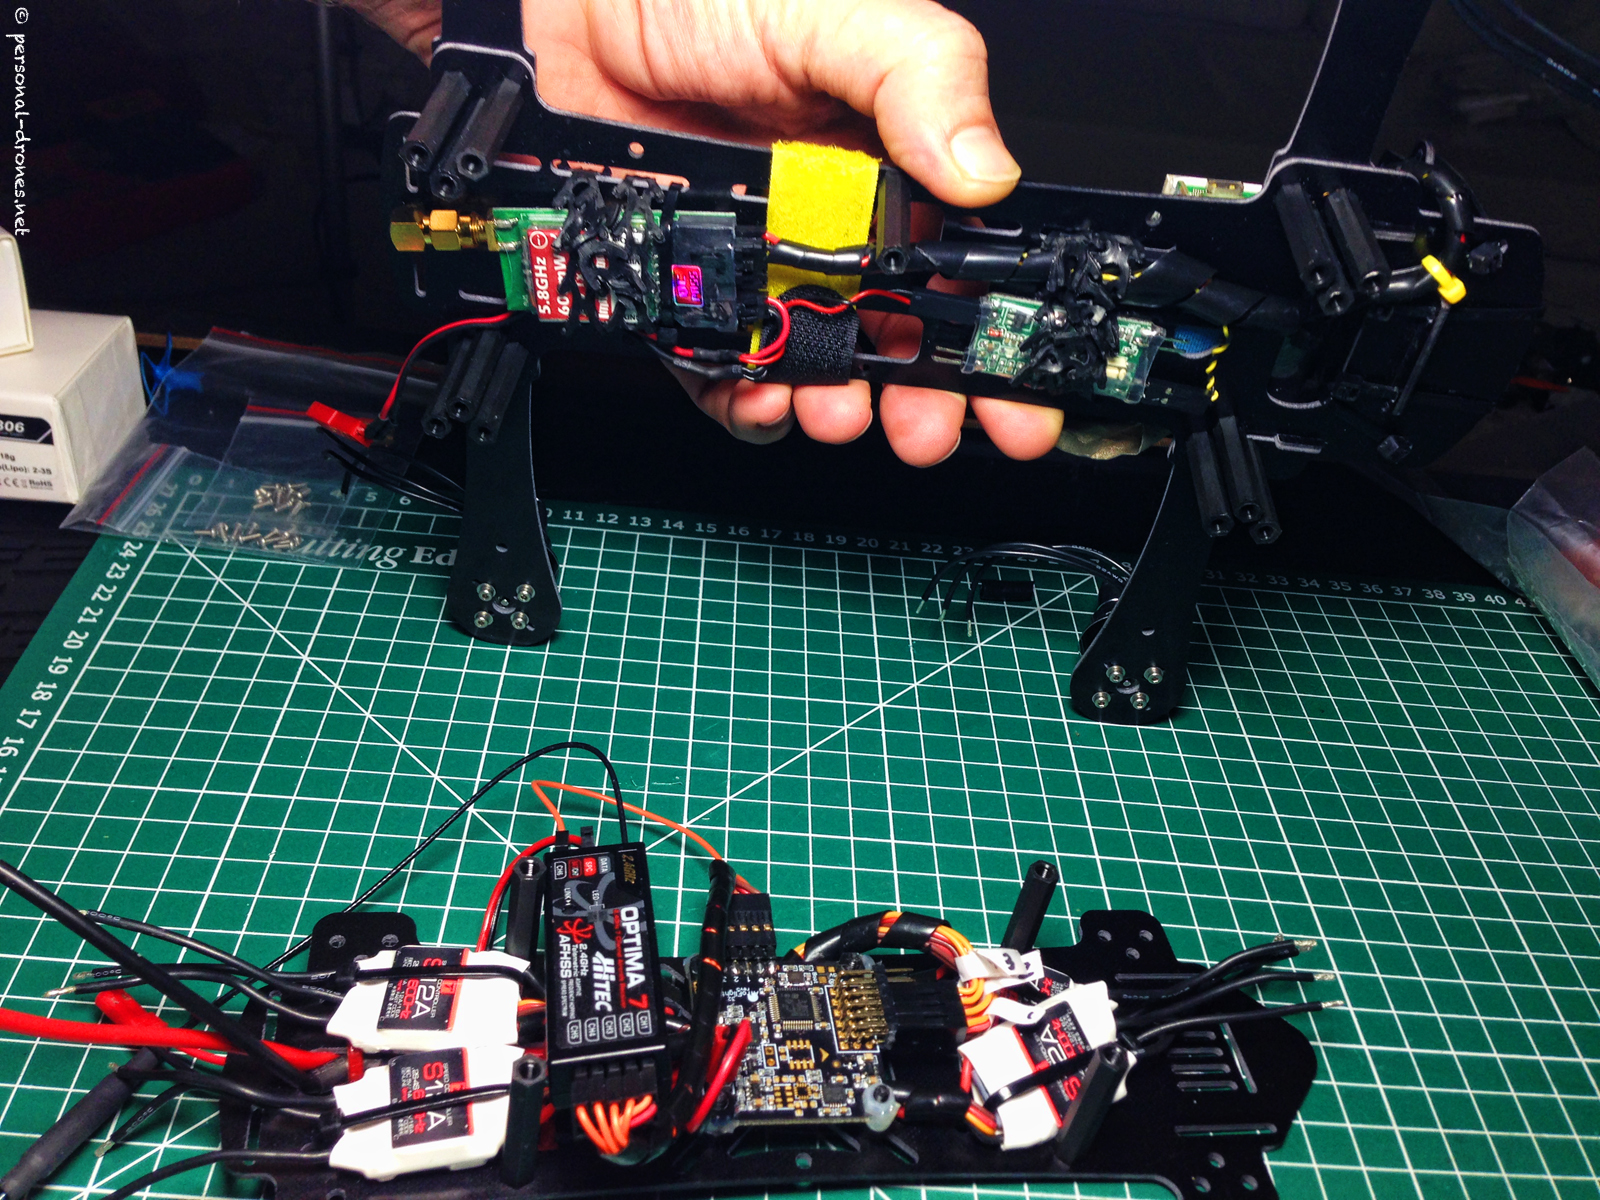
After assembly, we do have a FlyXcopter FlyX-Mini. However it is still not ready to fly! We have to solder the motor wires to the ESCs.
Note how I used some white spacers to make for some simple landing gear. This should keep the power distribution board from touching the floor, preserve the lower part of the frame from scratches and possibly allow me to add some leds later on.
I totally skipped, in this build report, the setting up of the AcroNaze32 board with the Baseflight software, which is a necessary step in the setup process. I will dedicate a post to this topic, which is rather complex on itself and really beyond the scope of this article that focuses on the review of the FlyXcoper frame. For any question on this topic, on the build, on the frame, you are most welcome to contact me or post a comment to this article below.
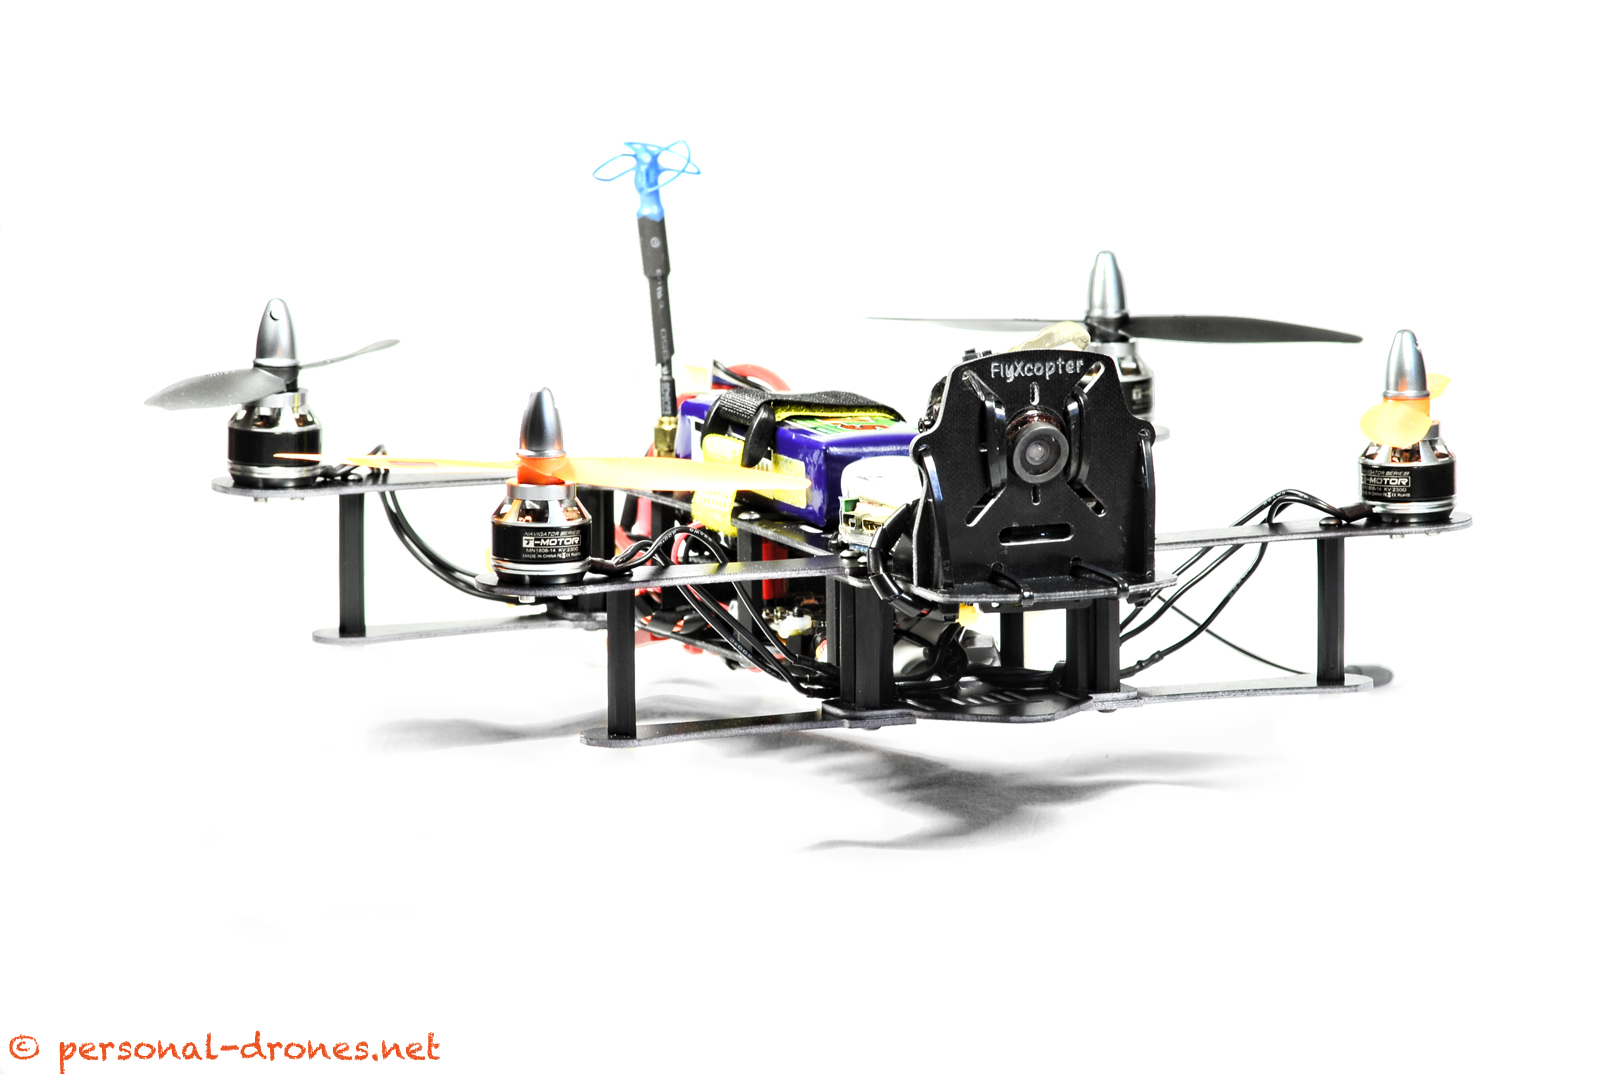
Let us review the final result. I should say it is beautiful. I have to thank Quentin Daems for sending me this nice quad that I will surely enjoy in the months to come. Click on the photos for full size!
Final weight with full FPV equipment, w/o battery: 478gr.
So how can you use your brand new FlyX-Mini? Here’s a possible application:
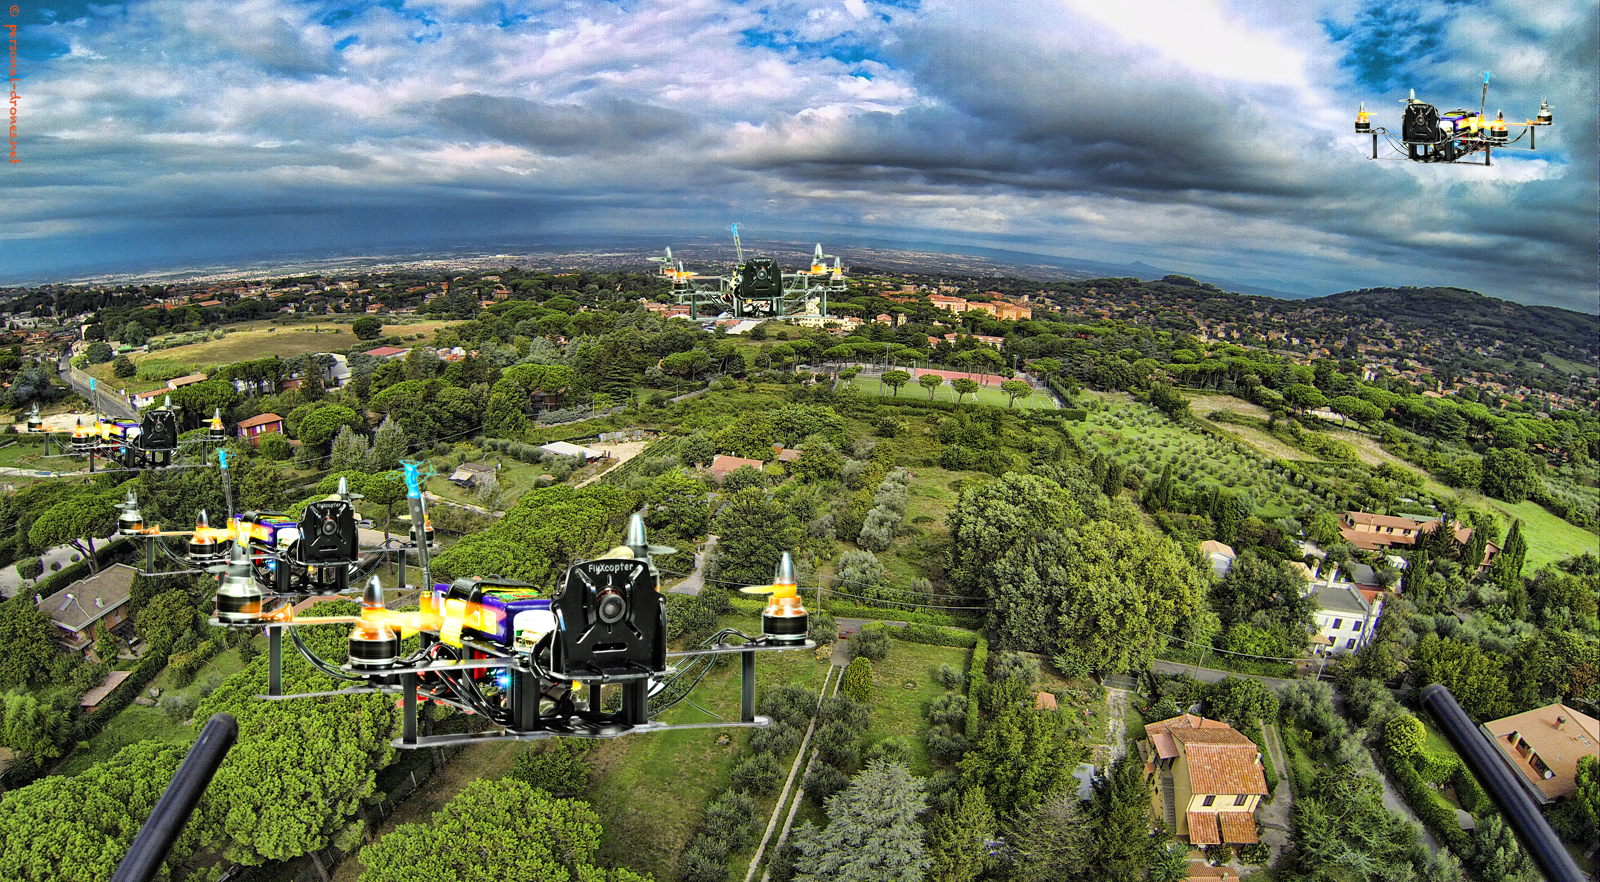
Use it to defend yourself from other drones!

If you are inclined to more classical uses, you can of course use to fly FPV or to take some surprisingly stable aerial footage. Let’s see some videos from Quentin Daems and “Team White Rabbits”, the FlyXcopter’s team:
https://www.youtube.com/watch?v=0f06GKhOZv0
https://www.youtube.com/watch?v=0bSXW1U60Ic
See all the videos on Quentin’s youtube channel
Conclusions
How can we summarize this build experience? Among the various mini frames I have used for my builds, I found this frame particularly friendly to dress up the exact way I wanted to. This is not surprising if we look closely at how the plates were designed.
Consider for example the upper plate and see how, throughout the length of the plate, you have both vertical and horizontal attachment points. This makes things easy while building.
So the first point is that building the FlyXcopter FlyX-Mini is a pleasant experience and you do not have to squeeze things too much, you will find space for everything and hopefully this report might provide an idea or two for your own build. it is a build that can be made also with very limited experience and does not require complex or sophisticated solutions. It would make for a very approachable first build for a newcomer to the hobby.
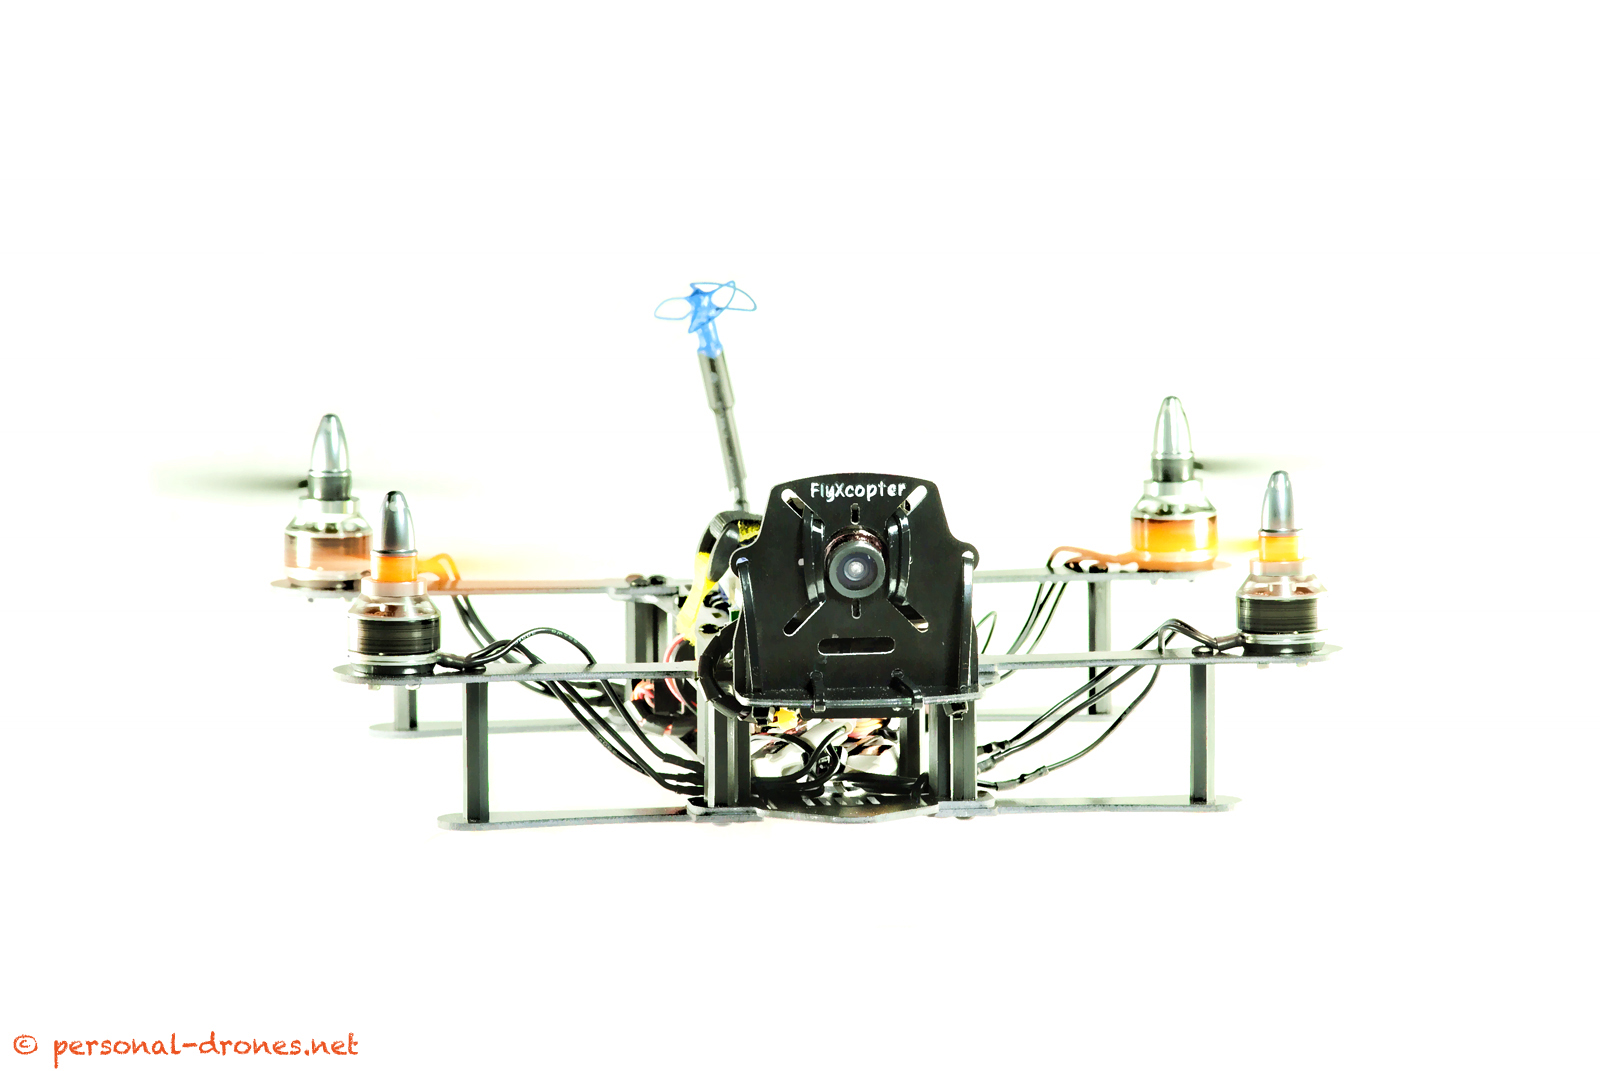
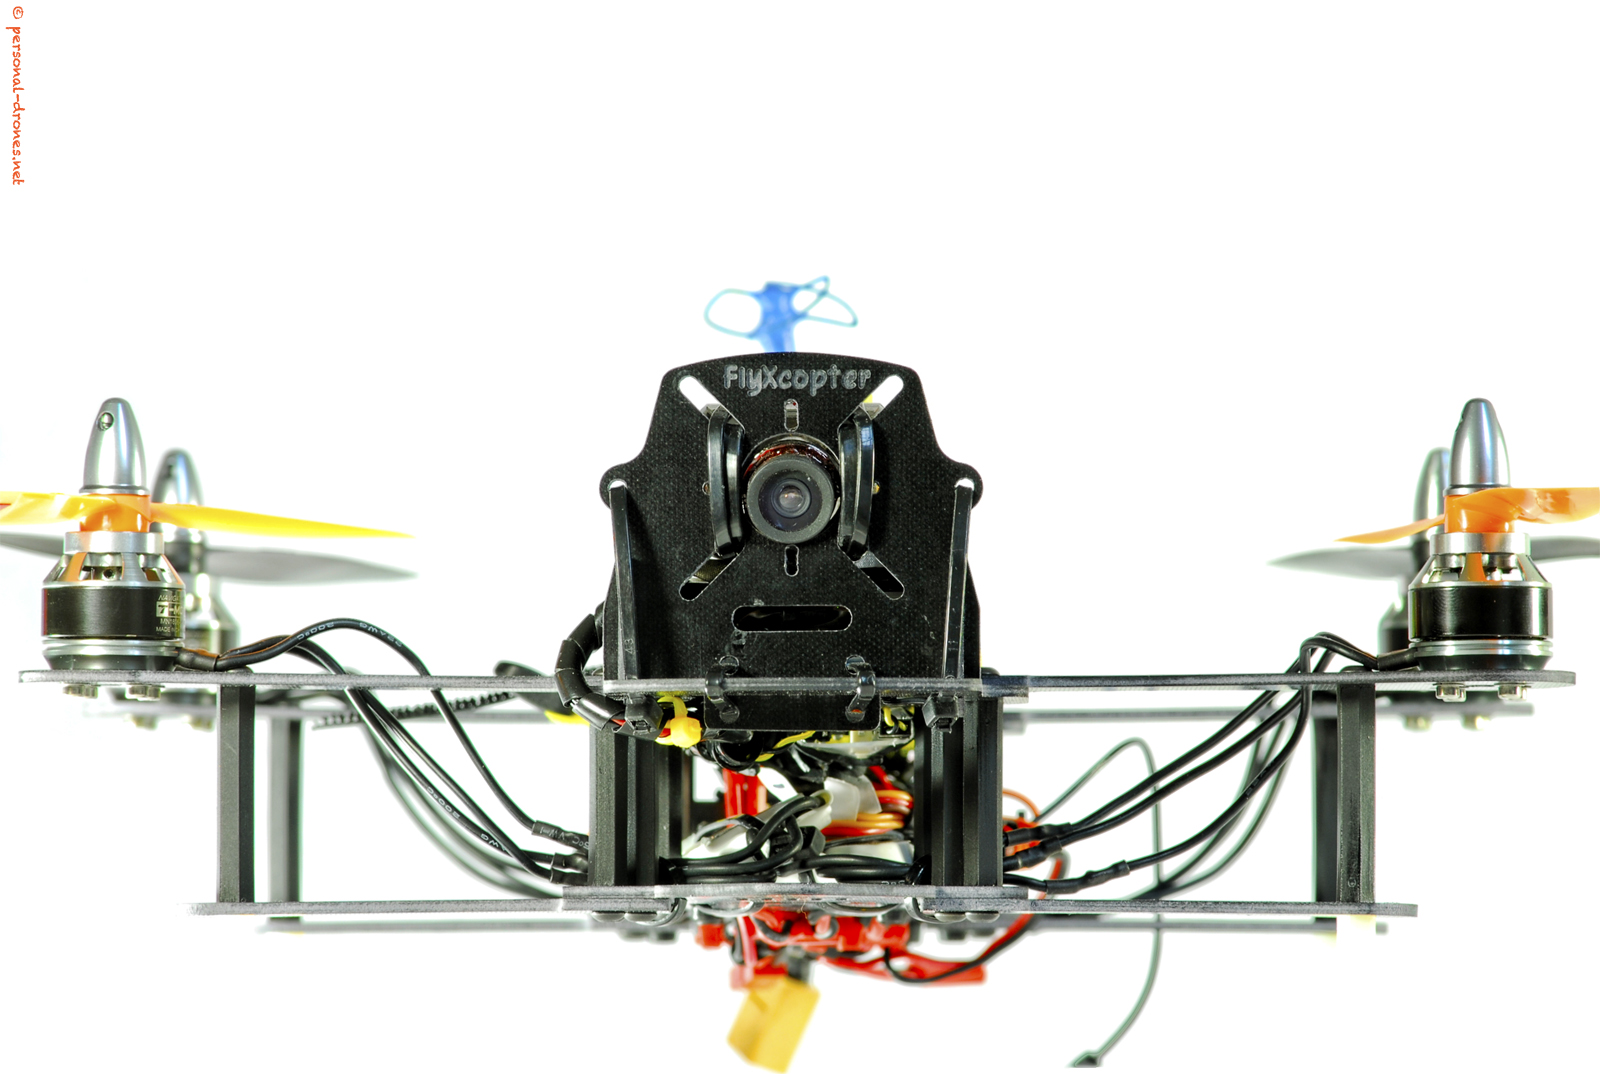
The second point is that although the FlyX-Mini is indeed, well, a mini, I feel it really belongs to a different size class with respect, for example, to Blackout’s Mini H Quad, have a look at these photos.
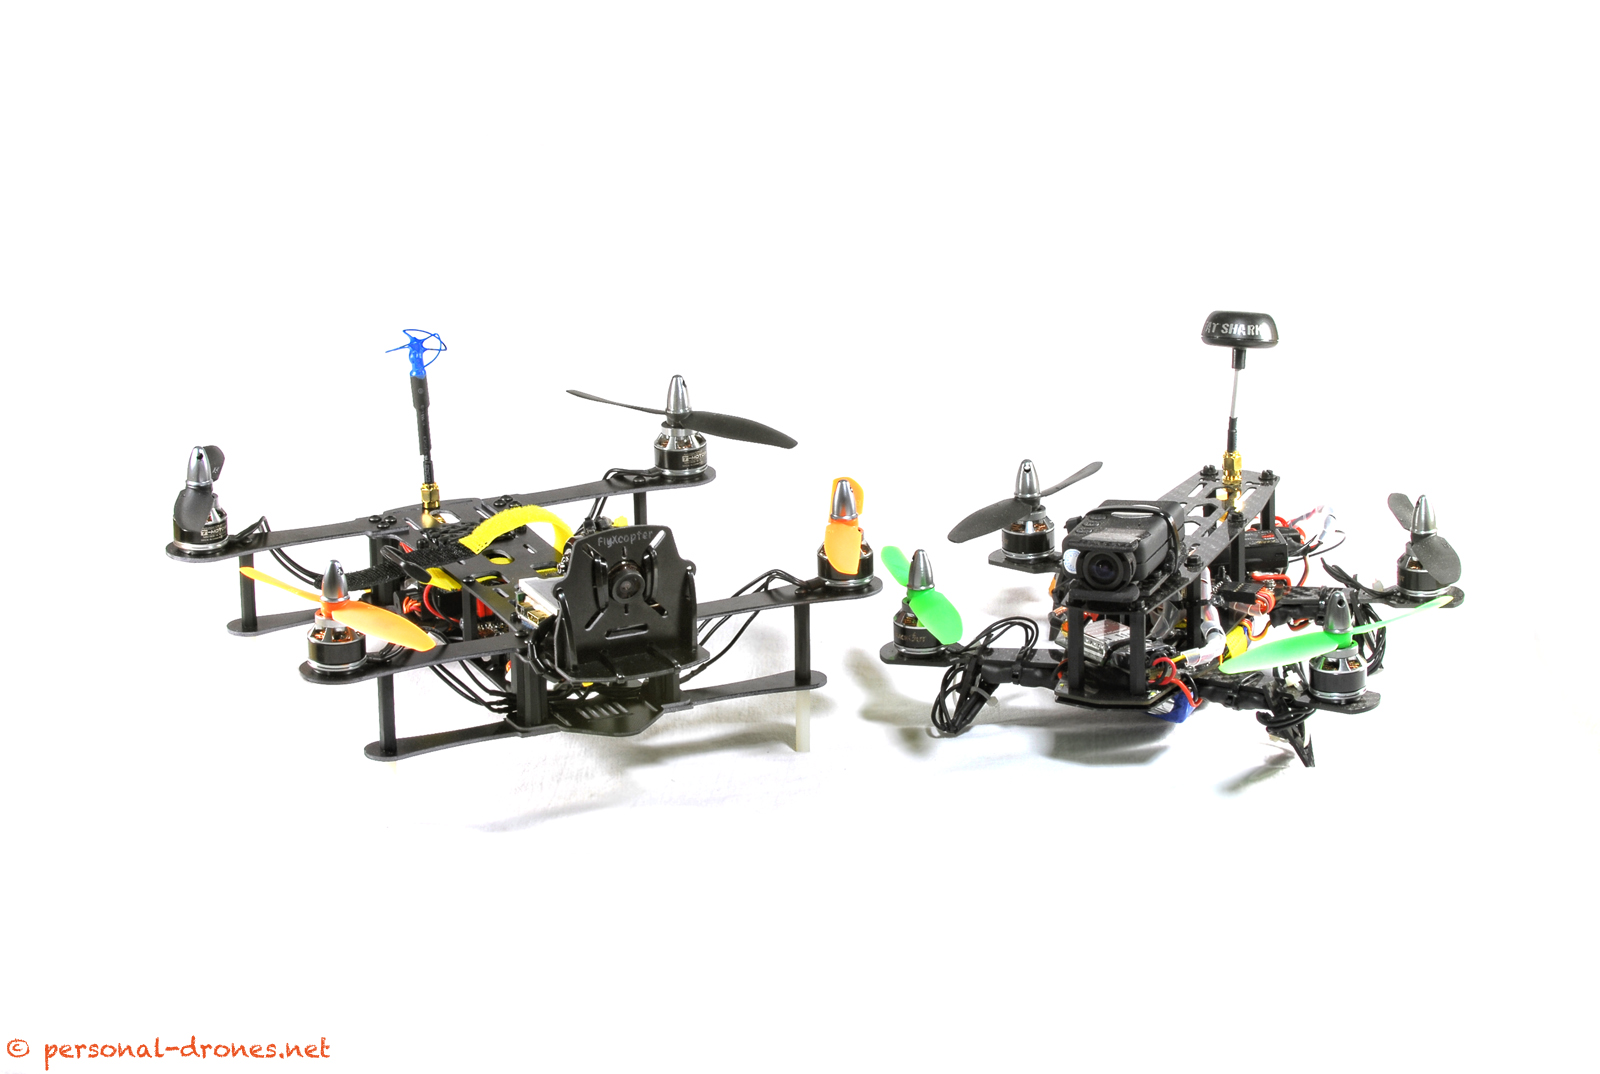
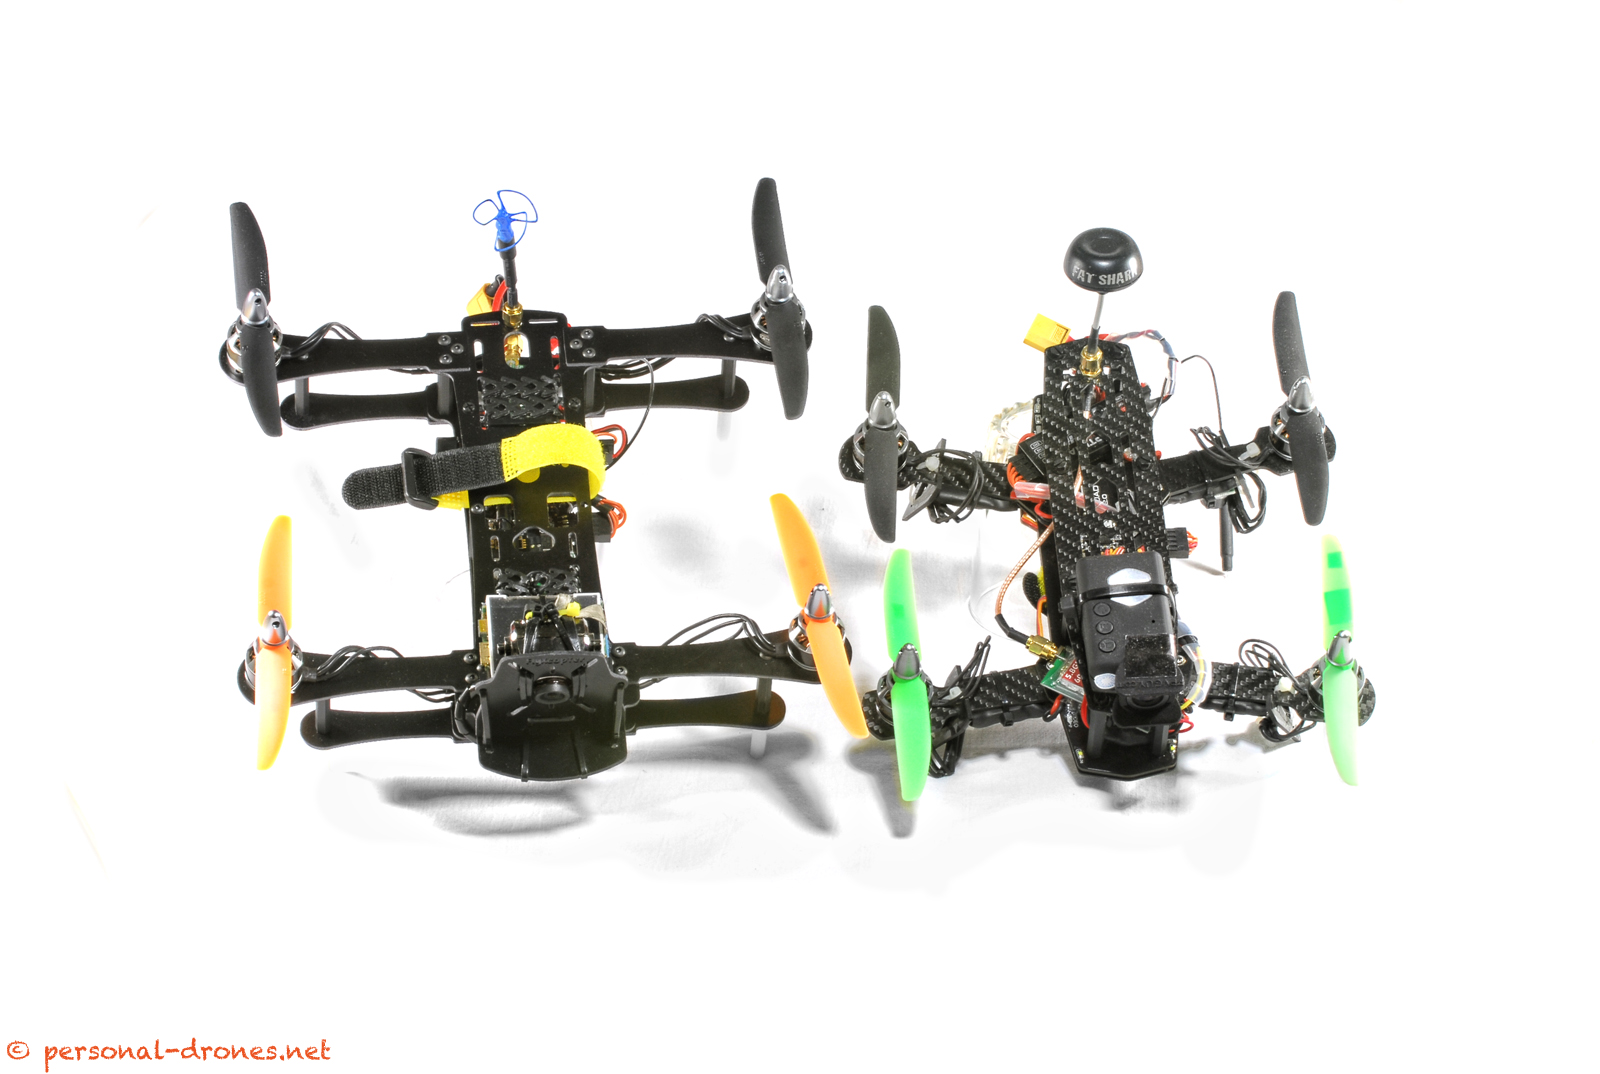
I am not saying that bigger is better. Each size has it’s merits, and smaller can indeed be better, at times. For instance a smaller quad fits into a smaller bag. A smaller quad can likely access spaces that a bigger quad cannot, at times. However the point is that the FlyXcopter FlyX-Mini is not another clone of the Mini H Quad but rather a truly original creation, quite different from may others in the same size class. Thanks to the front camera plate and the peculiar way the arms are built, it has a very distinctive look and a special character, it is a beautiful object to look at.
A first test flight showed a perfect stability, the FlyXcopter surely makes for a perfect miniquad also for beginners, as control is smooth and easy, which also helps in taking some very stable aerial video. As a first impression I found it slightly less “nervous” than some smaller brothers. I am looking forward to take the quad out for some more serious flying and report in a future post.
Should you buy one? If you are looking for a mini quadcopter for FPV and aerial video, I feel the FlyXcopter could be an excellent choice. There is now a terrific offer on the FlyXcopter web site for an Almost Ready to Fly FlyX-Mini, inclusive of motors, esc, flight controller (!) for less than 250€. This is a really good value that allows you to be in the air, with a professional grade, very well designed frame for a really limited budget, as compared to other branded minis. The price of the frame only, considering the quality, is quite affordable as well, check it out here.
If you liked (or disliked) this review, or you have any thought or comment, I’d love to hear, thanks for sharing below!
Resources
FlyXcopter web site
Quentin Daems youtube channel
Stay tuned on the Personal Drones blog for the latest multirotor and quadcopter news!
That thing is sweet! Great project to really get to know your drone. If you are looking for something a little more Ready To Fly I’d check out the UDI U818A