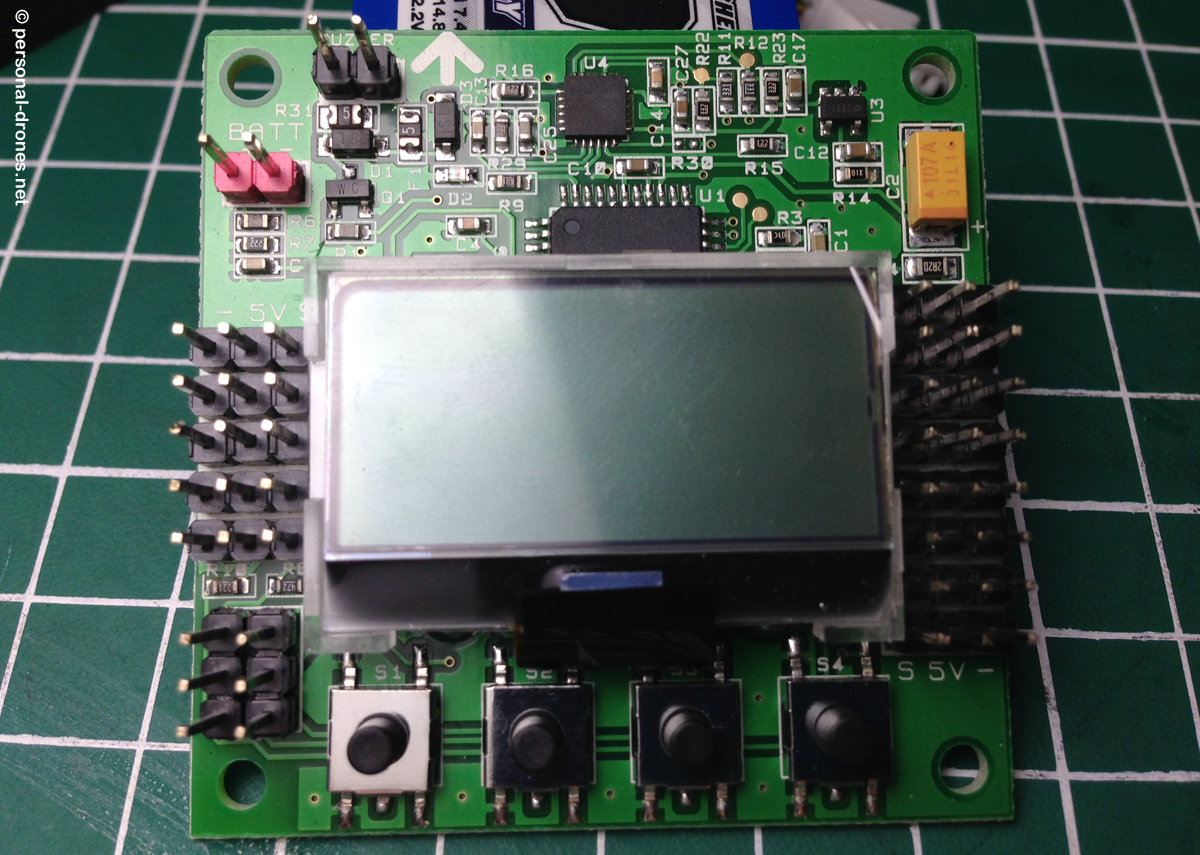
KK2 boards from Hobbyking are a great and inexpensive solution as flight controllers for all sorts of multirotors. In particular in the latest versions, such as the KK2.1.5, they really fly great and stable. One of the main advantages of these boards is that they have an embedded LCD screen that displays configuration settings in an easy to navigate menu, with clearly laid out options that you can navigate and change with the 4 little black buttons at the bottom of the board. Therefore, connection to a PC is not required for configuration and adjustments (for example gains adjustments), making setup and tuning quite handy even directly in the field.
Hobbyking’s KK2.1.5 board
I often get questions about KK2 board firmware upgrades. How do I update the KK2 board software to the latest version? Does this require superior programming and informatics skills? Well, the answer is yes it does. You don’t have to worry though, just send yours over and I will upgrade it for you for a miserable 100$. The very latest, coolest firmware, I promise. Or, keep on reading. Continue reading Hobbyking’s KK2 / KK2.1 / KK2.1.5 board firmware update/upgrade: how to→
I’d like to report on my latest build in the quest for the perfect mini personal drone. Like the mini H quad and the mini quad for FPV builds, this is again a small quadcopter, that should be possibly slightly smaller than the last one.
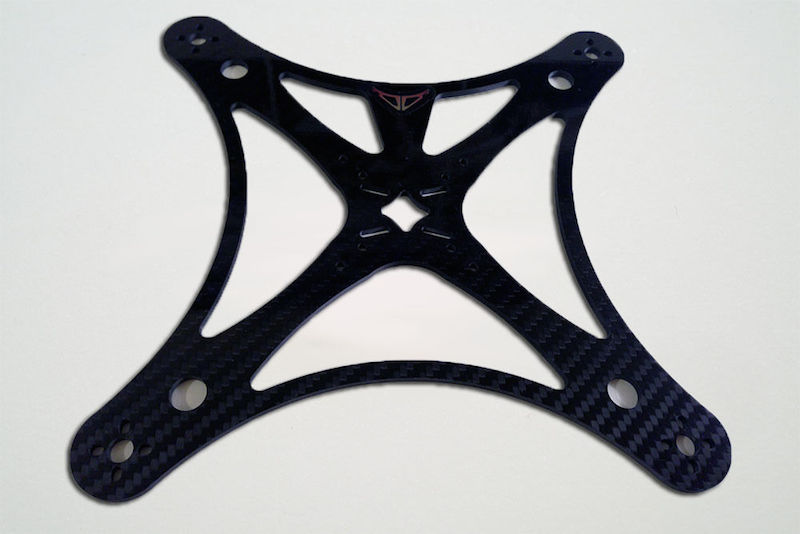
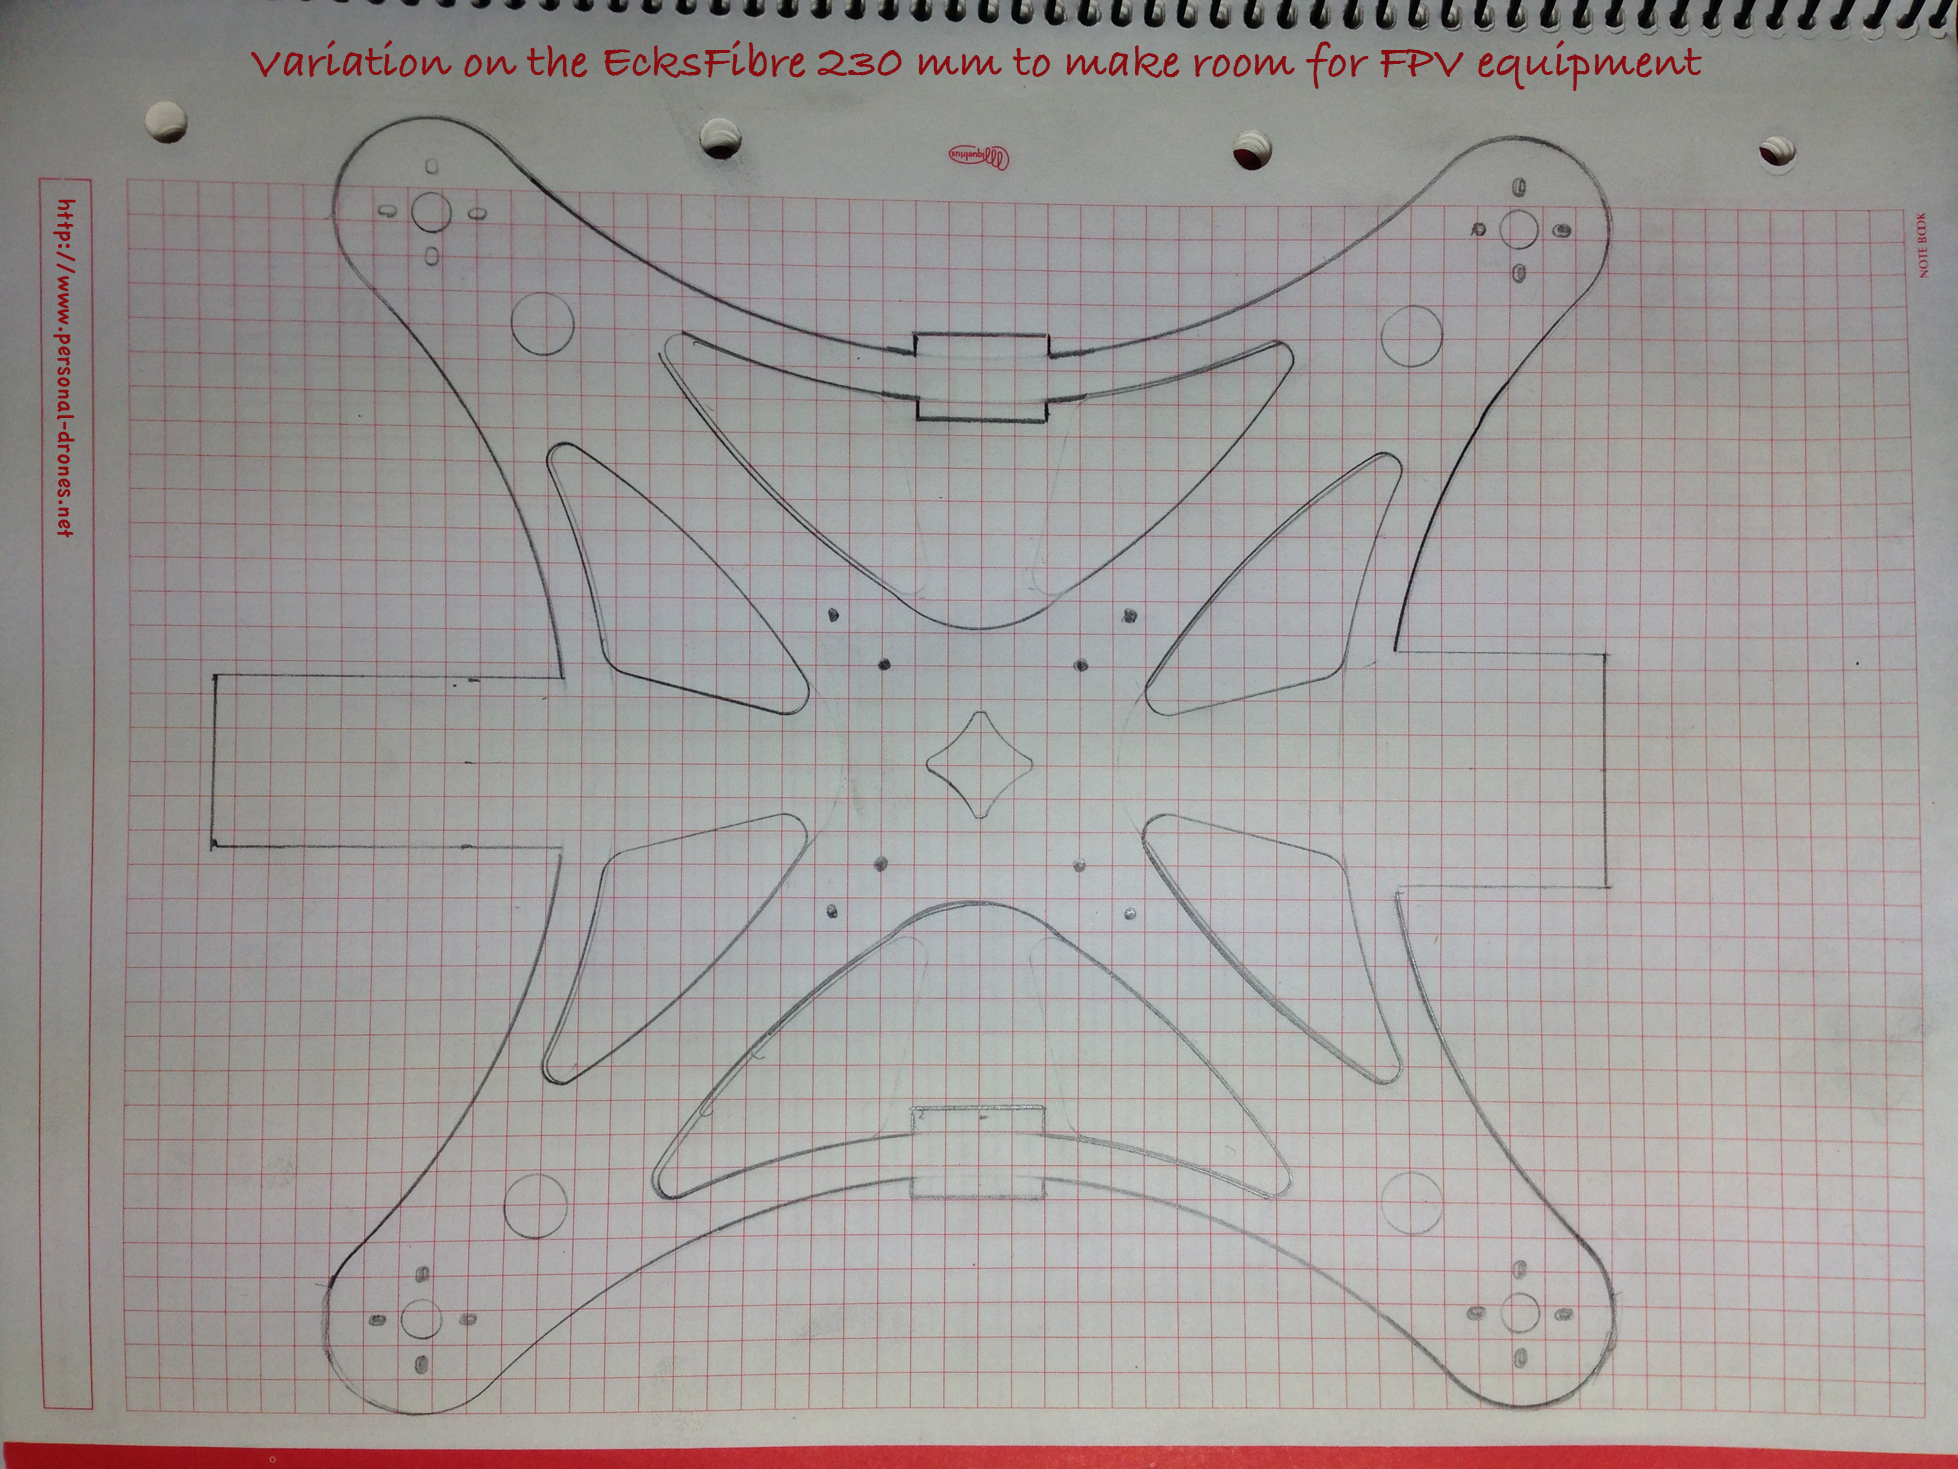
I started from an EcksFibre 230mm frame as a template. The main goal is to modify the design so as to include extension plates for a mobius camera and an immersion RC 600mW video transmitter, for First Person View flight.
The EcksFibre 230mm frameThe plan: adding extensions for a Mobius camera and an Immersion video transmitter
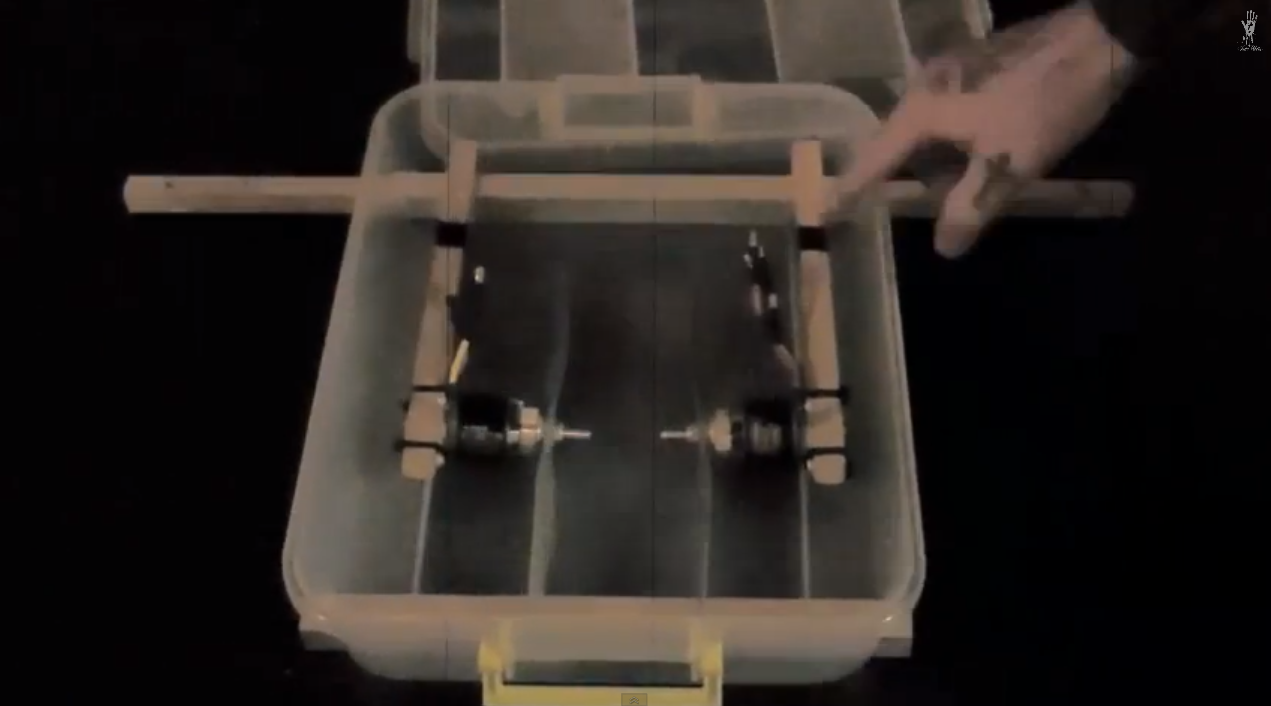
Check out this nice post by Jake Wells on DIYDrones. Features a video that summarizes the build of great DIY quad, out of a plastic box and some wood pieces.
Main features of the quadcopter are portability, durability and to be waterproof.
BoxCopter, partly folded inside the body box for portability
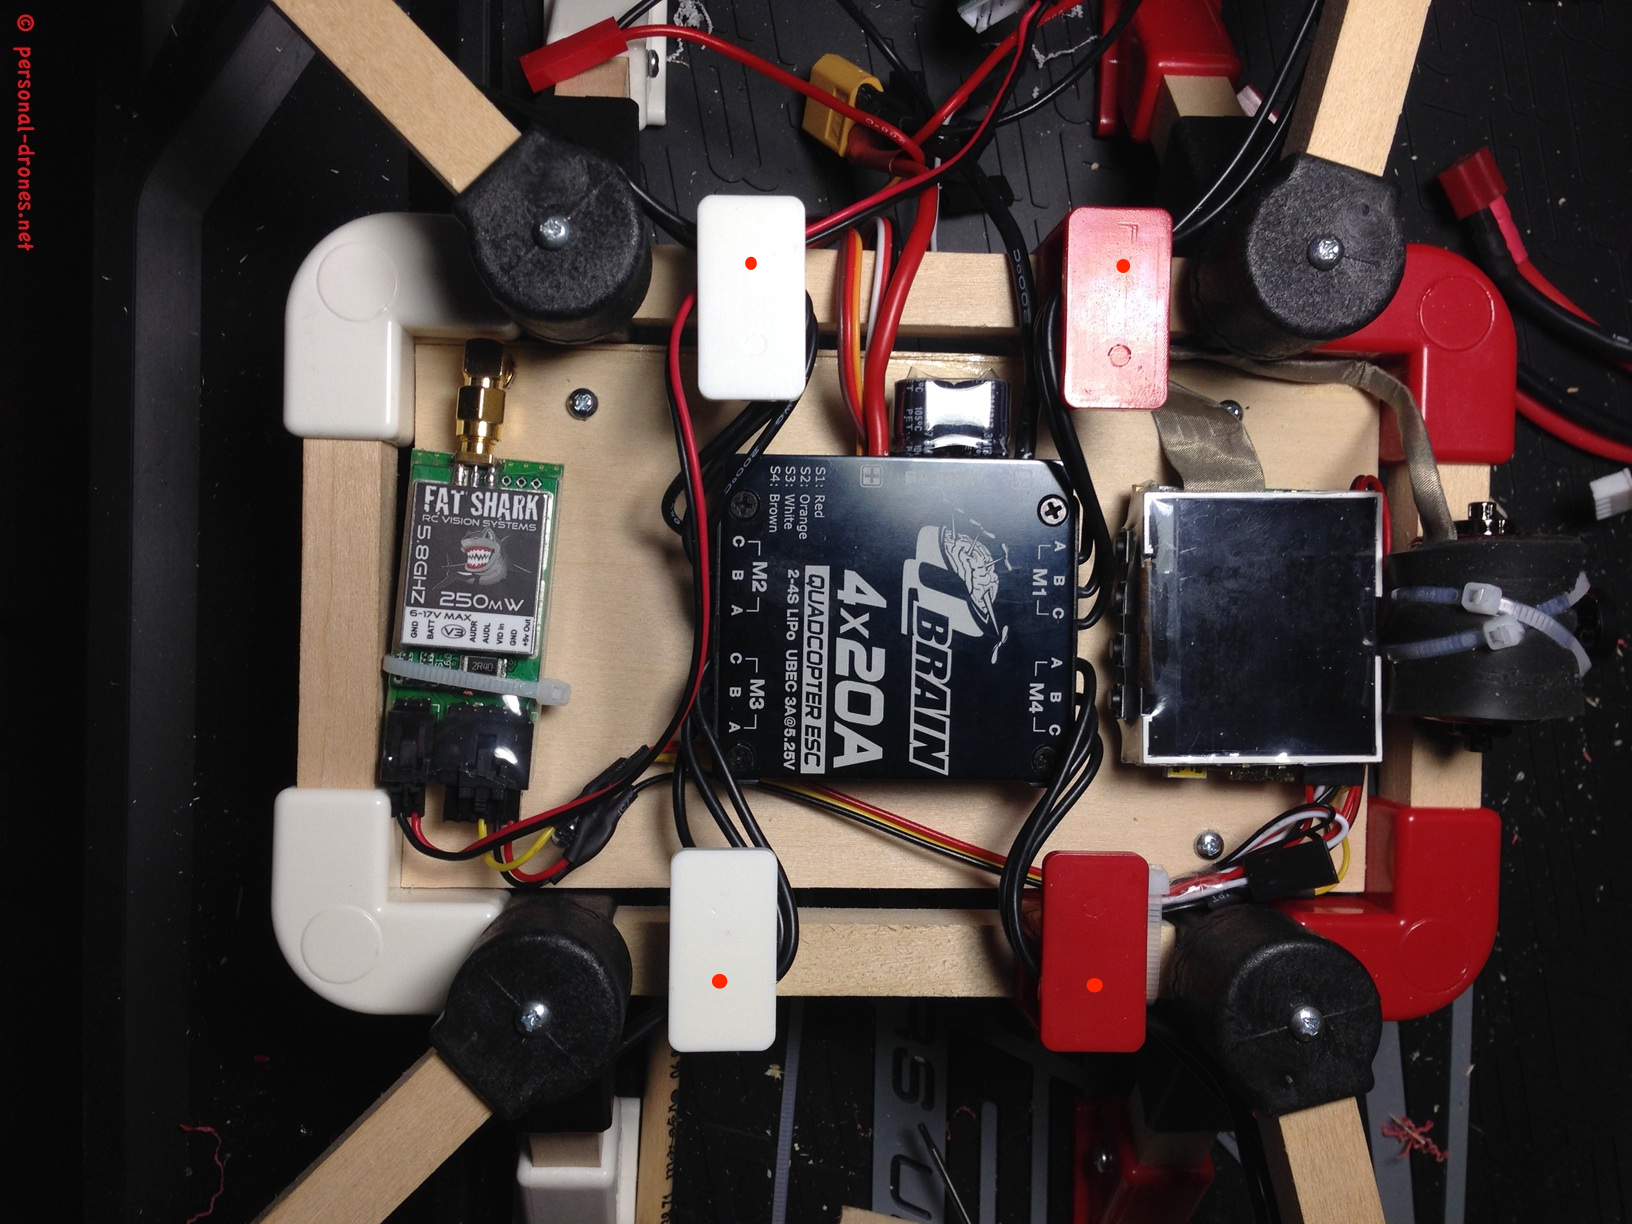
If you followed up to here in this multi part article on the Quadlugs multirotor building system, you know that we are now at a stage in which we have a basically fully assembled 480 mm quadcopter, with motors, escs, and FPV equipment in place. In the image below the placement of the electronics on the lower board is shown. We will have to drill the 4 positions marked by red spots in the figure in order to secure the upper deck in place.
Electronics on lower deck. Points to drill to secure the upper deck are marked with red spots
We now need to finish the build by mounting the upper deck with control board and radio receiver. mounting the upper deck is straightforward. First, drill the upper plate lugs in the positions marked in the figure above. You should do this with extreme care as the ESC wires, in the suggested configuration, run into the lug hole. You could also remove the wires while you do this, or drill before inserting the wires. Then with a pencil, carefully mark the position that correspond the the drilled holes to the wood board. Mind that the board, like the lower board, is larger than required. I did cut down mine to 8.5 x 13.5 cm in order to fit this design. Continue reading QUADLUGS MODULAR MULTIROTOR SYSTEM QUADCOPTER BUILD AND REVIEW – PART 4→
In part 1 of this build and review article I have been looking at the general features of the Quadlugs multirotor modular system and some preparation steps required before the actual frame assembly, namely the drilling of holes in some of the lugs.
2. Quadlugs quadcopter frame assembly
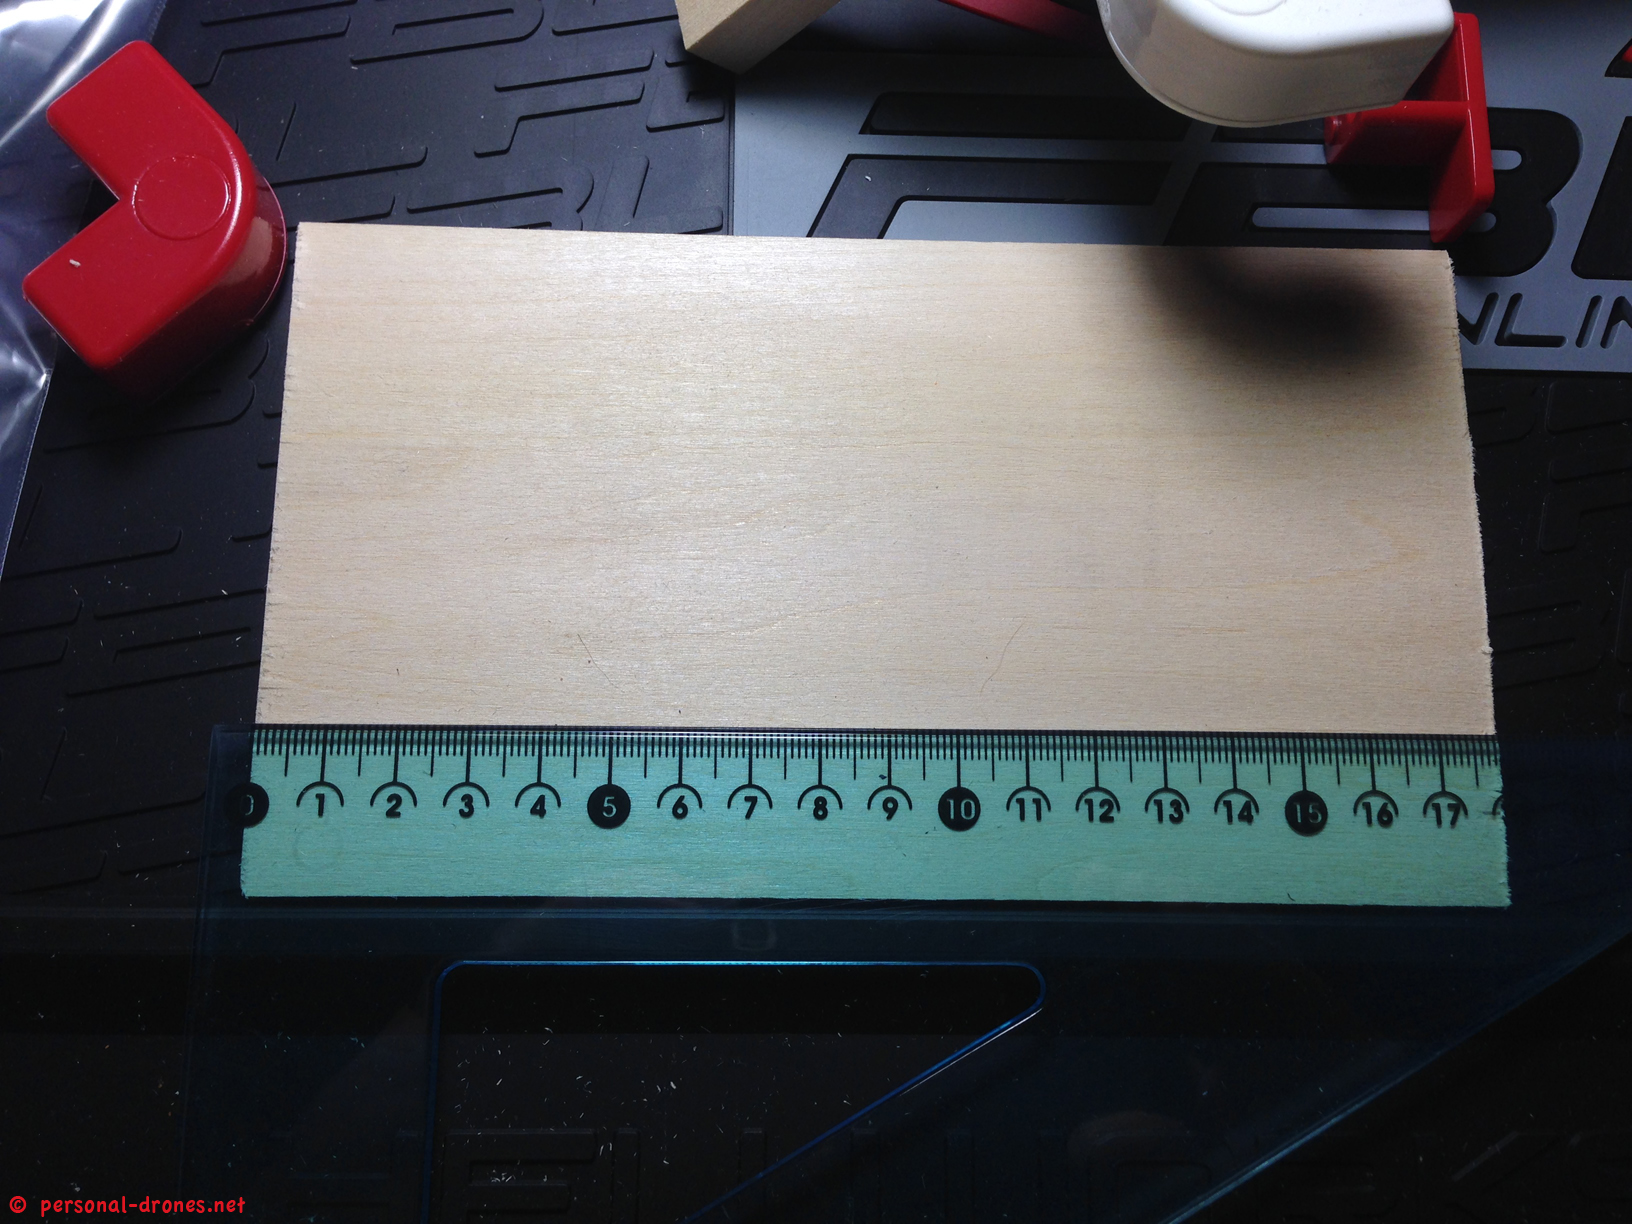
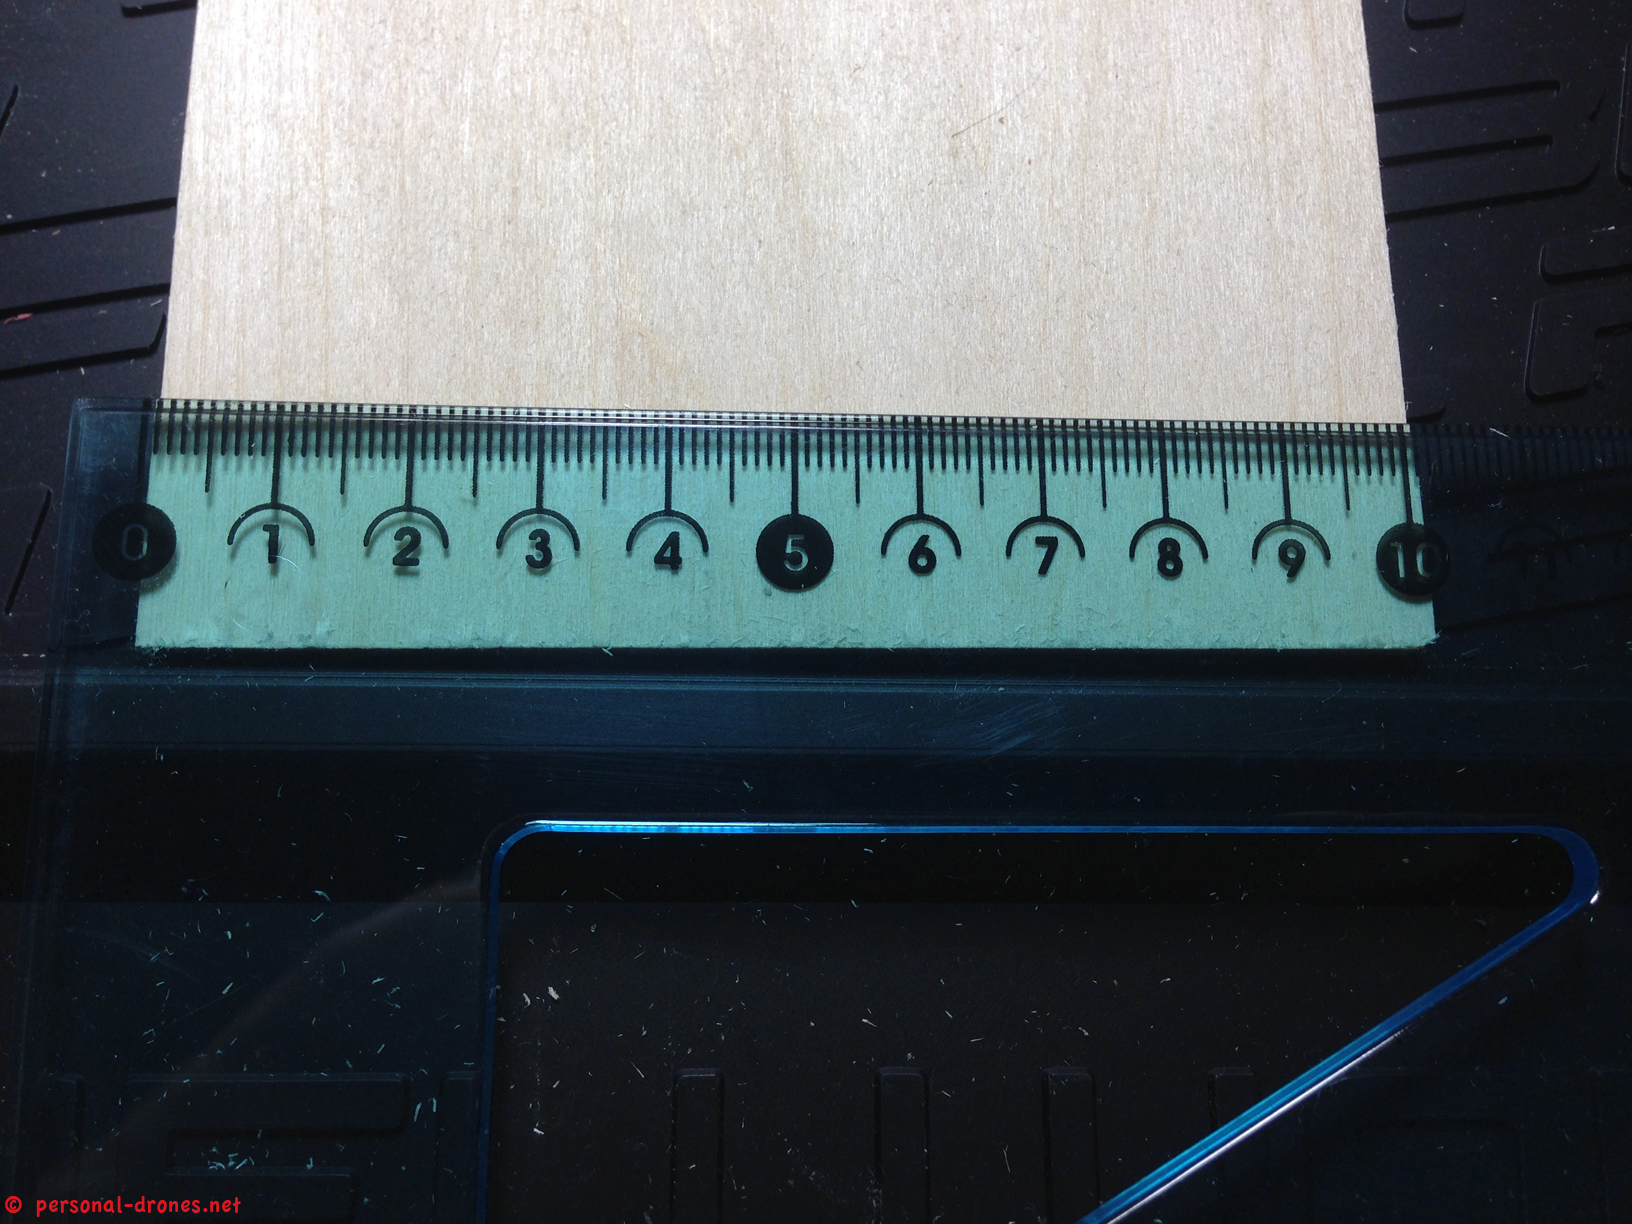
Before we actually assemble the frame, we have adapt the bottom plate, which is slightly larger than possibly needed.
The original size of the provided bottom plate is 17,9 x 10,1 cm (and 3 mm thick):
Measuring the bottom plate heightMeasuring the bottom plate width
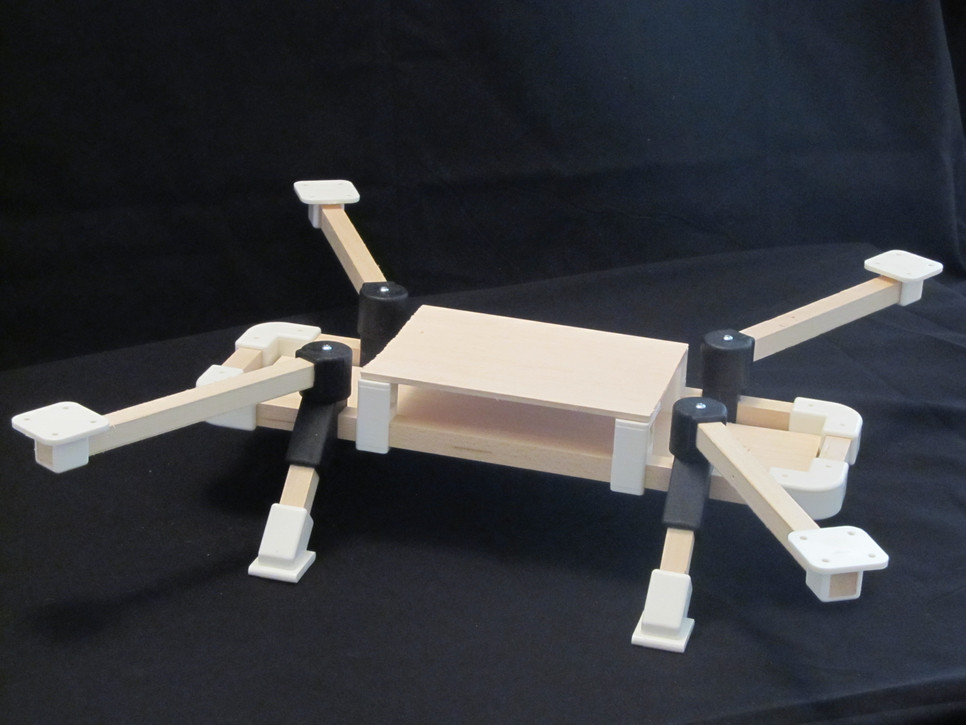
I have received a nice USPS box from Danny, funder of the Quadlugs multirotor modular system and started a build with the main purpose of testing this original piece of technological equipment for strengths and weaknesses, report to our blog readers and providing a build blueprint for others that might want to built their own Quadlugs based multi rotor.
A packet from Quadlugs!A mounted Quadlugs frameThe result of quite some work on the packet contents: a Quadlugs 480 build for FPV, straight from the Personal Drones Blog! Stay with us and build yours by following our simple instructions
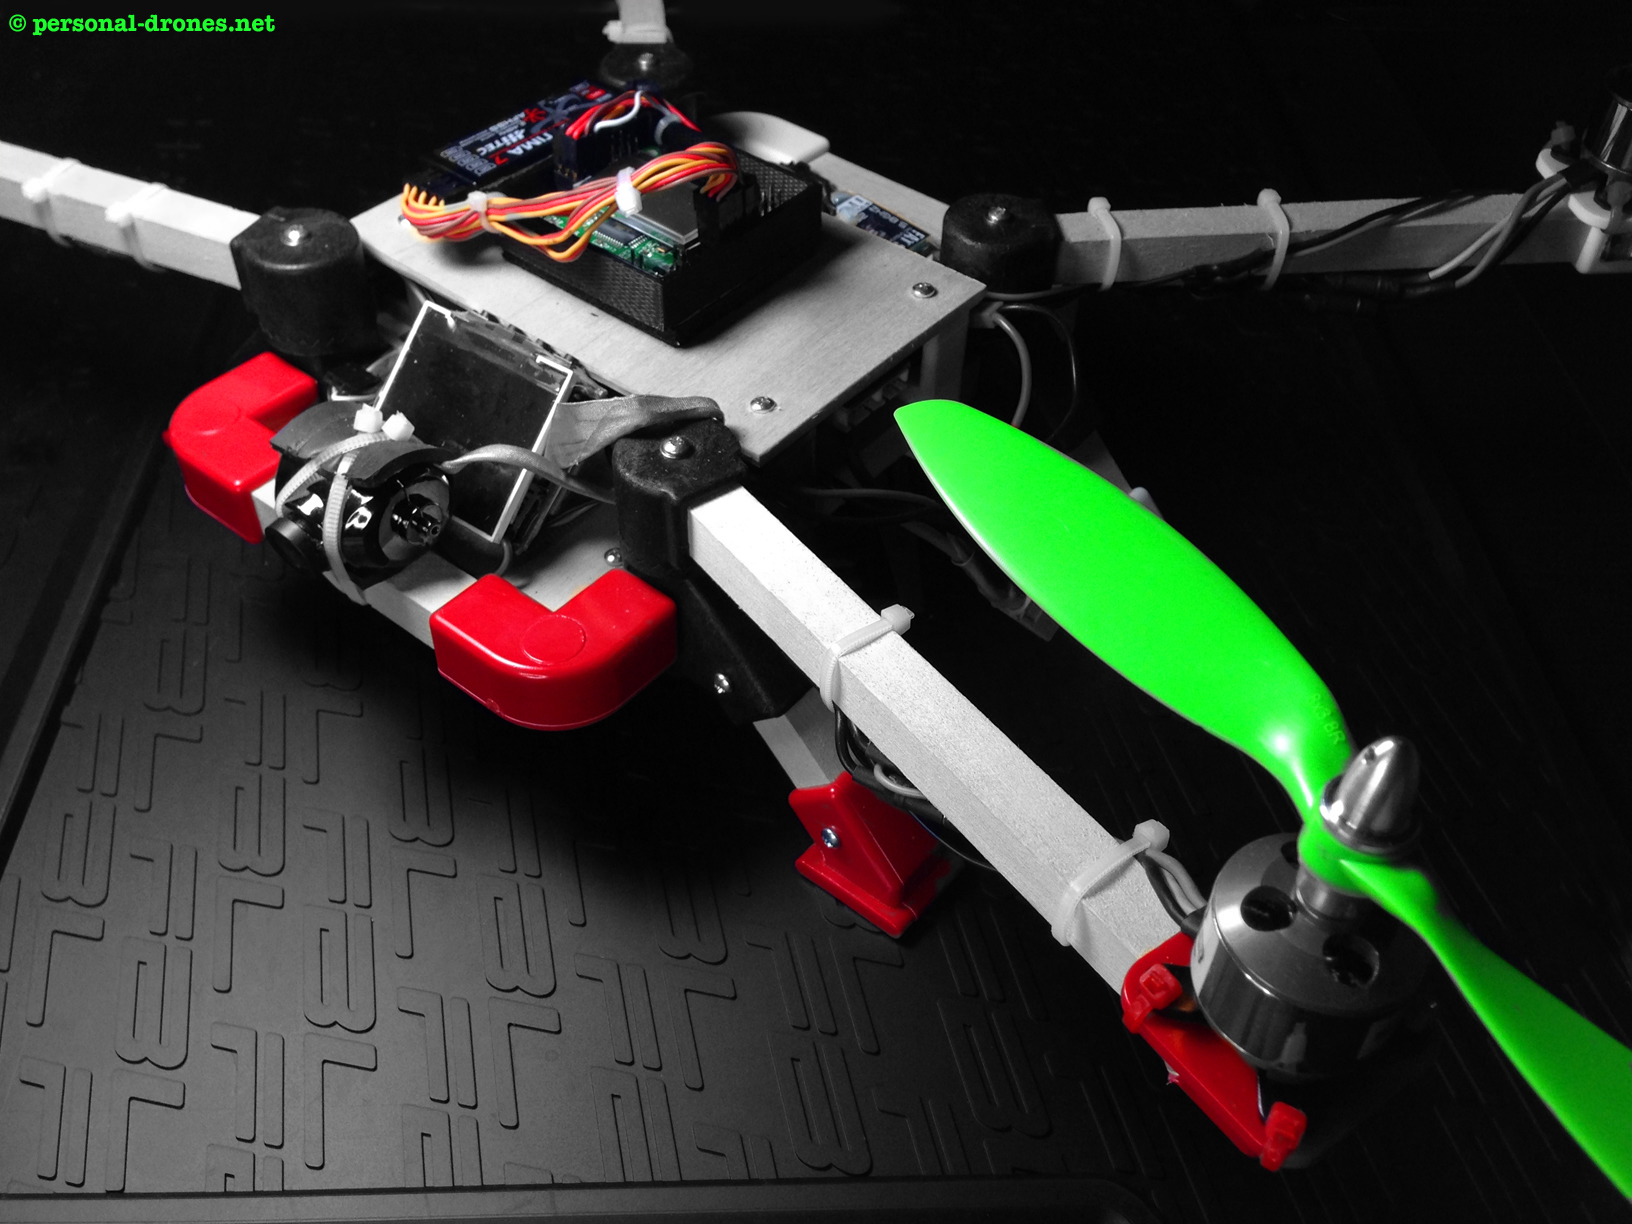
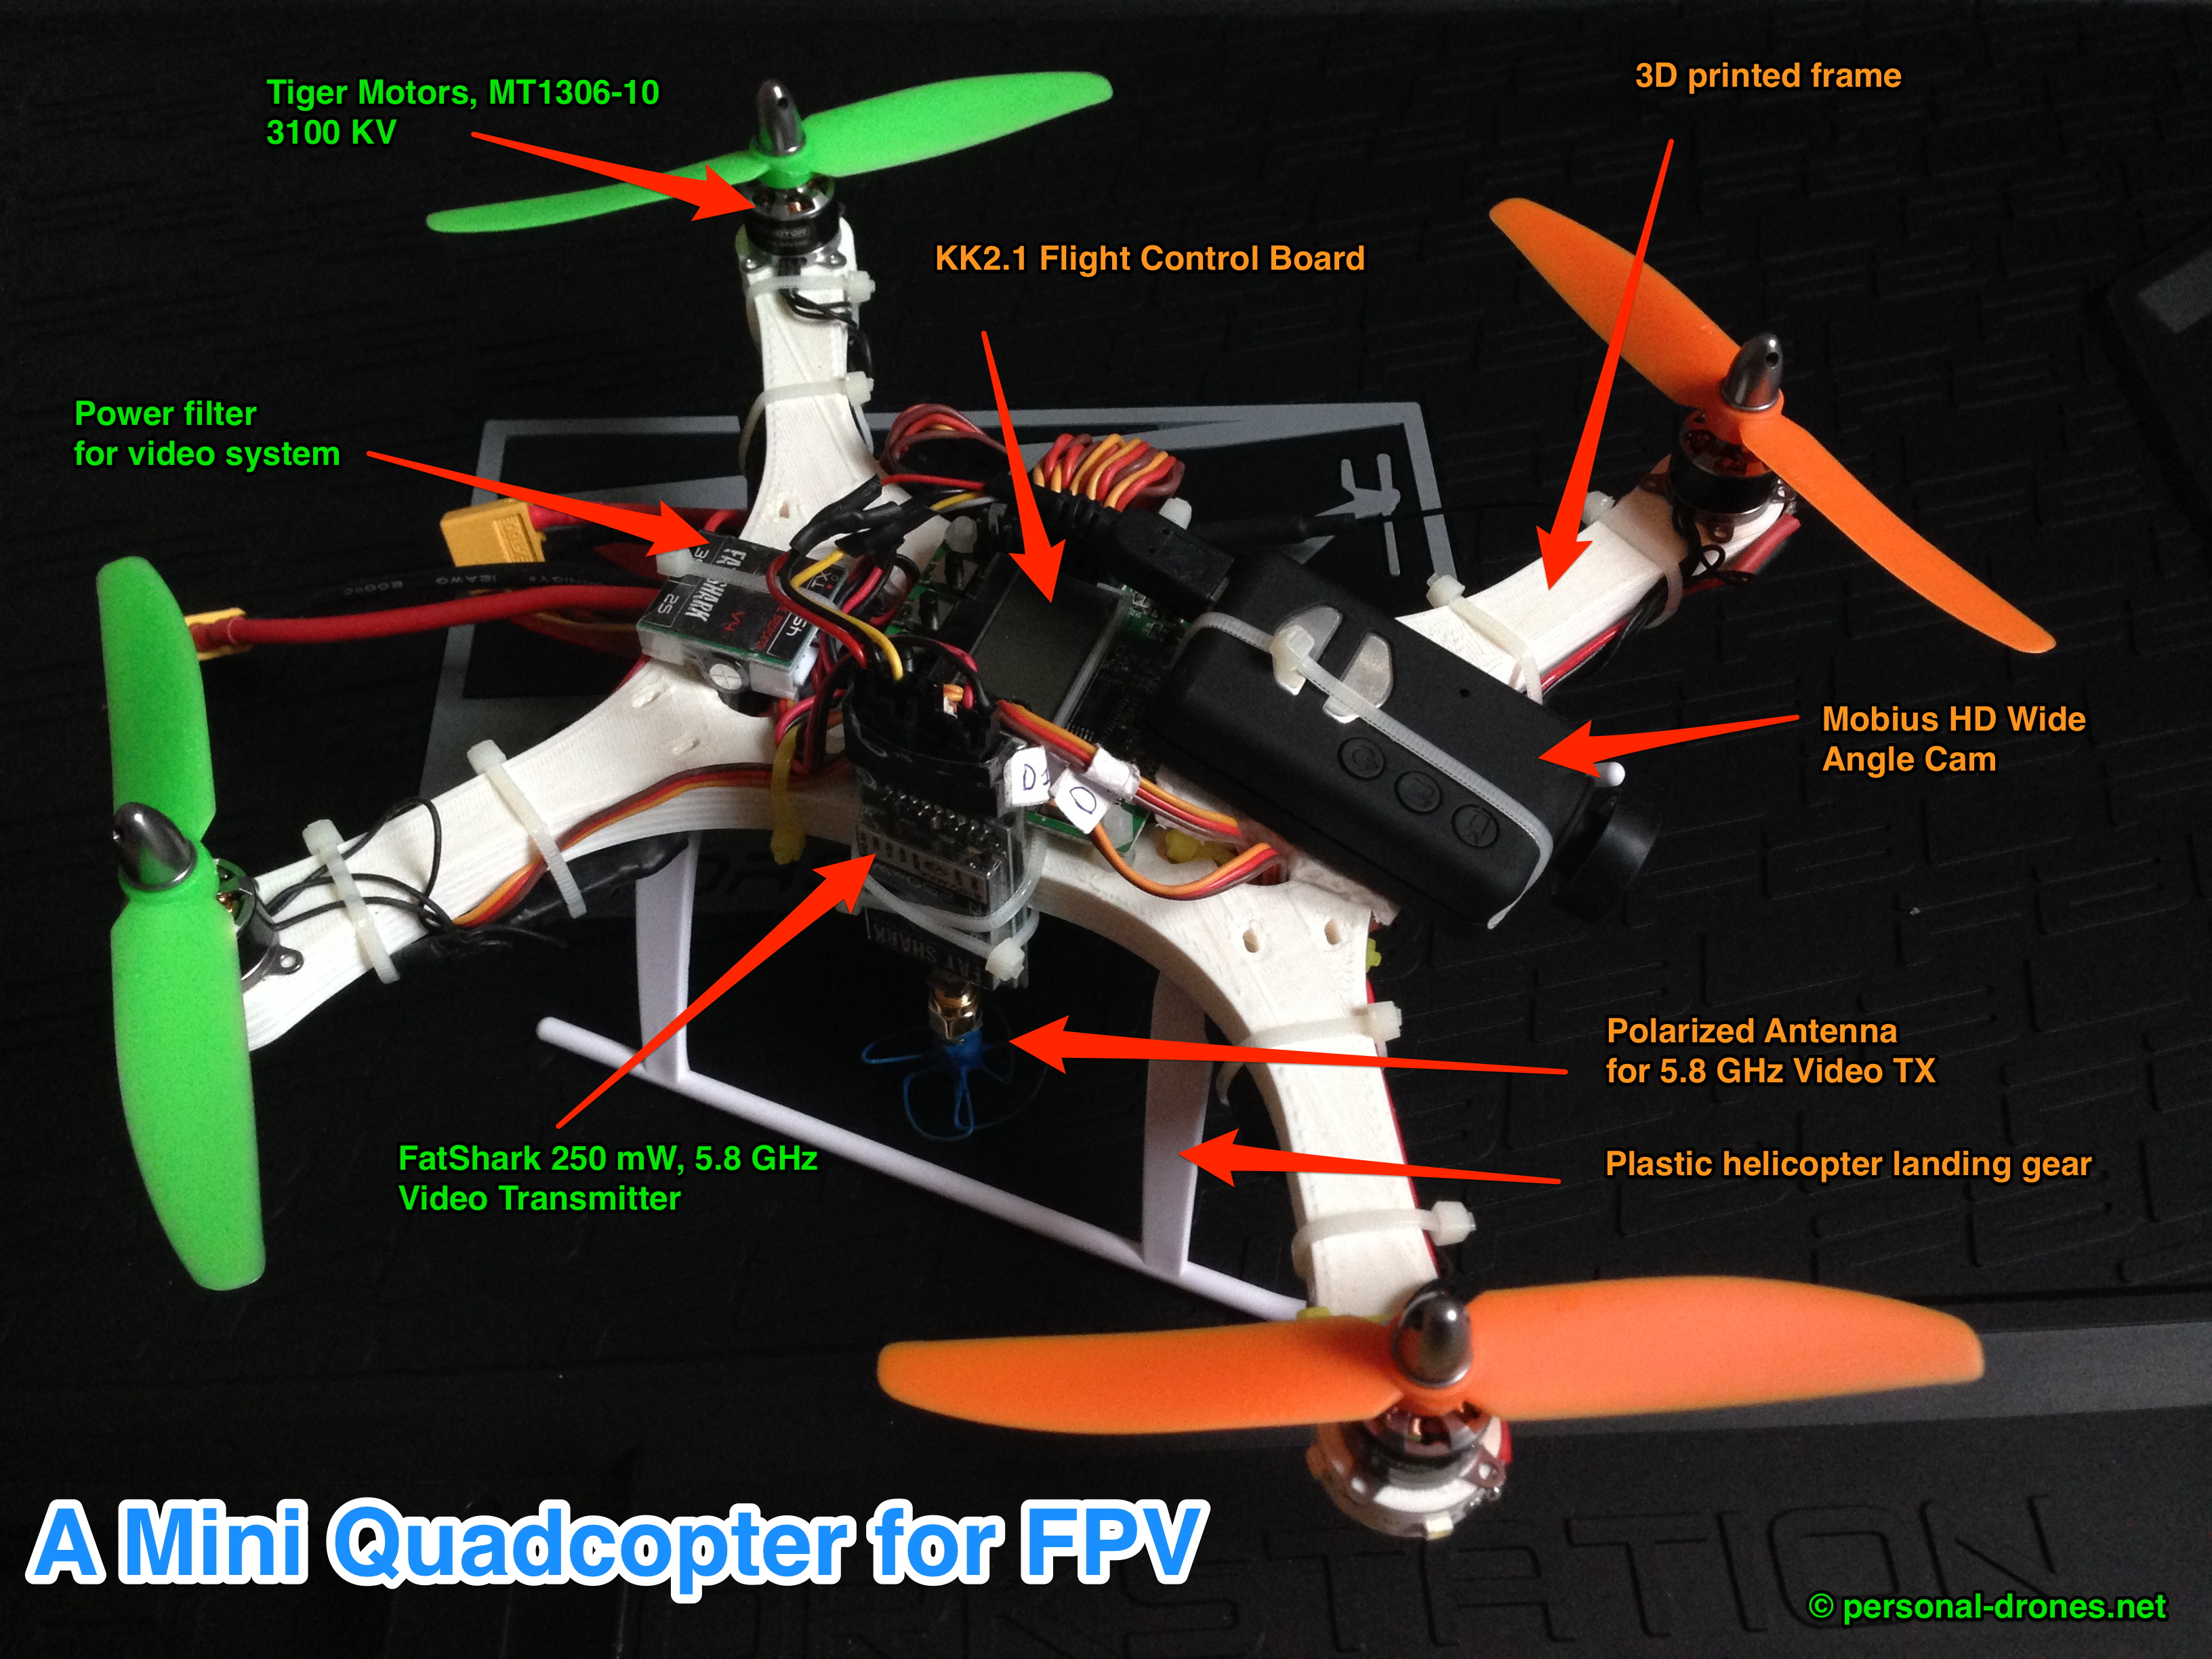
I’d like to report here some details of my last personal drone build, a mini quadcopter for First Person View (FPV) flight.
A manually assembled mini quadcopter for FPV
Weight: 360 gr w/o battery. With 2200 mA 2S battery: 487 gr.
Size: The 4 motor centers form a square with a side of 17,5 cm and a diagonal distance from front motor to back motor of 25 cm. So the quad is in the 250 class. Continue reading Building a mini quadcopter for FPV→
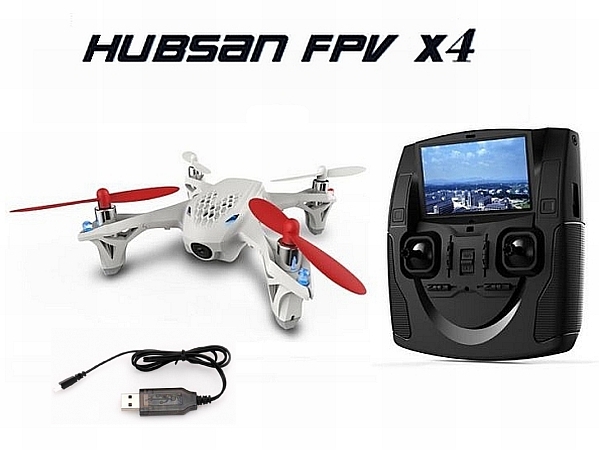
The Hubsan H107D FPV is quite close to my ideal personal drone: small, with embedded video transmitter and camera and good flying performance.
The Hubsan H107D FPV quadcopter with it’s radio
At least some channels ar compatible with FatShark equipment, so it is possible to fly it FPV with just a pair of FatShark goggles. It is also possible to fly it FPV right from the hubsan radio, which comes with a generous screen that gets the video feed live.
The Mobius camera is the big brother of the 808 camera. It features 1080HD quality, a wide angle lens, easy of use, light weight, storage on SD card. I recently got one and decided to try an FPV setup by using this camera together with a Fat Shark Immersion 250mW 5.8GHz video transmitter.
Since it took me a little while to figure out how to establish a correct cable connection between the camera and the transmitter, I thought I would share here how I did it, it’s an easy and quick FPV setup.
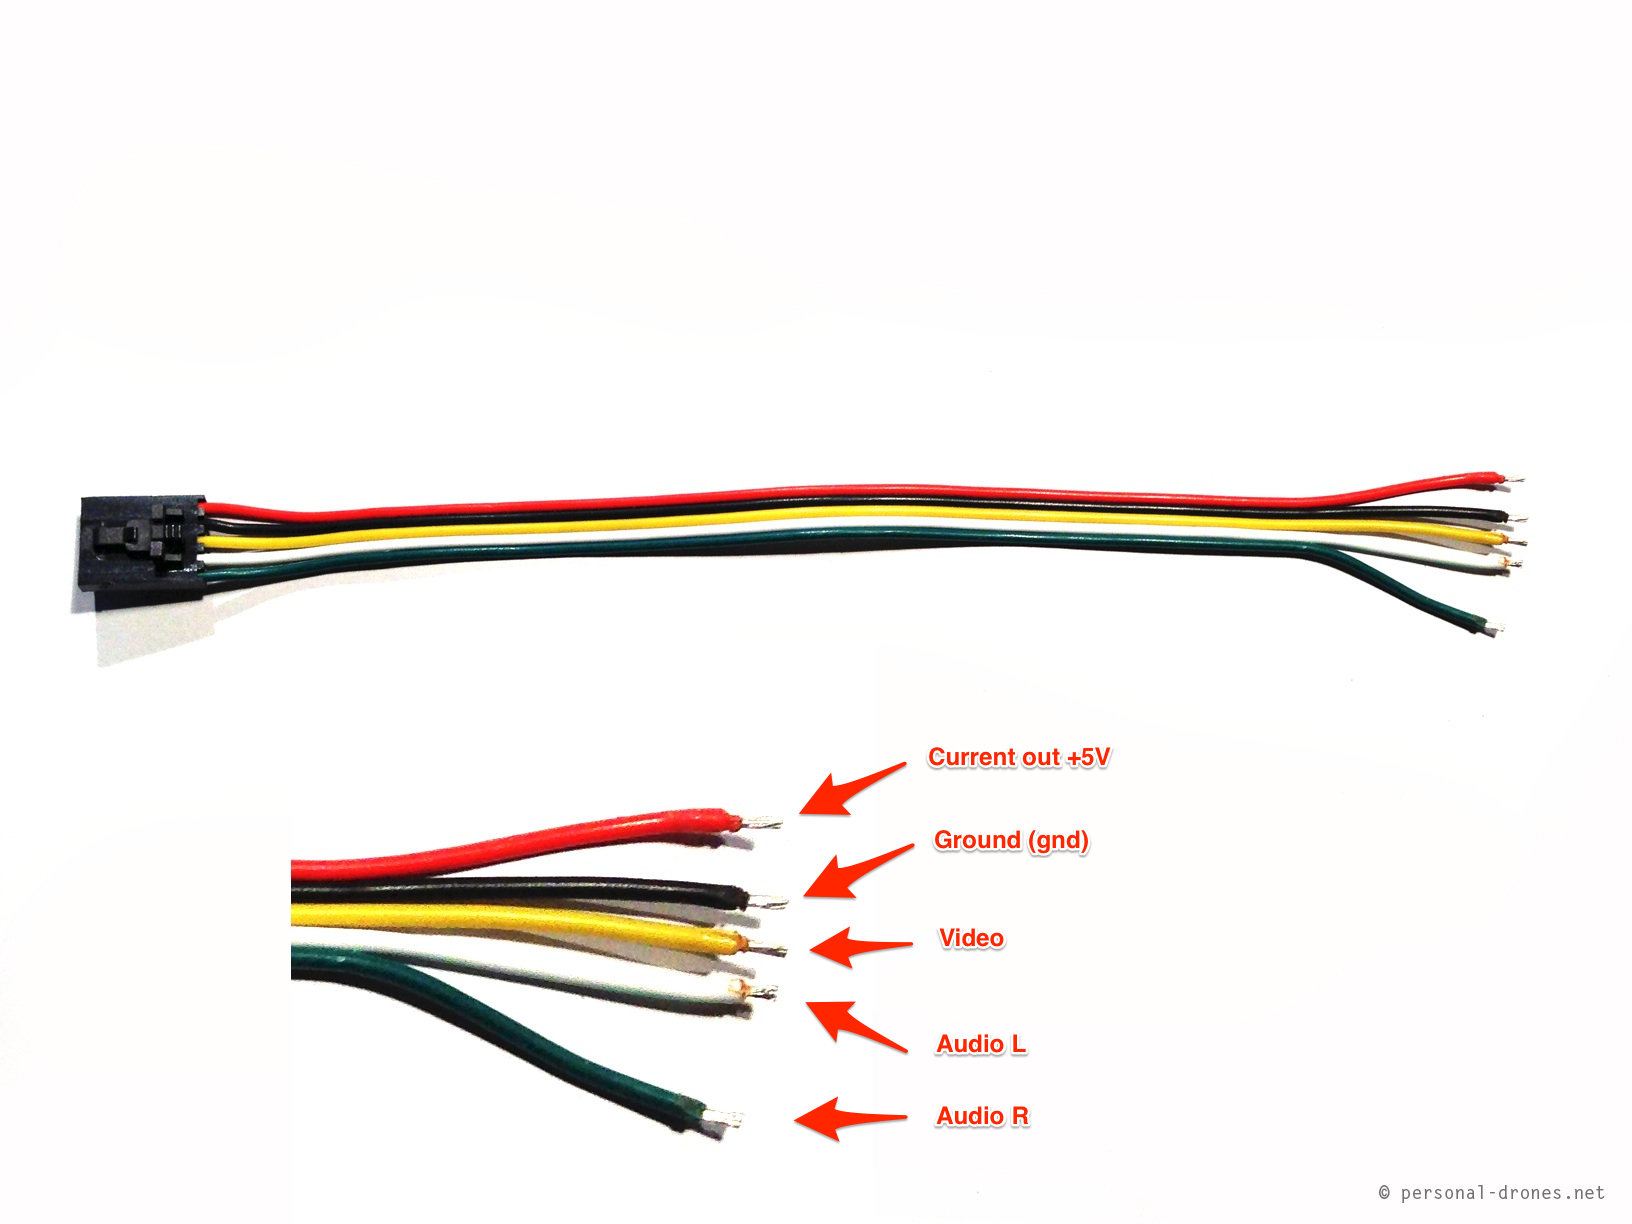
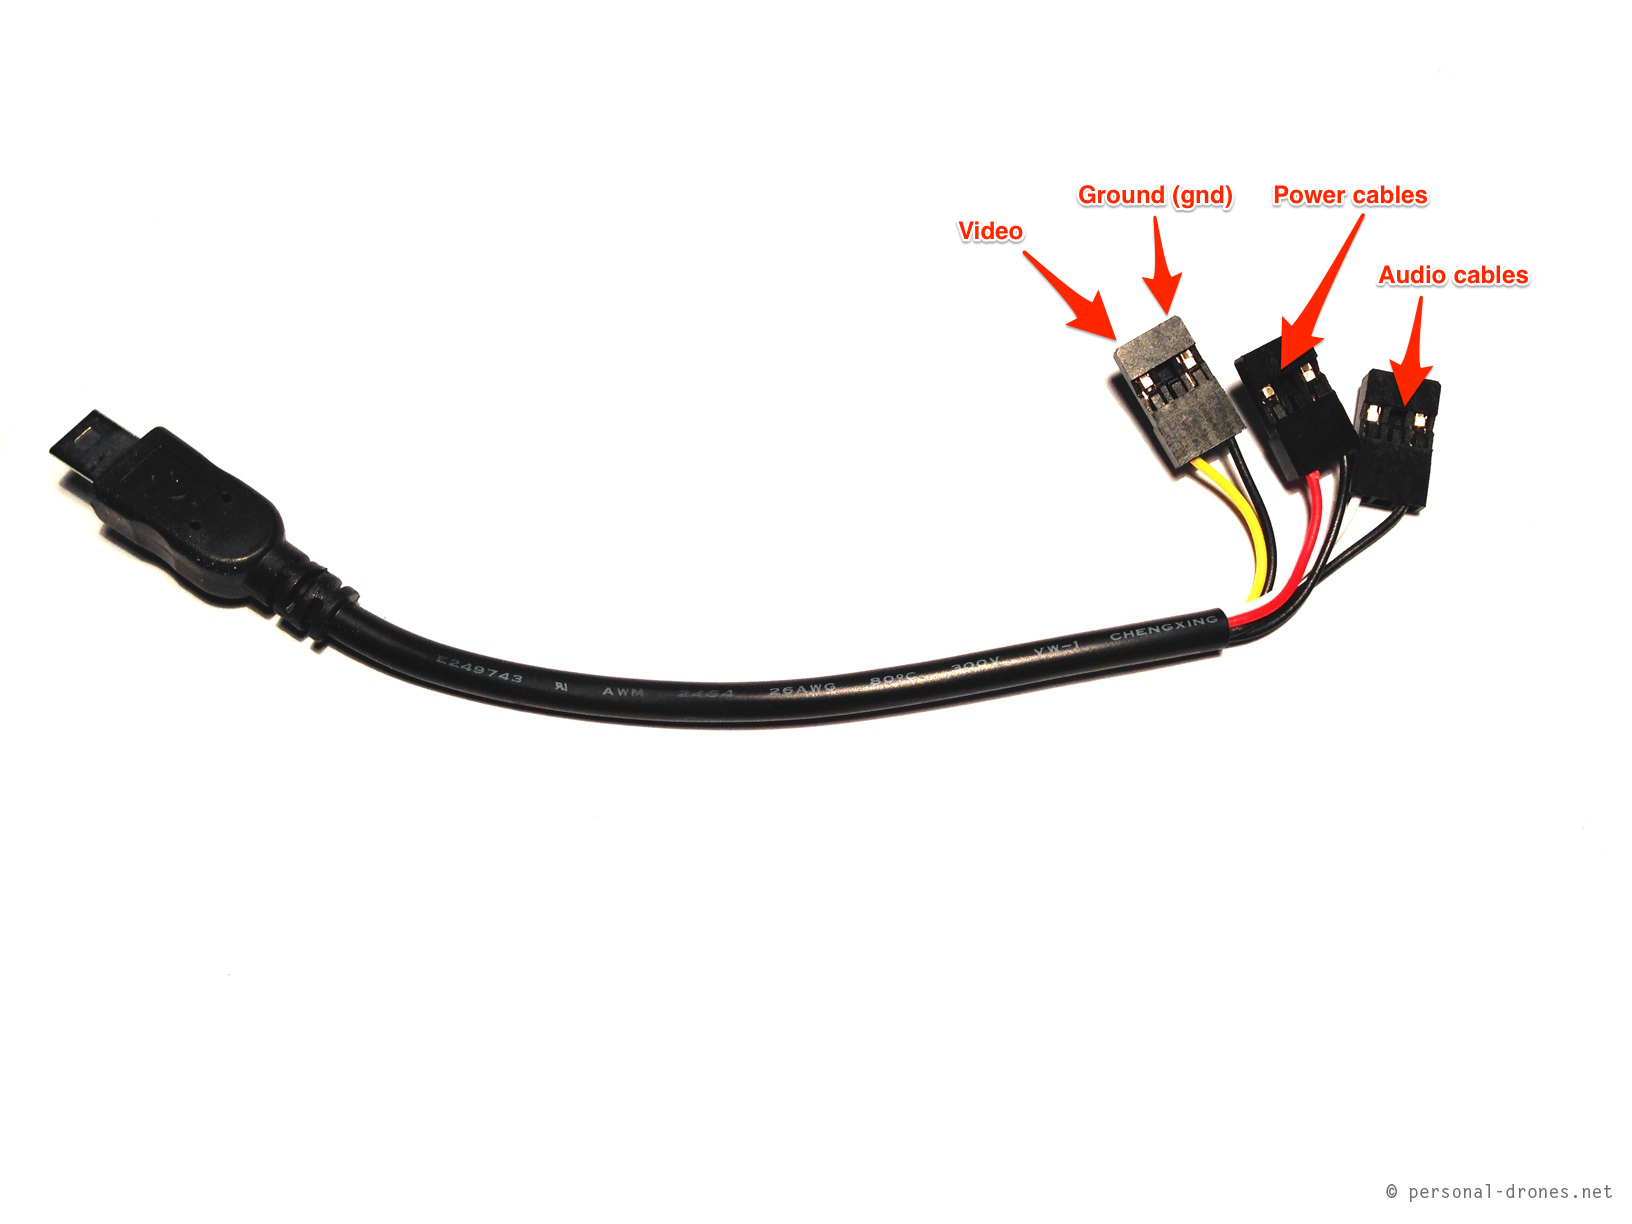
First let’s have a look at the immersion style cable that comes with the transmitter:
Immersion style video transmitter cable
In this little tutorial we will limit ourselves to connect the video component only, constituted by two wires: the video wire (yellow) and the ground (gnd) wire (black). However, by following a similar approach, it is easy to also hook up the audio and power wires, so as to provide power to the camera directly from the battery of the aircraft.
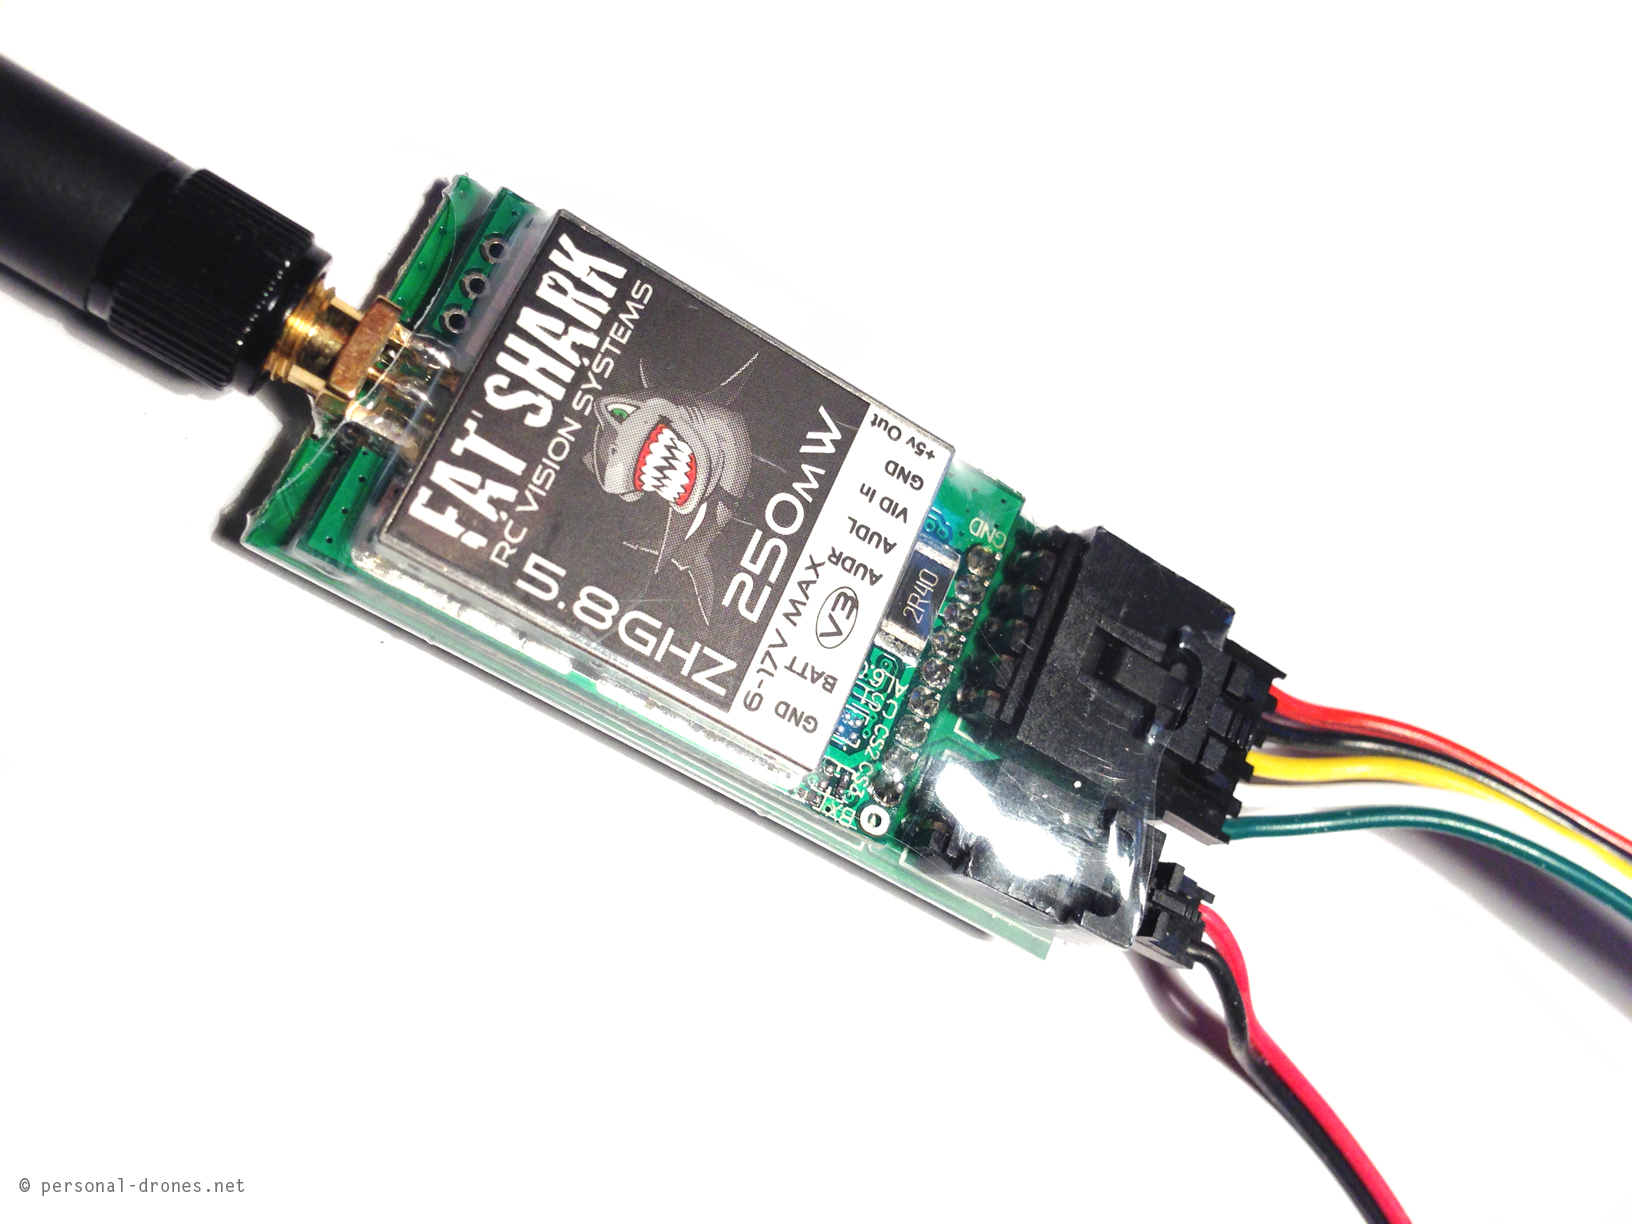
This is the transmitter cable connected to the Fat Shark video transmitter:
FatShark 250mW, 5.8GHz video transmitter
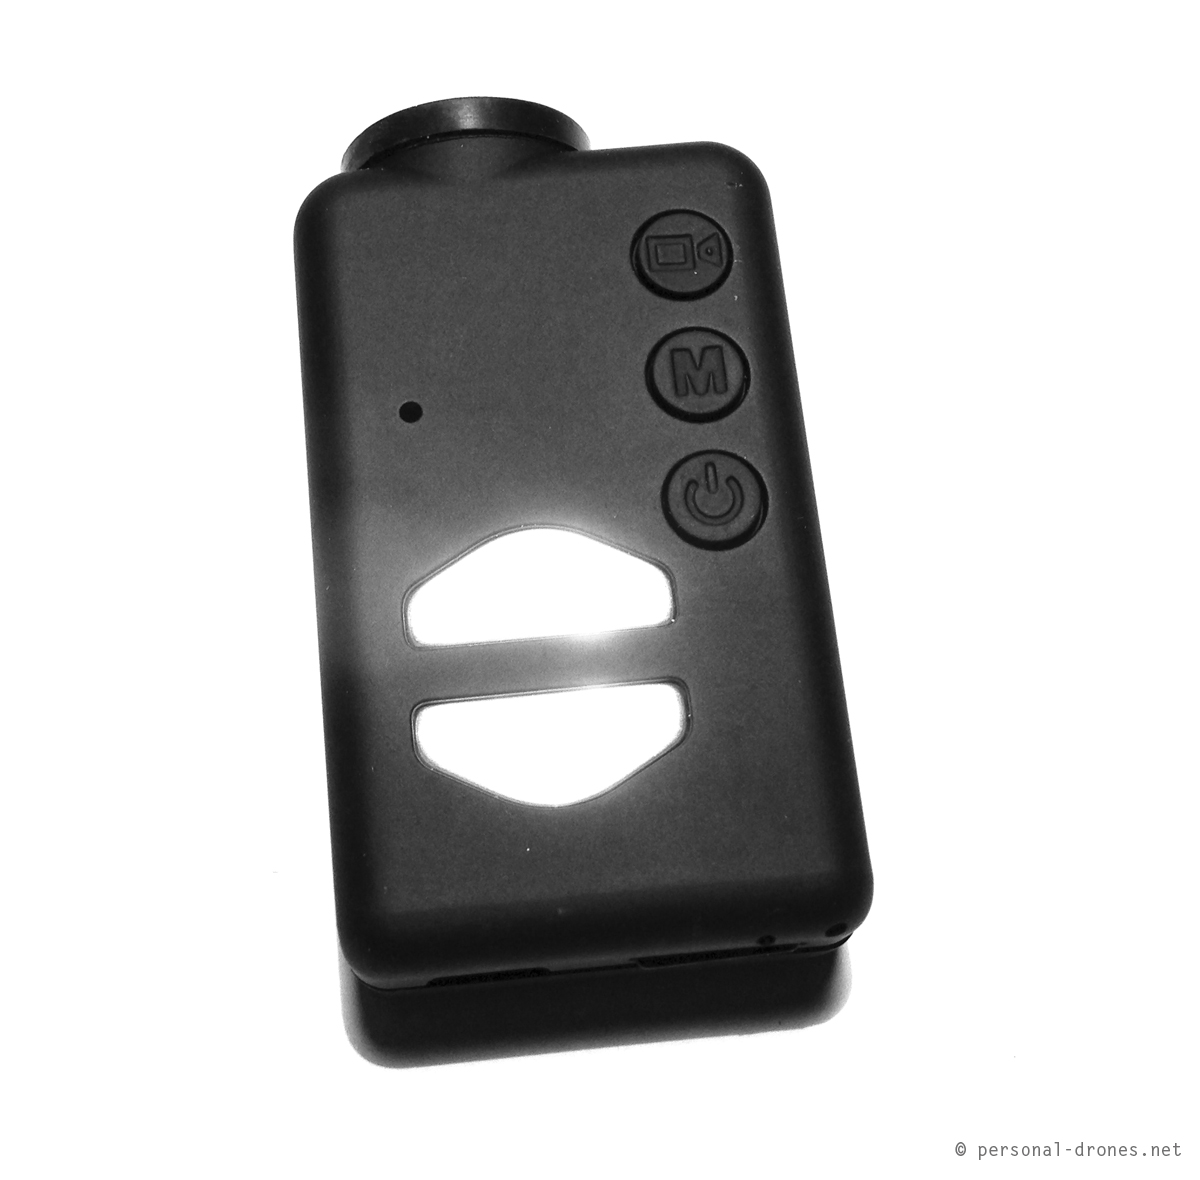
For the mobius camera
Mobius camera
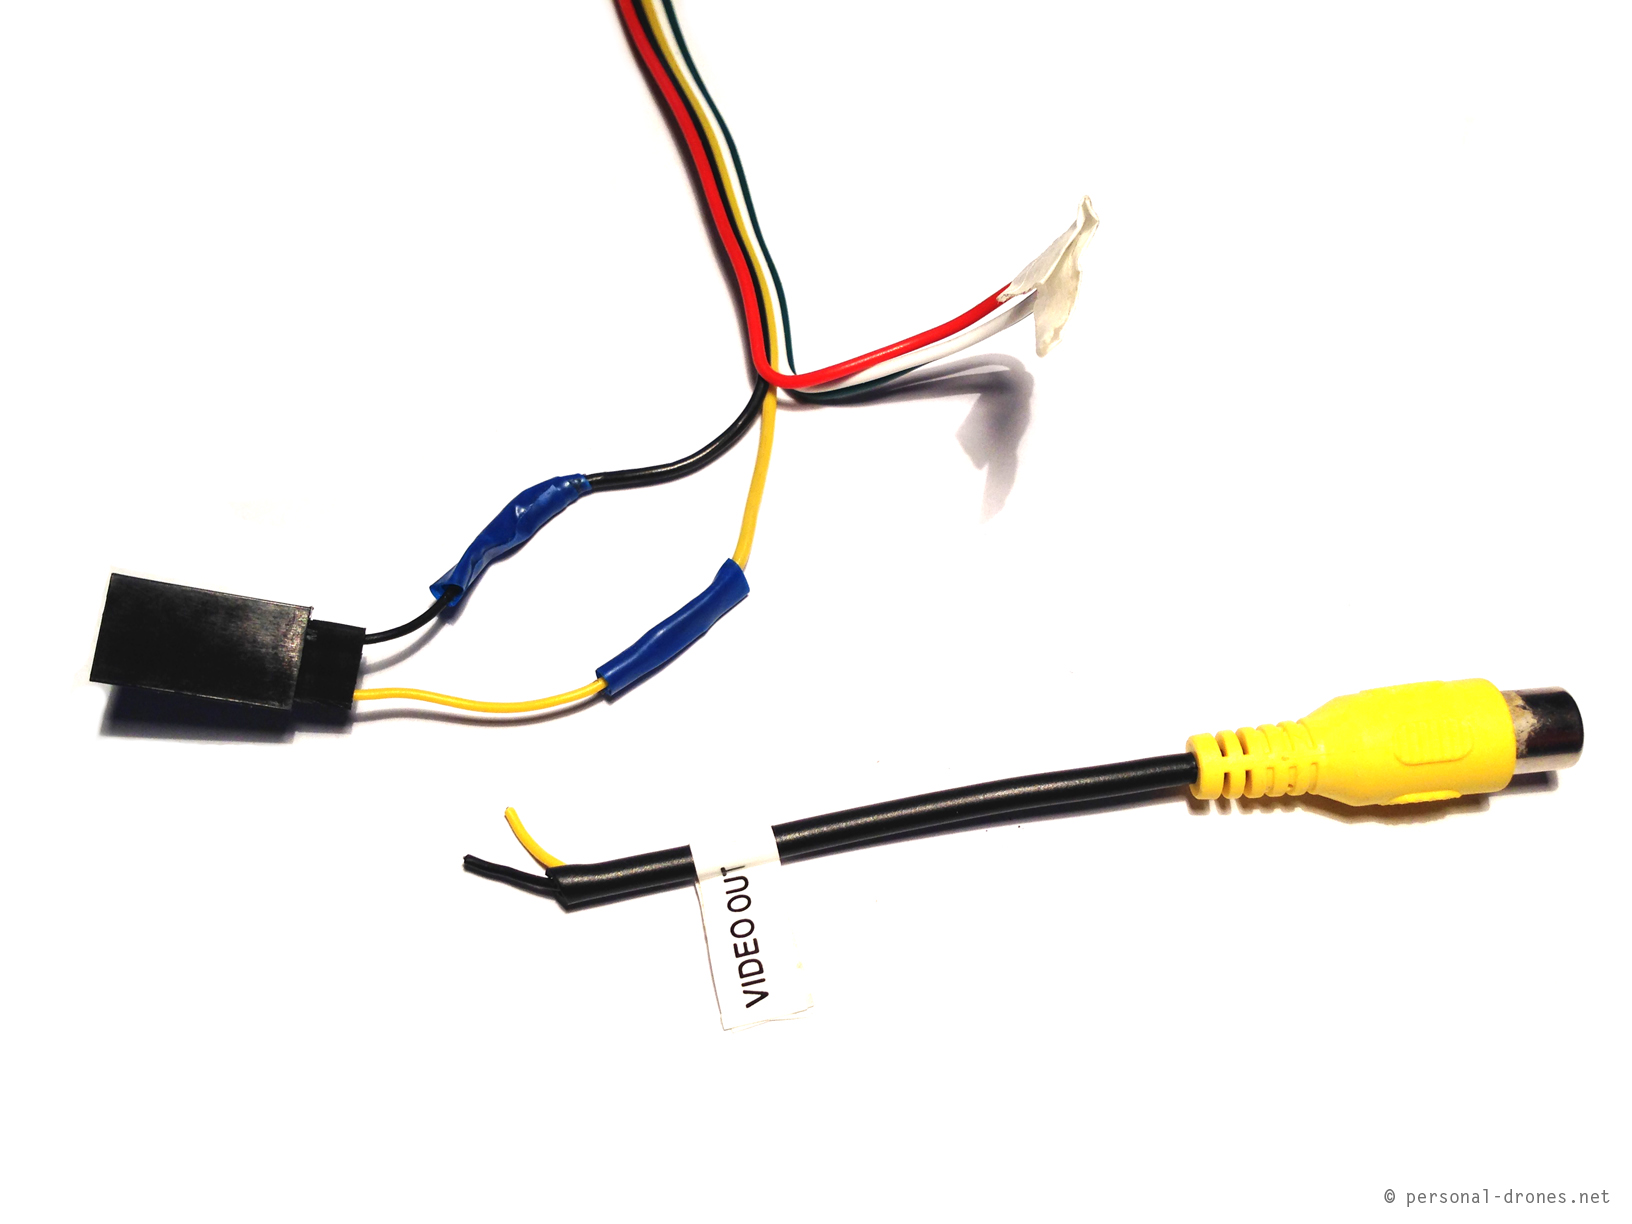
it is easy to buy a special usb cable for video and audio out and power in. It looks like this:
Video out usb cable for mobius camera
What we want to do is connect the video and ground wires of the USB connector to the video and ground wires of the transmitter cable. We could simply cut out the connector for the video and ground wires from the usb cable and solder them directly to the corresponding wires of the video transmitter cable. However I opted for a little more flexible setup that would leave the usb cable intact, for an eventual different use in the future.
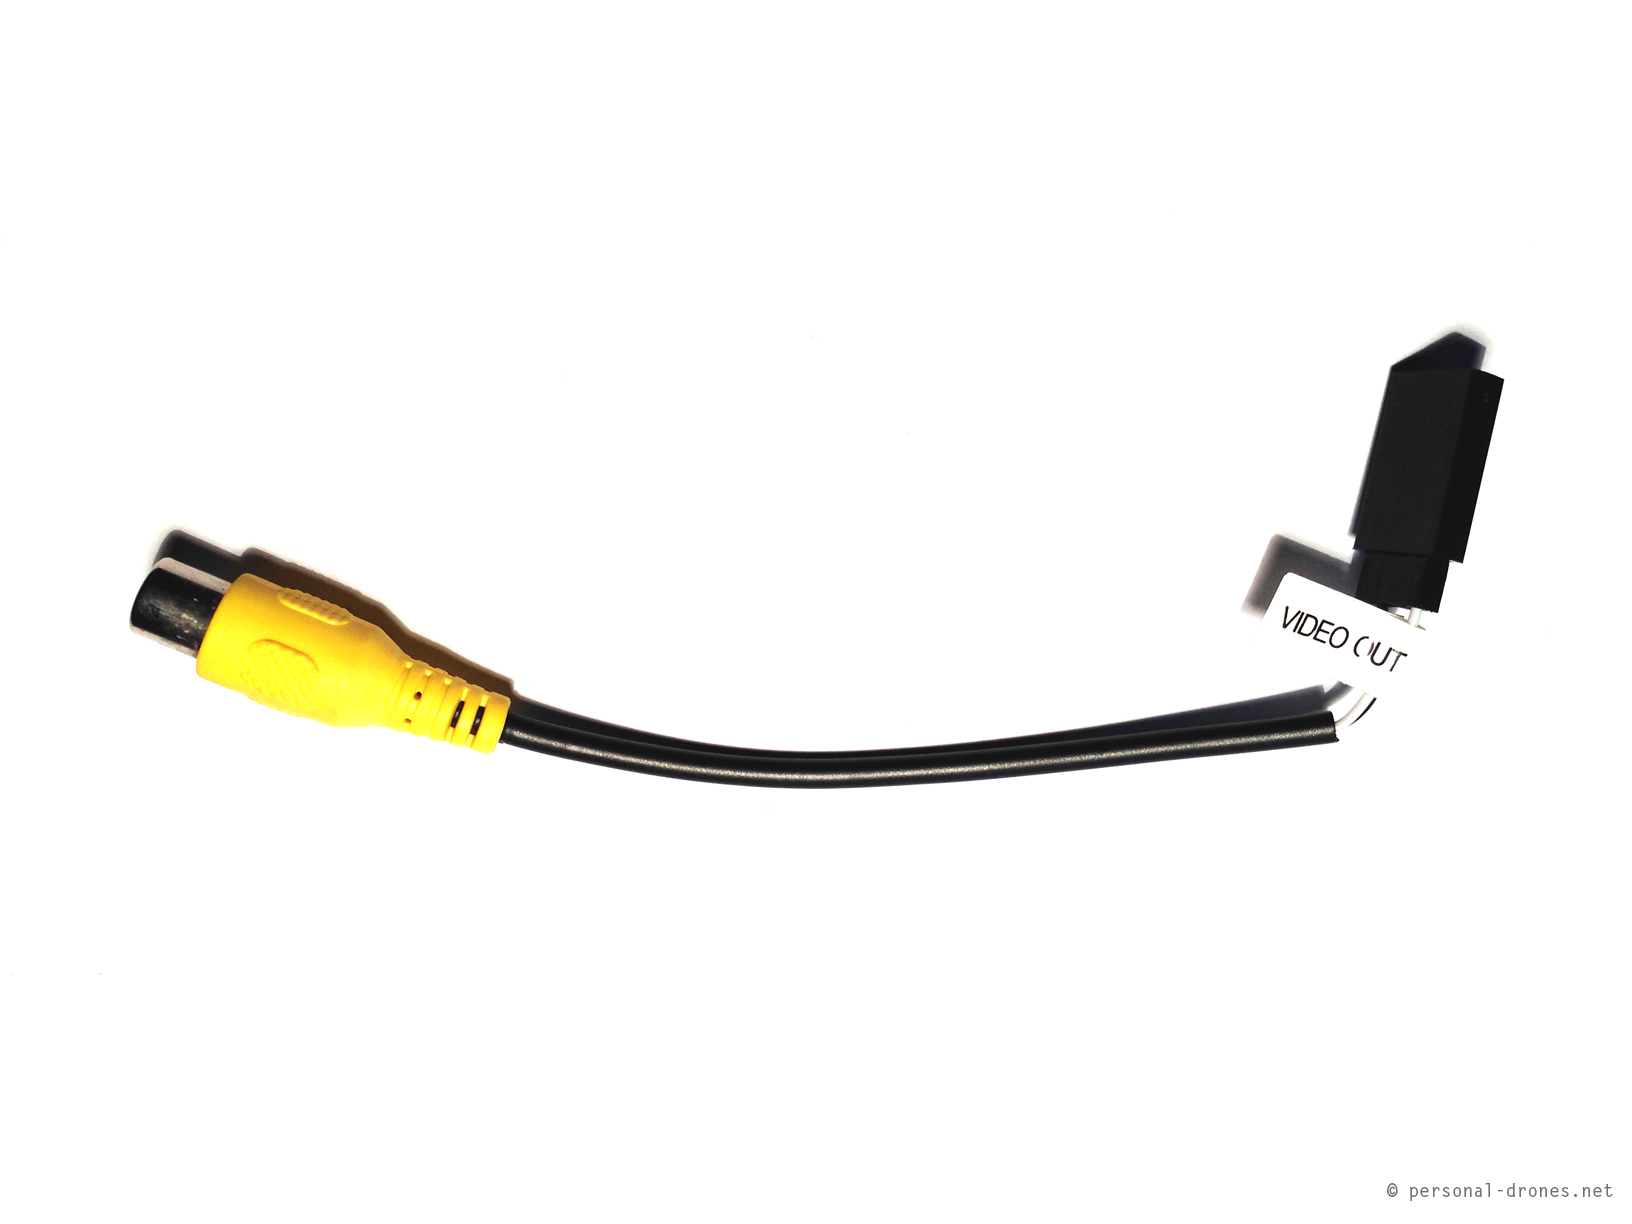
The mobius cables set (optional purchase) not only includes the usb video out cable (photo above) but also an RCA video cable that can be connected to the video connector of the usb cable. It looks like this:
Video cable for mobius camera
In the cable in the photo above the video wire is white. I actually used a very similar cable in which the wire is yellow instead.
What we will do is to cut out the connector from the video cable and solder it to the corresponding cables on the video transmitter cable. Here’s the final result:
Job finished. All you have to do now is connect the camera to the usb cable, then the video connector of the usb cable to the newly attached connector to the video transmitter cable.
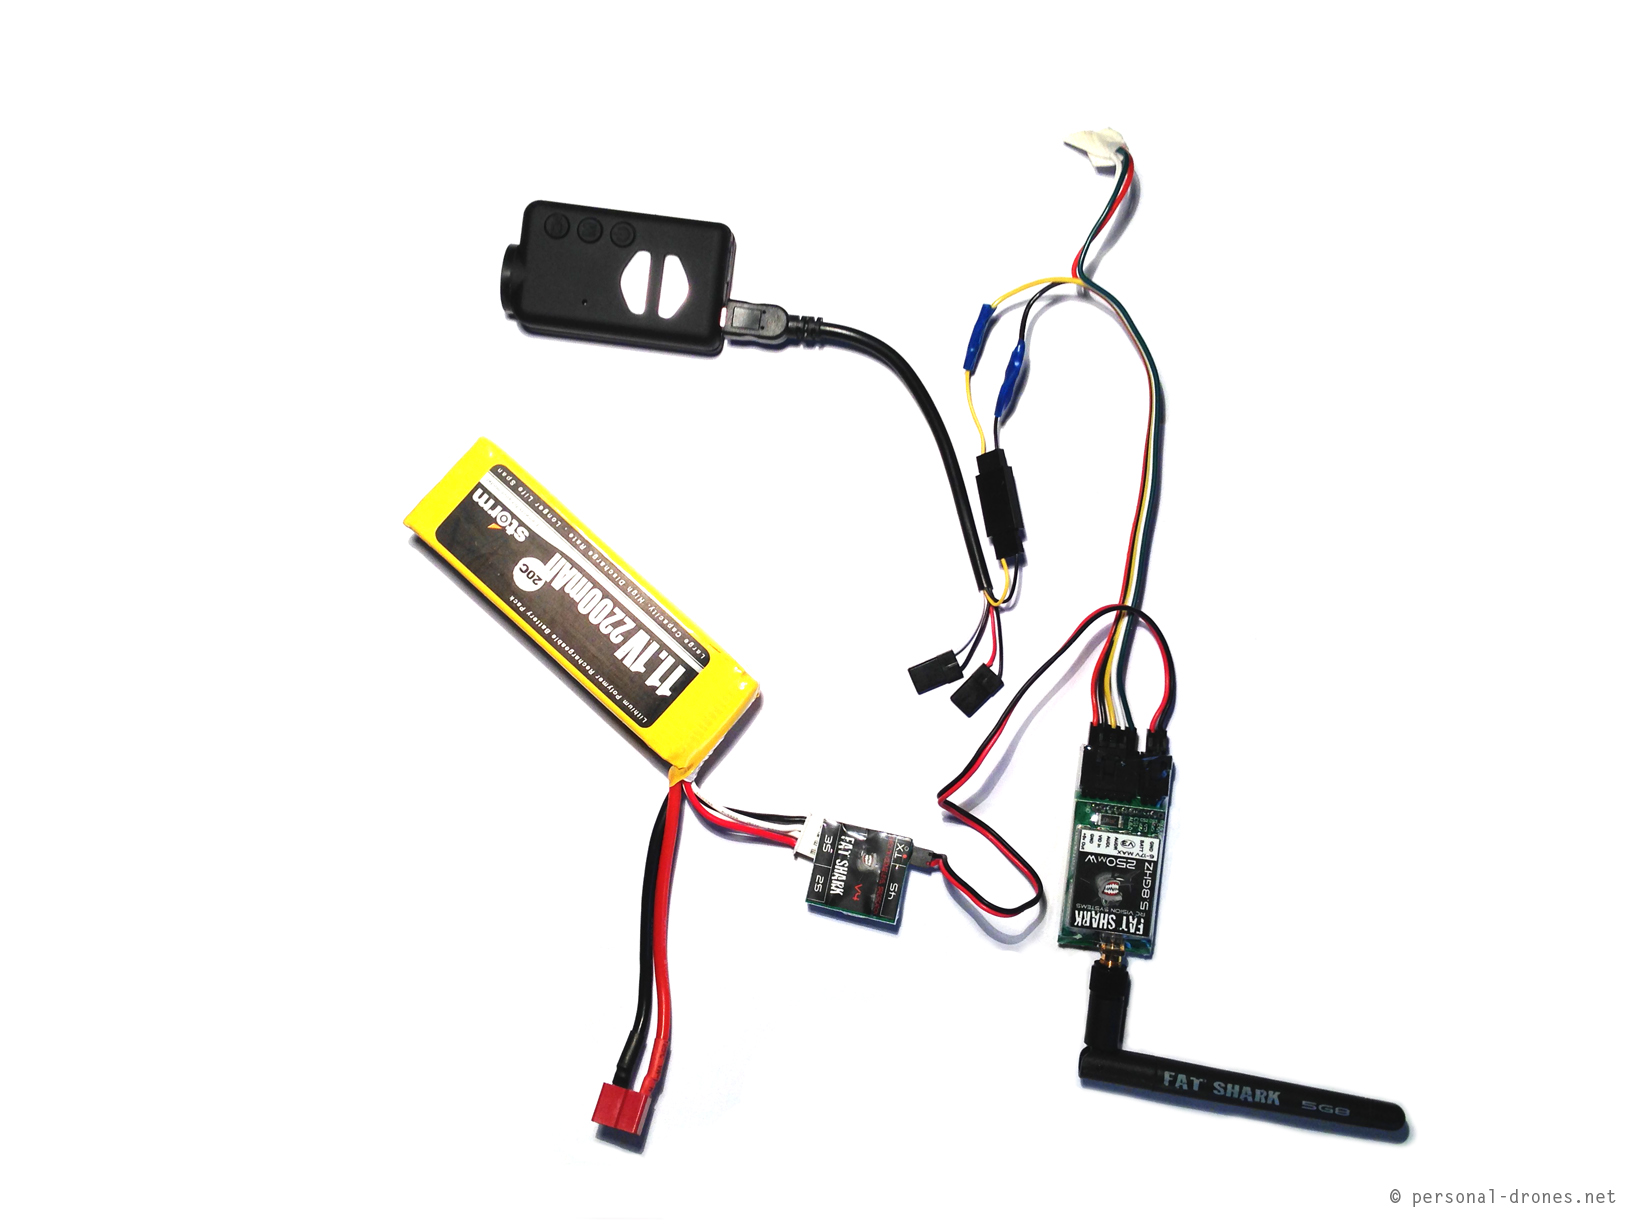
This is the final complete FPV setup:
Mobius camera connected to the FatShark 250mW video transmitter, complete setup
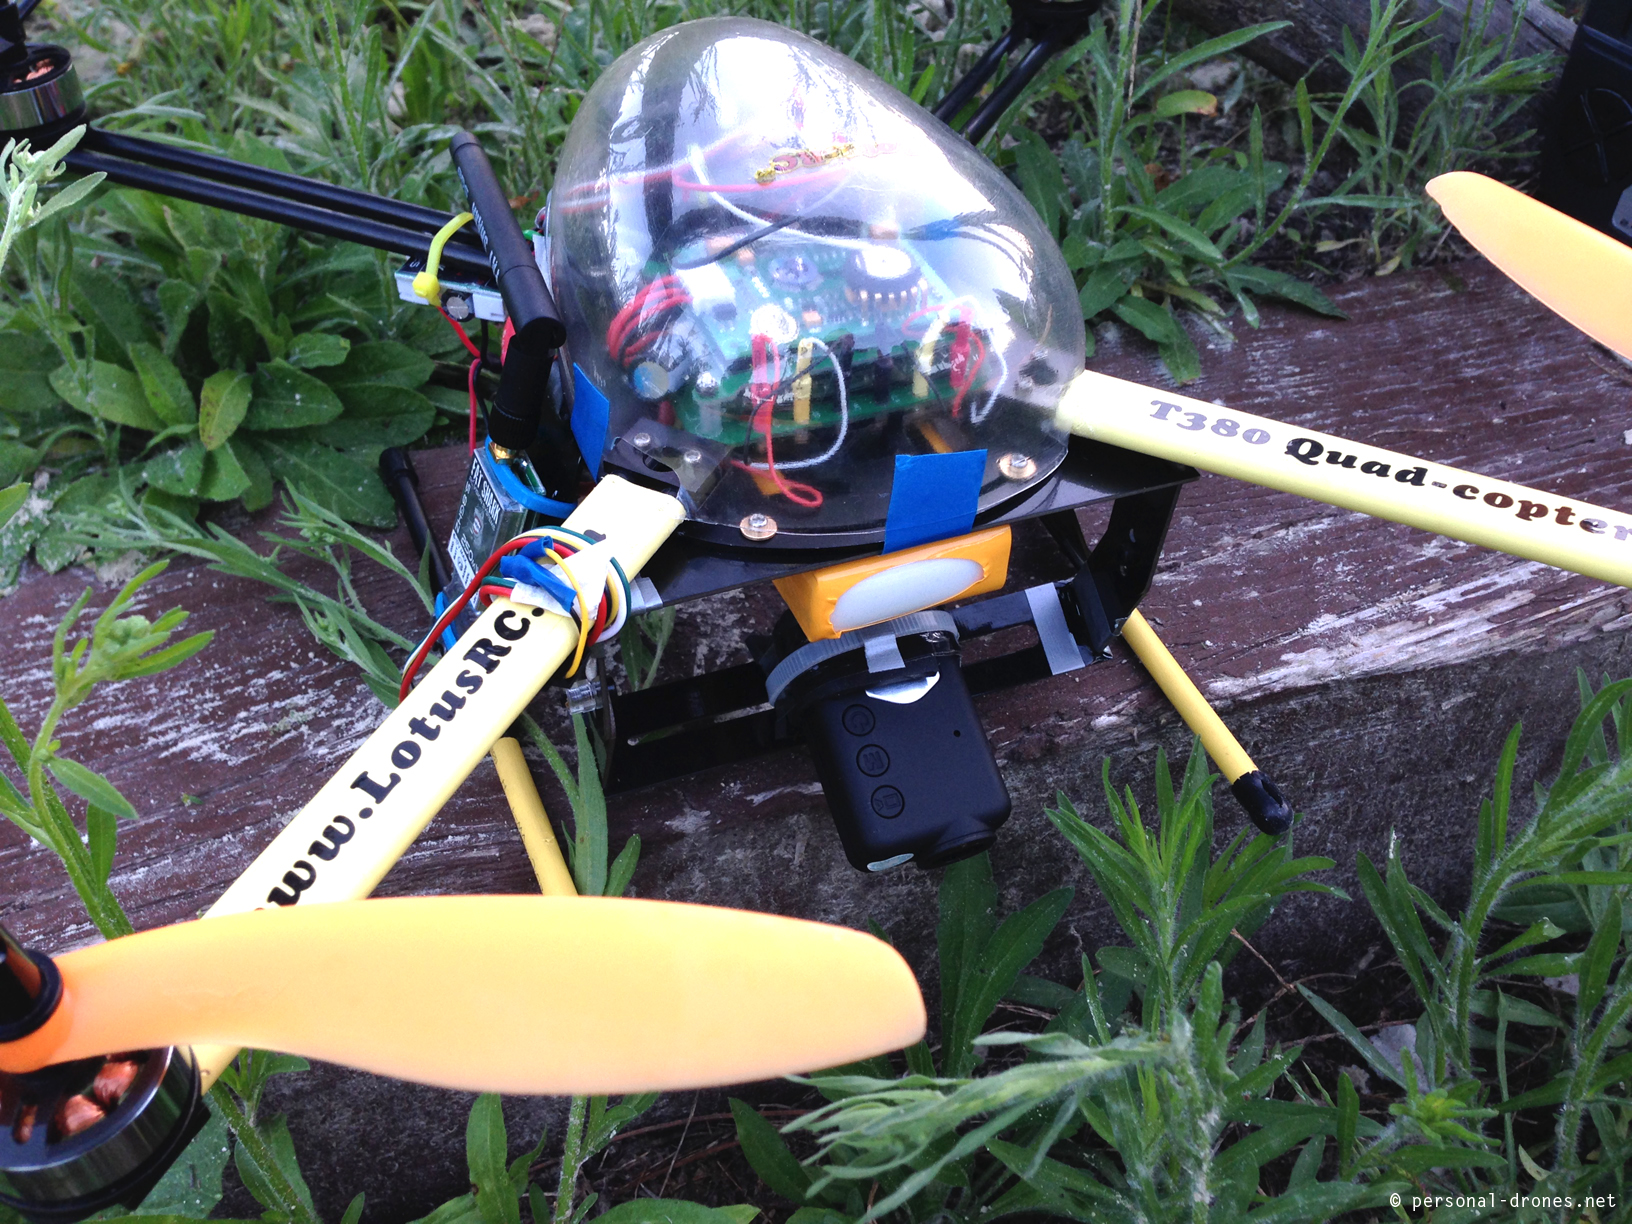
This is a first test mount of this setup on a Lotus RC T380 quadcopter.
Loutus RC T380 equipped for FPV with Fat Shark transmitter 250M and Mobius camera
Questions or comments most welcome.
Edit April 25, 2014
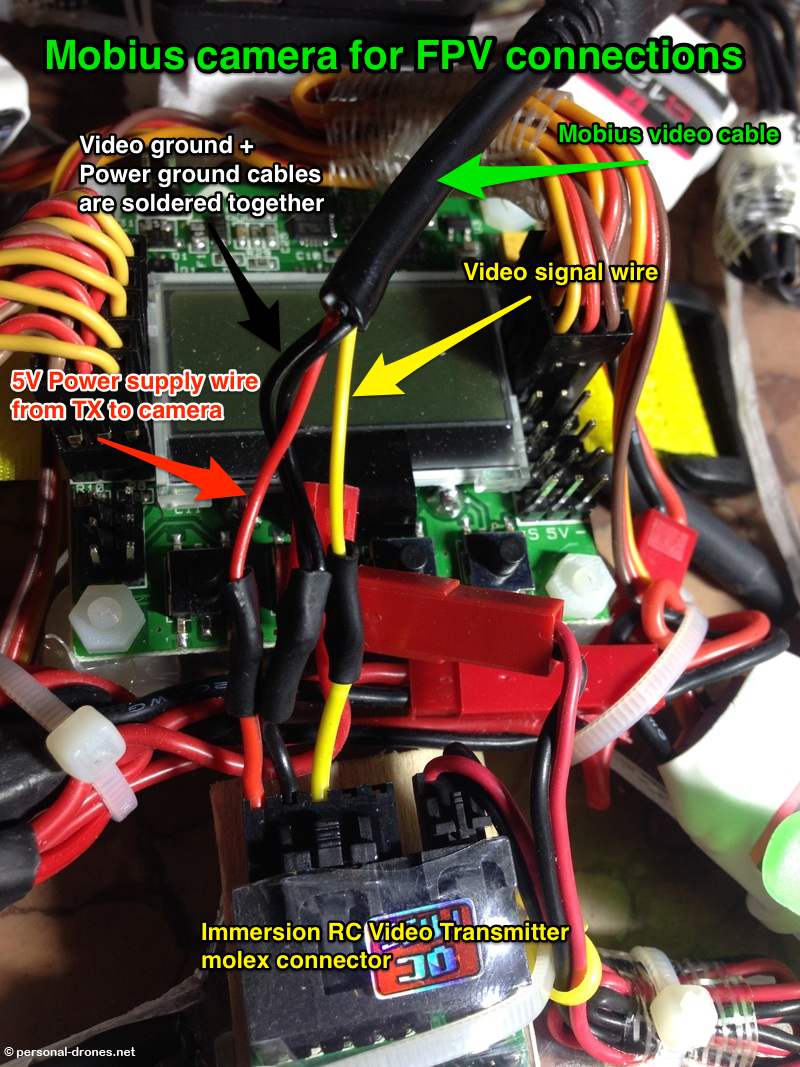
Here’s a picture in which the power wires were connected along the video signal wires. In this case the wires from the mobius video cable were soldered directly to the wires of the molex, with no connectors in between:
Another example of setup for the mobius camera for FPV in which the wires were soldered directly and the power wires were connected in addition to the video wires
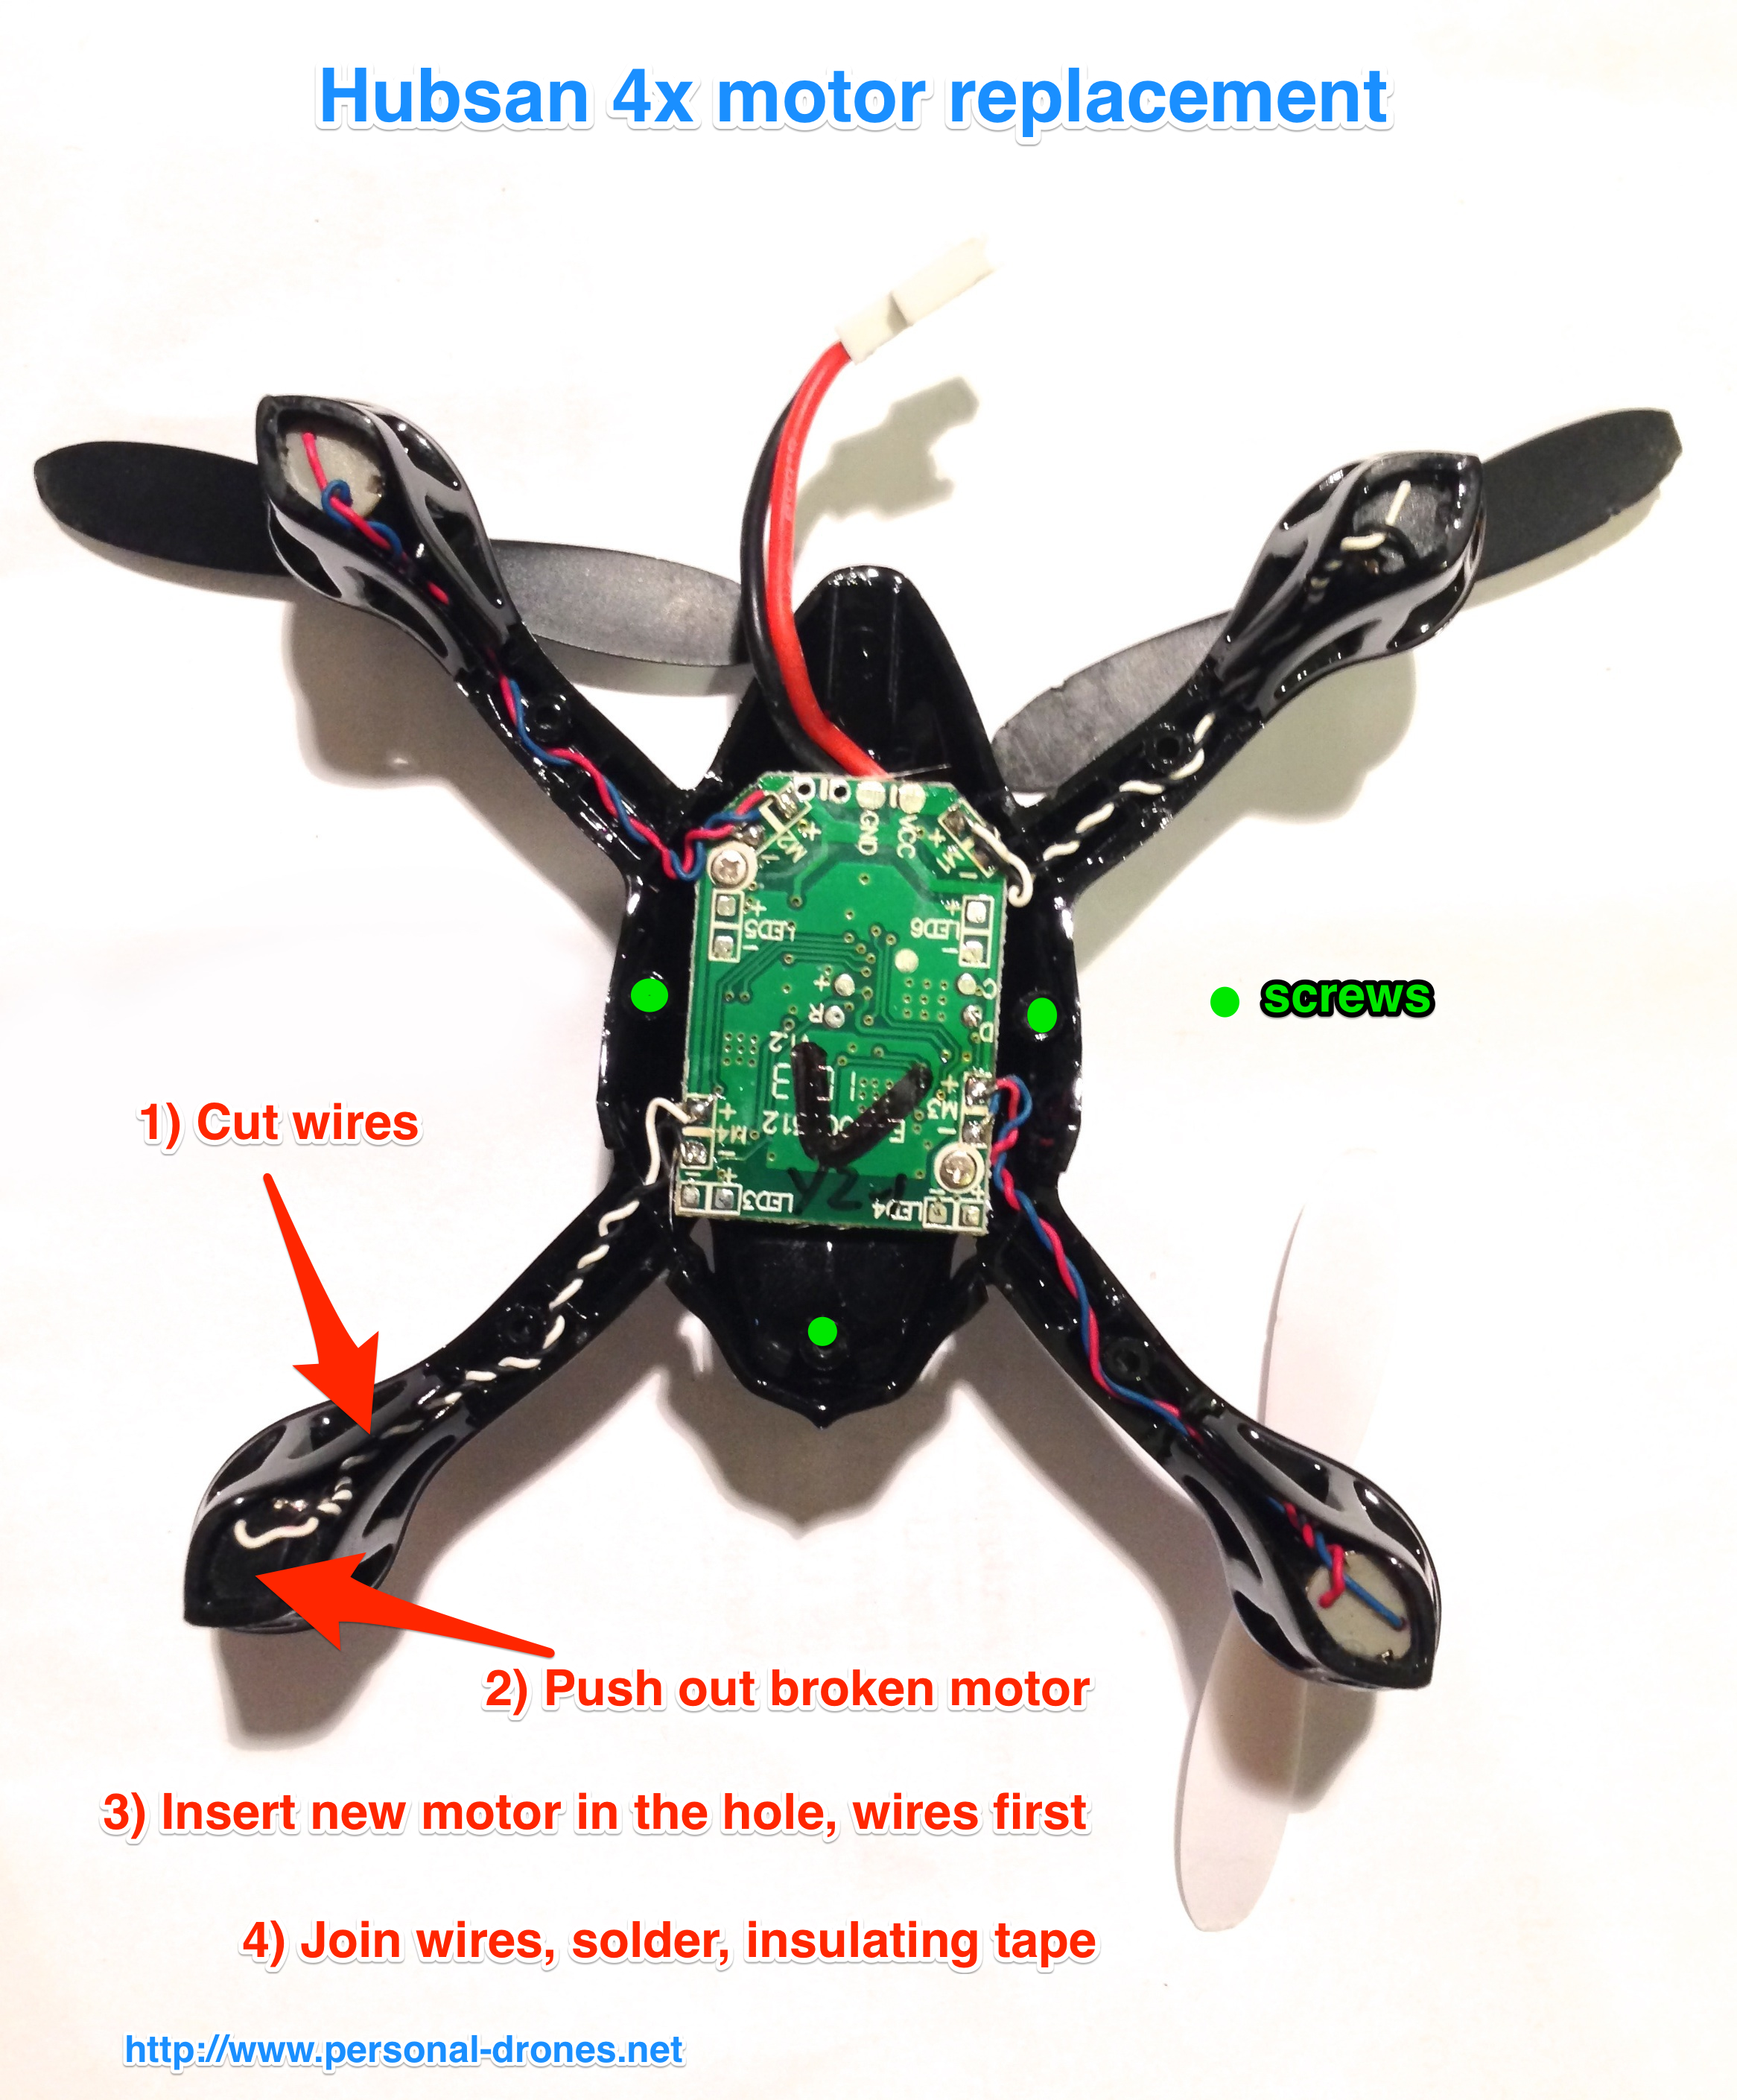
The Hubsan 4x is an extremely fun microquadcopter to fly. Sometimes, maybe after a crash, a motor stops working and replacement is required.
Unfortunately motors wires are soldered directly on the controller board. No connectors. The spare motors that can be bought online indeed come with 2 “naked” wires.
I had to replace a motor on an Hubsan 4x for a fiend today. What I did was to open the Hubsan 4x, it is hold together by 3 tiny screws and 4 little plastic pins located halfway on each of the arms. So once the screws are removed, you still have to play a bit, gently, to take apart the two halves.
Once the quadcopter is open, first step is to cut the wires of the faulty motor, approximately 1cm from the the body of the motor, so as to leave a generous length of the wires soldered to the board.
The motor can be extracted by pushing it from below with a screwdriver or a pen. The new motor can be now inserted, but first the wires of the new motor have to go through the motor hole.
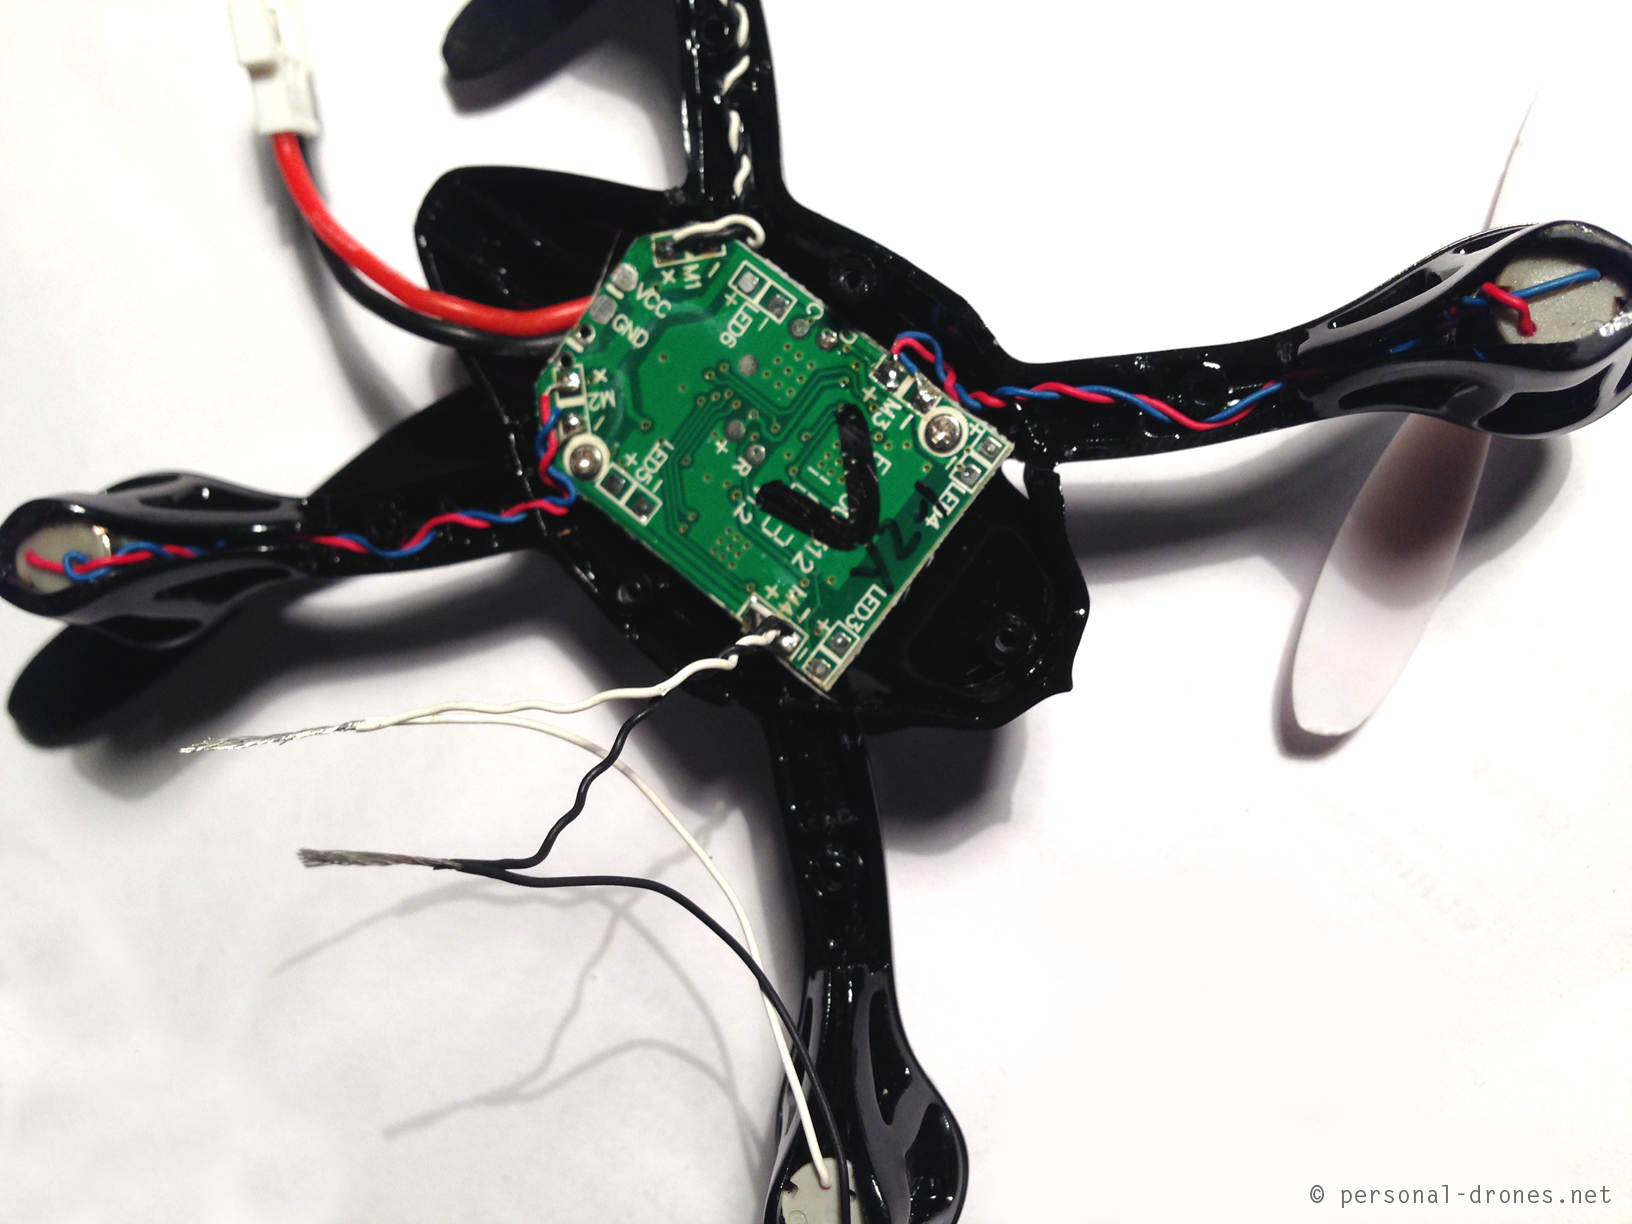
Then, you uncover the final 0,5cm of each of the 4 wires, the two of the original motor, soldered to the board, and the two from the new motor and join them together as in the picture below:
Replacing an Hubsan 4x motor involves some soldering, but not to the controller board!
Then the two junctions can be soldered easily. Some insulating tape on each of the junctions will finish the job. Here’s an excellent video about the basics of soldering, highly recommended:
http://www.youtube.com/watch?v=BxeDkcAa4Fs
####
This post is sponsored by Apps4Rent
Monitor, edit configure files and go mobile like the quadcopters by carrying your virtual PC on the cloud and access it via your mobile device using CloudDesktopOnline.com, Powered by one of the best Daas provider – Apps4Rent.
A quest toward the perfect quadcopter or multirotor for aerial video and personal flying freedom and a permanent survey on the latest quadcopter news and multirotor news
This website uses cookies to improve your experience. We'll assume you're ok with this, but you can opt-out if you wish.AcceptPrivacy and Cookies Policy
Privacy & Cookies Policy
Privacy Overview
This website uses cookies to improve your experience while you navigate through the website. Out of these, the cookies that are categorized as necessary are stored on your browser as they are essential for the working of basic functionalities of the website. We also use third-party cookies that help us analyze and understand how you use this website. These cookies will be stored in your browser only with your consent. You also have the option to opt-out of these cookies. But opting out of some of these cookies may affect your browsing experience.
Necessary cookies are absolutely essential for the website to function properly. This category only includes cookies that ensures basic functionalities and security features of the website. These cookies do not store any personal information.
Any cookies that may not be particularly necessary for the website to function and is used specifically to collect user personal data via analytics, ads, other embedded contents are termed as non-necessary cookies. It is mandatory to procure user consent prior to running these cookies on your website.