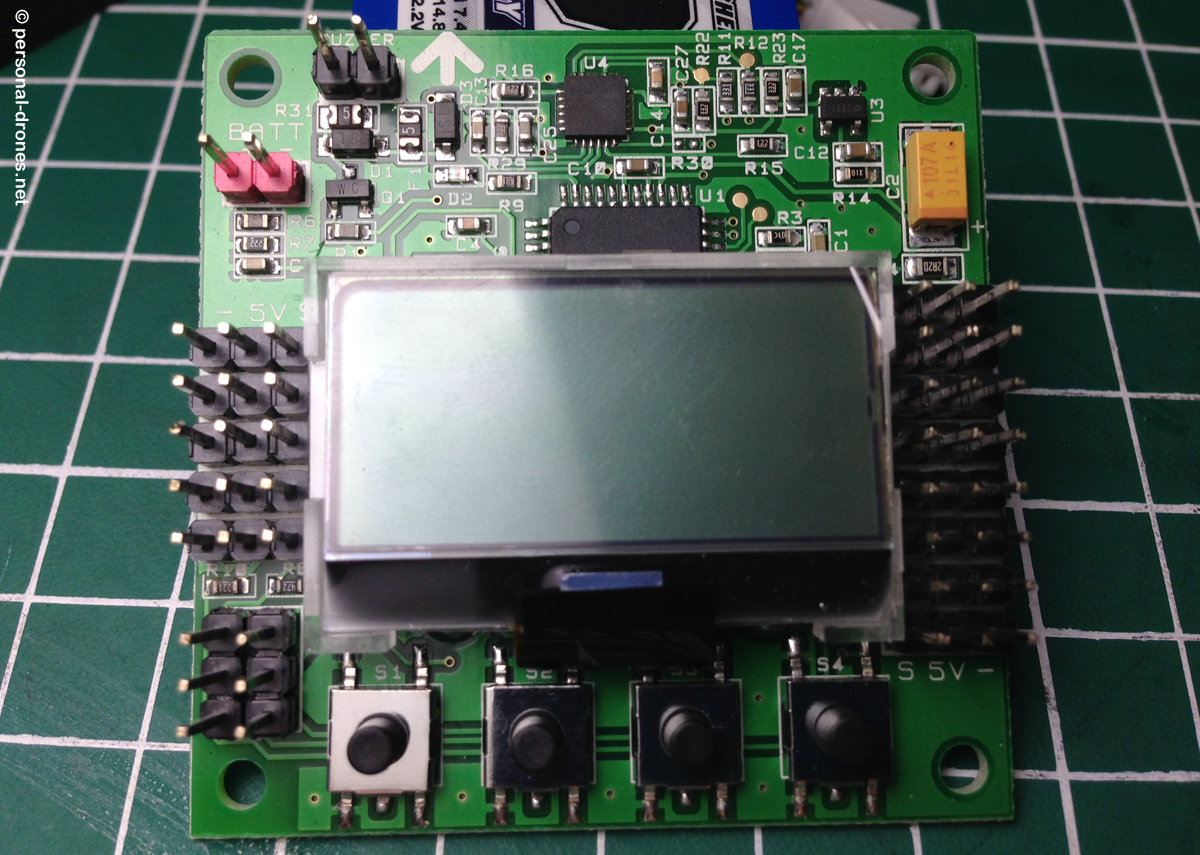
KK2 boards from Hobbyking are a great and inexpensive solution as flight controllers for all sorts of multirotors. In particular in the latest versions, such as the KK2.1.5, they really fly great and stable. One of the main advantages of these boards is that they have an embedded LCD screen that displays configuration settings in an easy to navigate menu, with clearly laid out options that you can navigate and change with the 4 little black buttons at the bottom of the board. Therefore, connection to a PC is not required for configuration and adjustments (for example gains adjustments), making setup and tuning quite handy even directly in the field.
I often get questions about KK2 board firmware upgrades. How do I update the KK2 board software to the latest version? Does this require superior programming and informatics skills? Well, the answer is yes it does. You don’t have to worry though, just send yours over and I will upgrade it for you for a miserable 100$. The very latest, coolest firmware, I promise. Or, keep on reading.
All right, you are a DIY fan, on a budget, and want to do it yourself. Also, you want to be able to always flash the very last firmware in your boards in a matter of seconds, without shipments in between.
I will show you, in this short post, just how to do that.
You do need
– An USBASP cable such as this one. I got mine here for a very low price.

– The KK multicoper flash tool software, get the right version for you, Windows/Linux or Mac OSX, depending on your OS. Versions are continuously updated, so make sure you get the latest version, and also that you check for a new version each time you use it as this will come with the latest firmwares and support the most recent hadware.
Step by step KK2 board firmware update procedure
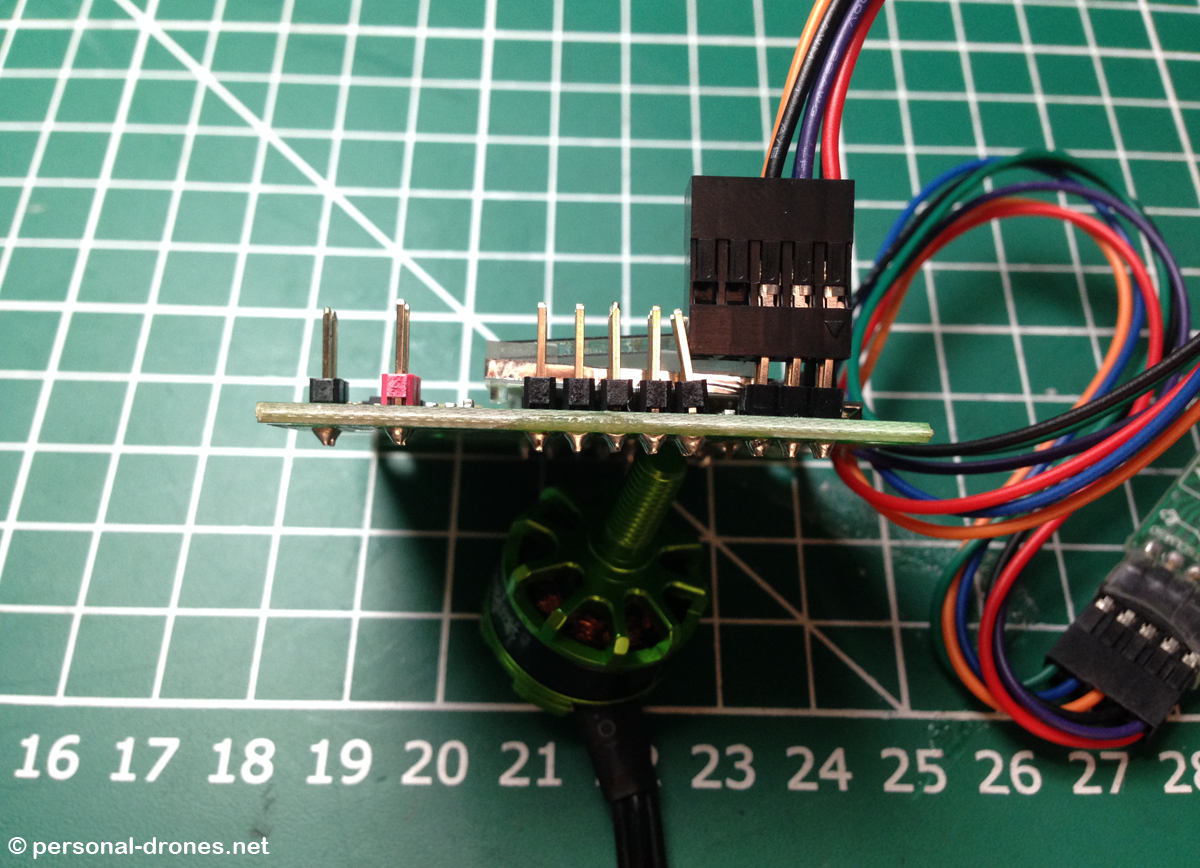
– Connect the USBASP to the KK2 board without any other wires (from ESC or receiver) plugged in. Just the USBASP cable and the “naked” KK2 board. The way the cable has to be plugged on the board is not intuitive, at least not with the particular cable I did get.
The picture below shows the correct way to connect the cable I have. The connector will have to press against, and bend slightly the pins for channel 5 on the KK2 board.
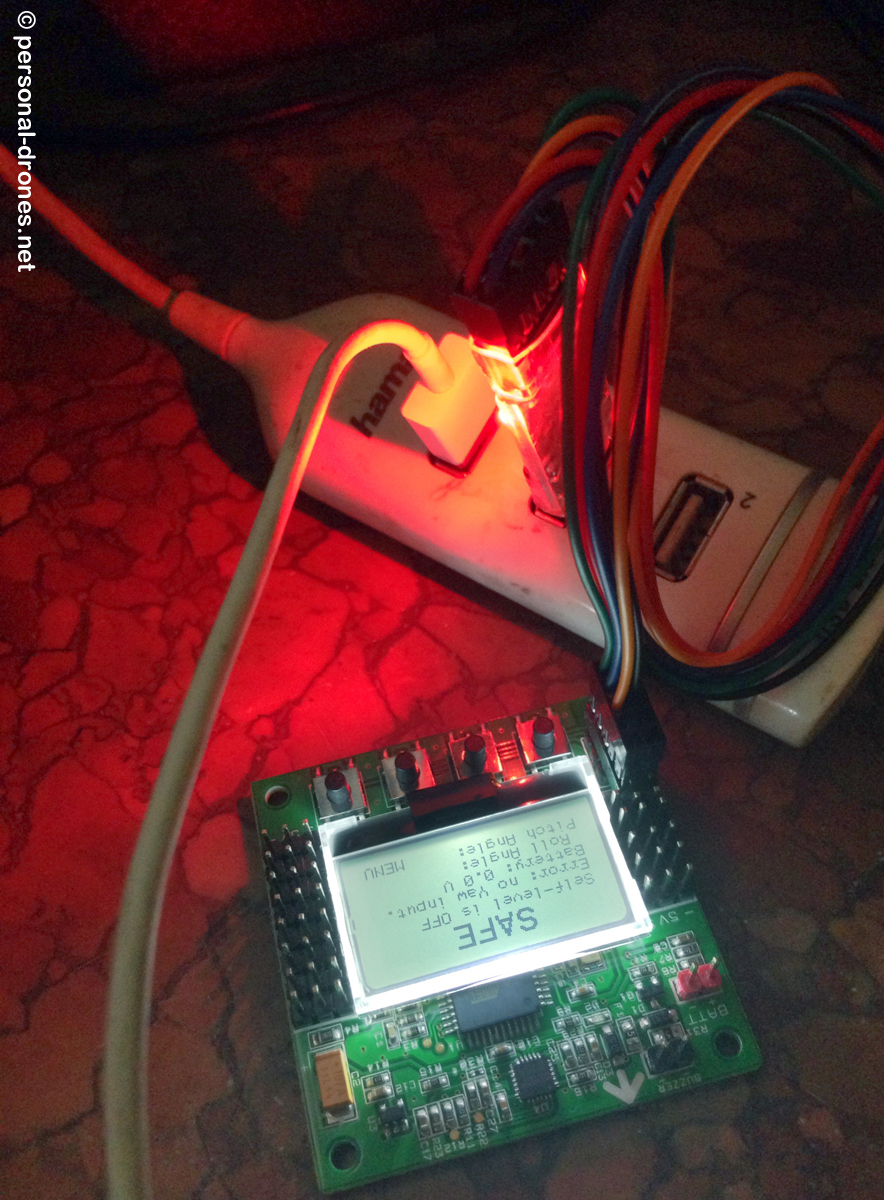
– Connect the USB connector of the USBASP cable to a USB port on the PC (I do this on a Mac). The board will boot. If it does not boot and does not seem to be powered up, you probably plugged the USBASP cable in the wrong direction. Invert and retry.
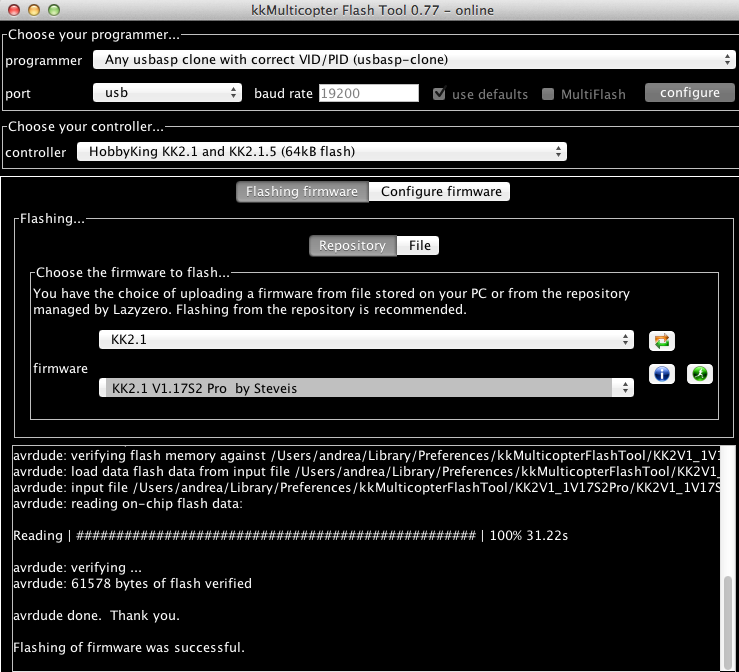
– Launch the software and select the options as in the picture below for a KK2.1 or KK2.1.5 board. At the time of this writing, the last firmware version is 1.17S, available in the Lite or Pro version. The Lite version has all I personally need for configuration. The pro releases contain more advanced options for configuration and tuning.
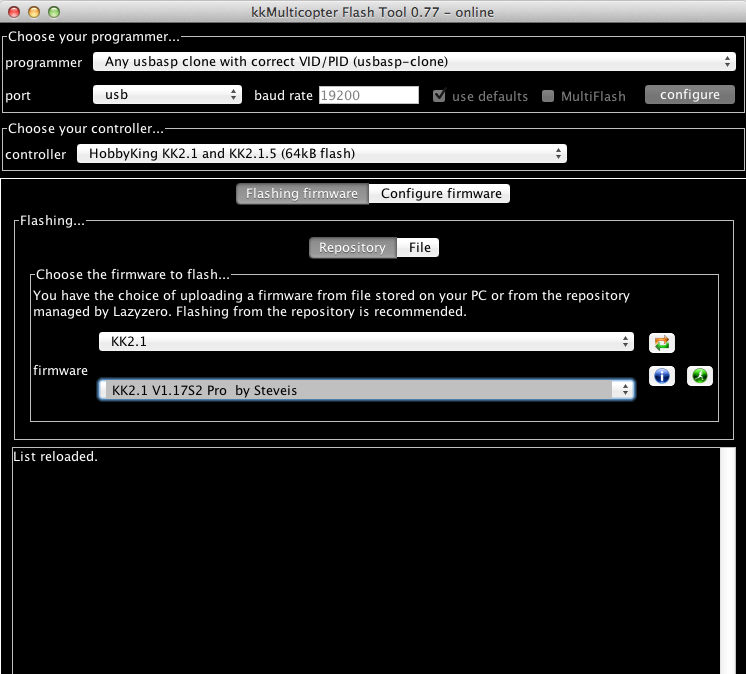
– Once you have selected the firmware you want, press the green icon with the little white man running, to flash the board. You will get a feedback about ongoing operations in the lower part of the software window. Flashing will take about 30 seconds. If writing to the board was successful, the software will tell you so:
That’s it! You can now unplug the board and rewire it into your model. Of course, before flying you will need to go through the basic configuration steps. We’ll go through them in another article to come soon.
For feedback or if you have questions, please feel free to comment below.
Stay tuned on the Personal Drones blog for the latest multirotor and quadcopter news!
CAN KK2 BE USED WITH HUNTER V TAIL 500
CAN THE KK2 BE USED WITH HUNTER V TAIL 500 ?
I think it should work. It’s still a quadcopter.
Hallo Personal Drones Team
I am locking for a new firmware ( board KK 2.15 )
KK 2.1++ all in one RC 911.
Could you help me to find it where to download?
Thank you so much
Best regards
Hans-Juergen
Germany
Hello, you can find the latest firmware here: http://lazyzero.de/en/modellbau/kkmulticopterflashtool
. Download the latest flash tool software. Through this, you will be able to flash the latest firmware. Hope this helps!
CAN I UPGRADE A 2.0 TO 1.6????
Dennis I am pretty sure you can. You will need a USBASP cable and the flashing software from the link above
Has anyone hooked a gps sensor and got RTH to work on the KK?
Muito bom! obrigado!
ajudou muito!
while updating kk2.1 firmware , its showing the error…..
Reading | ################################################## | 100% 201.16s
avrdude.exe: verifying …
avrdude.exe: verification error, first mismatch at byte 0x0000
0xff != 0x0c
avrdude.exe: verification error; content mismatch
avrdude.exe done. Thank you.
Error during writing flash.
It is happening to me now and i dont know why. Please tell me you figured it out.
Excellent tutorial, man! Worked for me the first time. Much appreciated.
One suggestion: it’s not necessary to bend those little receiver pins to get the cable plugged in. Gently snip off the two endmost unused leads on the cable like this, and it’s smooth sailing.
Even not nessesary to snip off the plug. Just take out the pins and place them on the other side (from right to the left; like this upper 000123, lower 000456 will become upper 123000, lower 456000 – hope this is clear enough).
My connection is fine but i am getting below error!
avrdude.exe:Warning: cannot set sck period please check for usbasp firmware update..
avrdude.exe:error:programm enable:target doesn’t answer 1
avrdude.exe:initialization failed, rc=1
double check connections and try again or use -f to override
I have the same problem as well as the buttons wont work now.
Jitendra, that error means that there is a mismatch in your usbasp driver. Use the the Zadig USB driver installer to get the correct driver. See http://zadig.akeo.ie/ for the download.
Use libusp-win32 as your driver.
i get the same msg but Im on a Mac
I can’t get the software to download on my pc,even with the new java!!
Thanks for the manual.
Can I flash any board (either 2.0 of 2.1) with any firmware (latest I’ve found isV1.6).
I think there is a difference in sensors / processor between the boards. Can both boards handle the same firmware?
Is V1.6 the latest firmware for the 2.1 board?
Just a thought about the USBASP cable. I moved my pins over one hole so I do not bend the pins on the board. Both ends have no pins in them just the six in the center. It fits perfect.
Link to picture.
https://drive.google.com/open?id=0B0a6ne32xrNPZ19LZFVZYnJDS3lGSnl4SkFSbjFvQjFPN2xN