Here’s another pilot that brings a bad reputation to quadcopters and personal drones. This guy thought he could land his DJI Phantom from his little balcony and very fly over Manhattan NYC at high altitude, what a great idea. Amazing and unique footage, however it’s just for chance that nobody got seriously injured. The FAA says it does not allow the flight of UAV over densely populated areas.
Interesting to note that the phantom looks very resistant to the impact on buildings, seems to hit several times and still fly afterwords. Also, it looks like the pilot is somehow controlling the flight, however he was not wearing goggles, so was this a line of sight flight?
The story:
Here’s the full video, however it looks like the crash moment is missing.
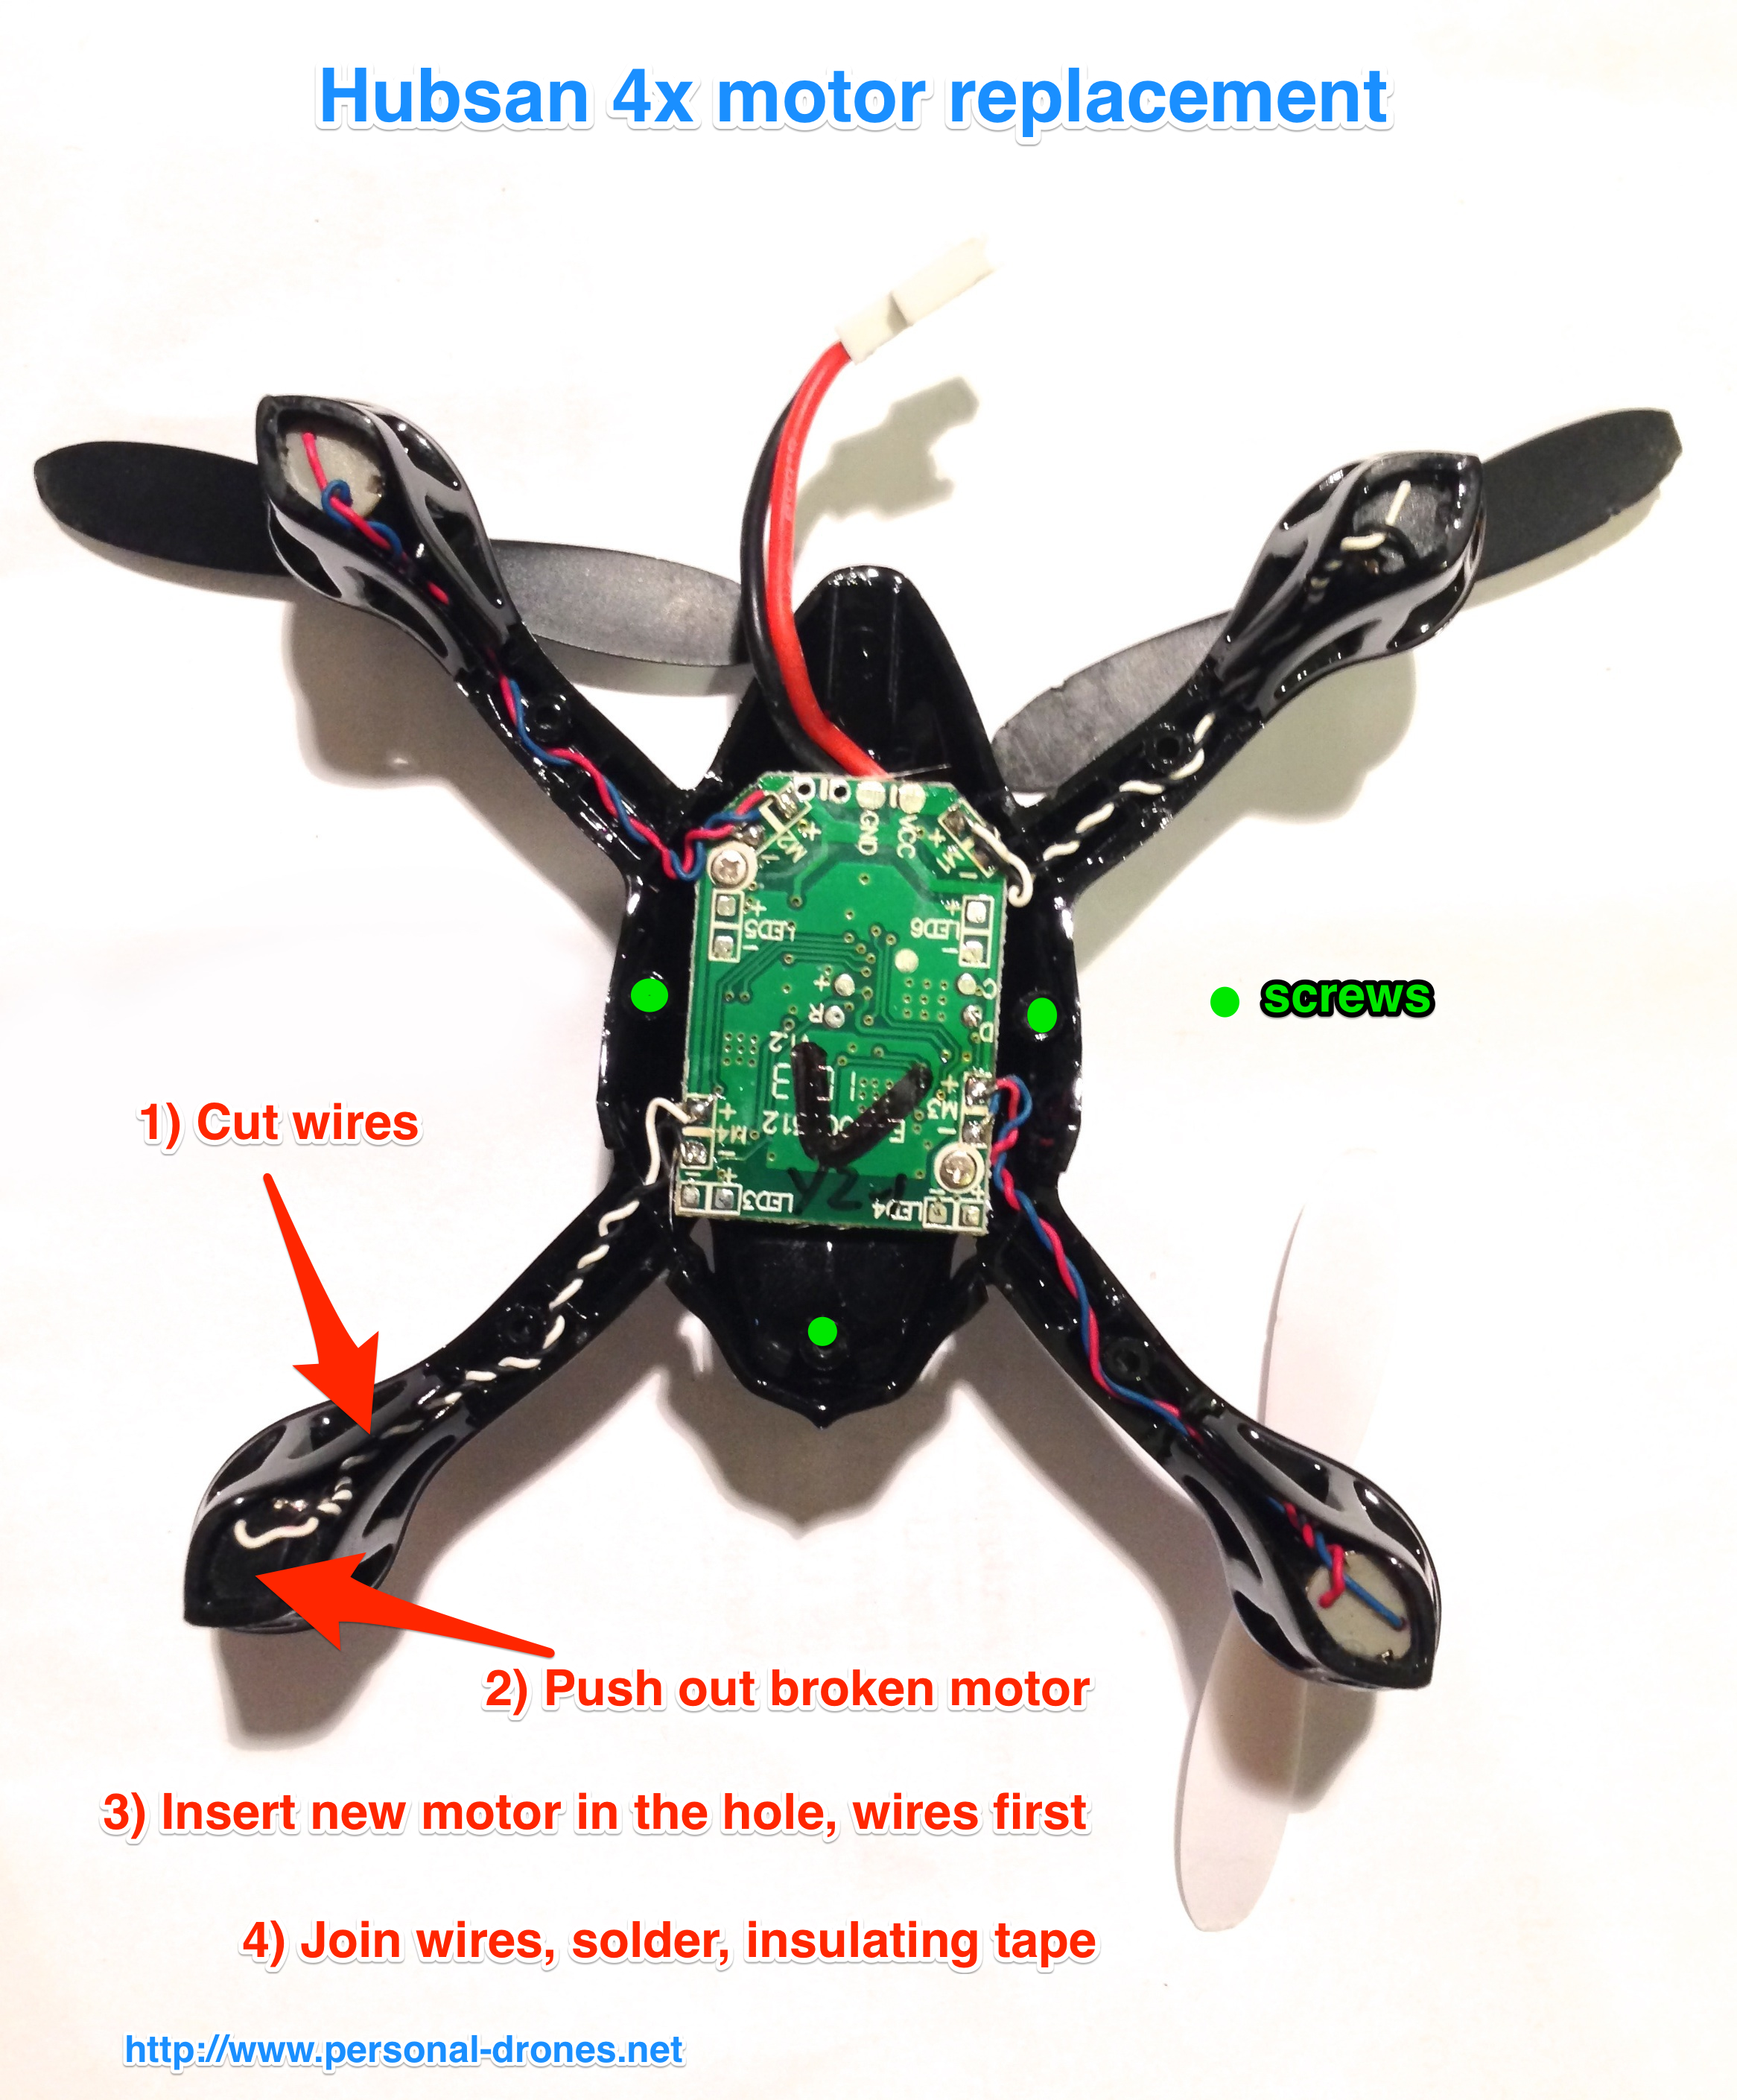
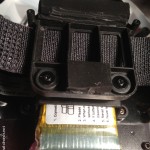
The Hubsan 4x is an extremely fun microquadcopter to fly. Sometimes, maybe after a crash, a motor stops working and replacement is required.
Unfortunately motors wires are soldered directly on the controller board. No connectors. The spare motors that can be bought online indeed come with 2 “naked” wires.
I had to replace a motor on an Hubsan 4x for a fiend today. What I did was to open the Hubsan 4x, it is hold together by 3 tiny screws and 4 little plastic pins located halfway on each of the arms. So once the screws are removed, you still have to play a bit, gently, to take apart the two halves.
Once the quadcopter is open, first step is to cut the wires of the faulty motor, approximately 1cm from the the body of the motor, so as to leave a generous length of the wires soldered to the board.
The motor can be extracted by pushing it from below with a screwdriver or a pen. The new motor can be now inserted, but first the wires of the new motor have to go through the motor hole.
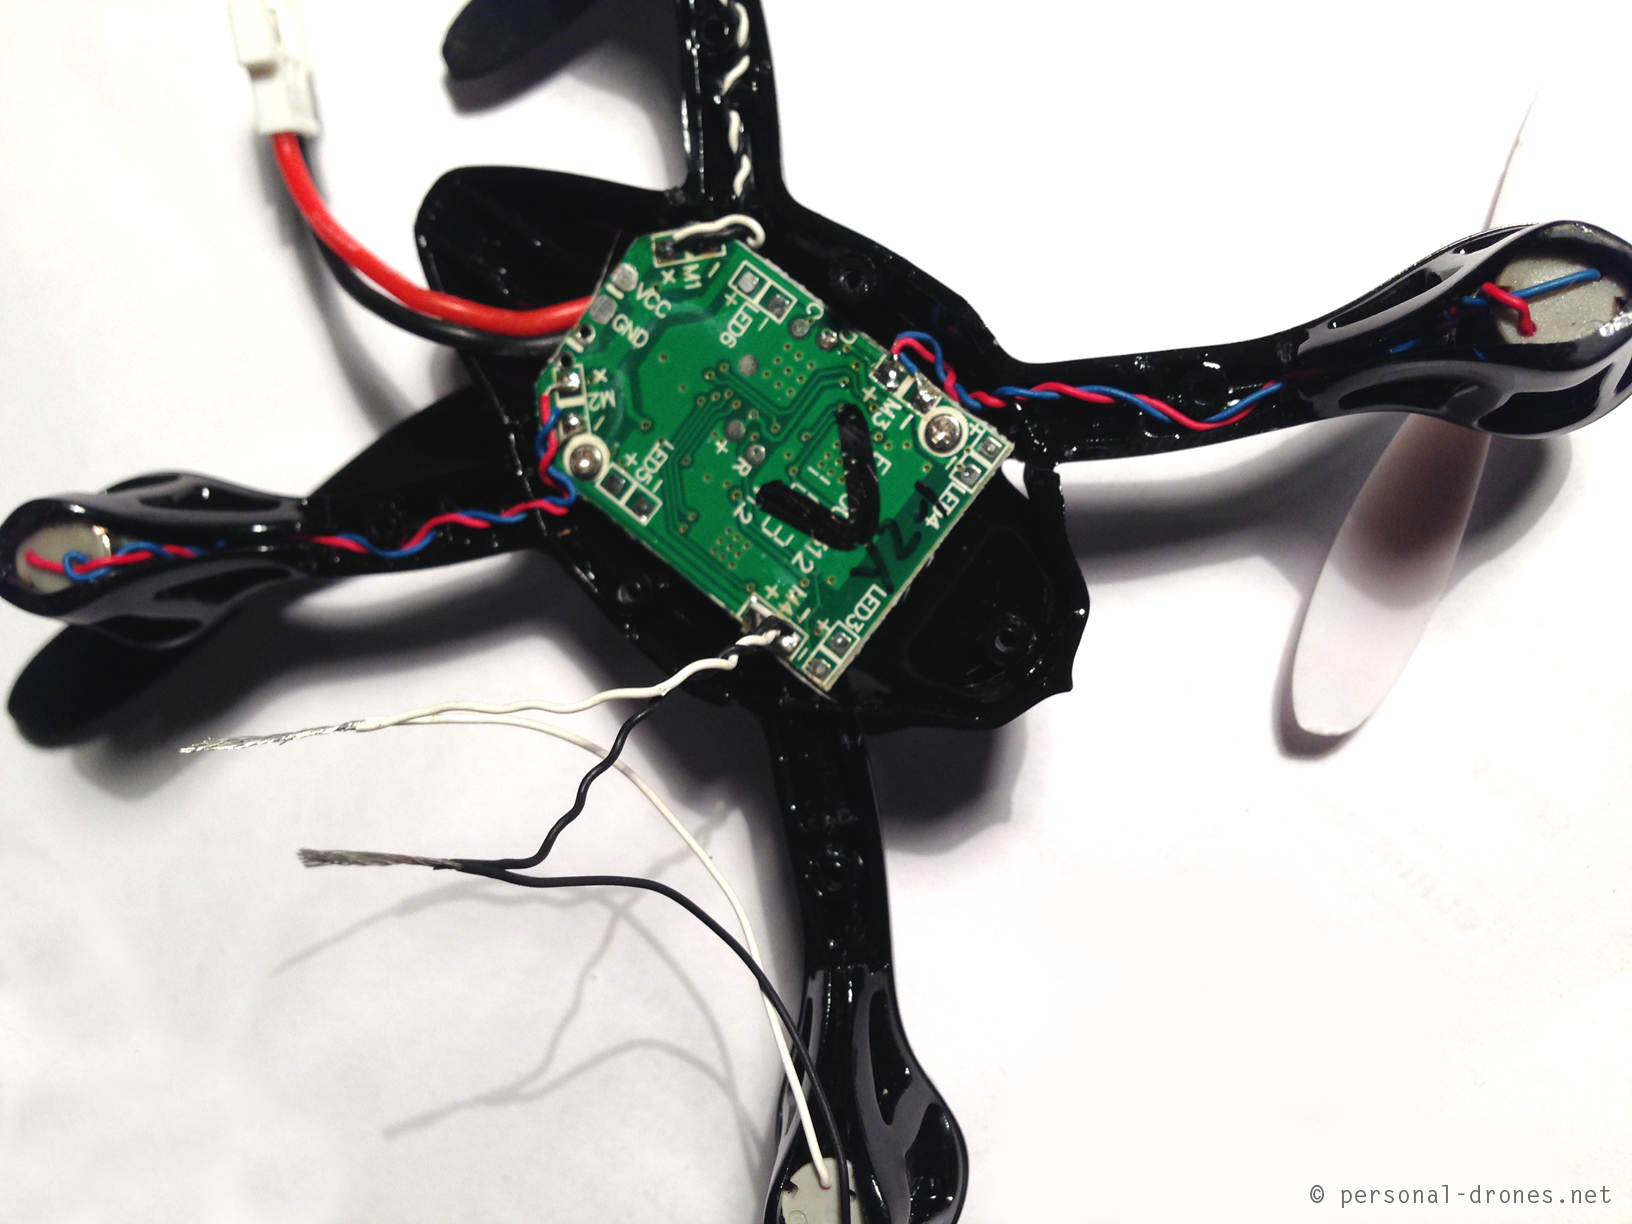
Then, you uncover the final 0,5cm of each of the 4 wires, the two of the original motor, soldered to the board, and the two from the new motor and join them together as in the picture below:
Replacing an Hubsan 4x motor involves some soldering, but not to the controller board!
Then the two junctions can be soldered easily. Some insulating tape on each of the junctions will finish the job. Here’s an excellent video about the basics of soldering, highly recommended:
http://www.youtube.com/watch?v=BxeDkcAa4Fs
####
This post is sponsored by Apps4Rent
Monitor, edit configure files and go mobile like the quadcopters by carrying your virtual PC on the cloud and access it via your mobile device using CloudDesktopOnline.com, Powered by one of the best Daas provider – Apps4Rent.
Finally finished the setup of the DJI Flamewheel F450 and went out for a first flight test very early in the morning at the park, with the idea to avoid kids.
Love kids but I feel that at this stage (of my flying skills), it could be dangerous for them, as they tend to come close to see the strange flying thing and are totally unaware of the possible dangers, those rotating propellers are like blades.
I discovered that dogs, that are indeed at the park early in the morning, are as curious as kids:
Just like kids, dogs are VERY curious about drones
Anyway it was my very first flight with a NAZA quadcopter, and it took a few tries to take off because of my poor acquaintance with the settings and led light codes. The quadcopter needs GPS calibration, entirely forgot about that. Then, in atti and atti GPS modes, the throttle becomes effective only after the midpoint, which was kind of misleading to me. At the end, all was good. Took a couple of short videos while the quad was locked in GPS mode, holds the position beautifully. Video is very short as I did not really trust the quad in this very first flight. Here you go:
So far we have been experimenting a bit with the most small devices, Hubsan H107C and Walkera Ladybird or Spacewalker with a normal 808 camera onboard. The video we could capture with those, is basically poor. This is because the quadricopters are very small, lightweight and wind sensitive. This makes the video inherently shaky. The relatively low quality of the cameras does not really help to get a great result.
Those are still valid devices maybe in situations in which a bigger drone would attract unwanted attention, and the event to be captured is still worth the poor quality, maybe because it is interesting for other reasons anyway, as it happens for so many videos we see on youtube.
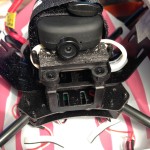
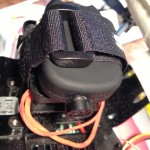
Anyway, as a next step I took of the DEVO-4 FPV camera off my brushed Hoten-X quadcopter and I built a little sorbothane basis to attach a 808 #16 camera with a velcro strap. Since the lens of the camera was nearly to the floor after mount, some foam was added to skids to gain some free space under the camera. See the picture gallery.
A step to attach a sorbothane base for 808 camera to the Walkera Hoten-X
Sorbothane base for 808 camera on Walkera Hoten-X, finished. Note the velcro ready to secure the camera
808 #16 camera strapped to Walkera Hoten-x
Walkera Hoten-X with onboard 808 #16 camera
808#16 camera on Walkera Hoten-X Brushed
The resulting video is a net improvement over the previously captured footage. Stability is much better, no traces of Jello effect, possibly thanks to the sorbothane mount and the mount for the DEVO-4 with little rubber foots that I left in place.
I recently received a package from UK with a BNF IFly4S. I connected it’s flight controller to a Walkera Devo RX701 2.4Ghz 7ch Receiver (Walkera-Parts-RX701) in order to be able to control it with my DEVO7 radio, best radio I have so far. Connection was not difficult although it took a while as it was my first connection between a receiver and a flight controller, ever.
The flight controller was then connected to a PC with Ifly Tools installed and calibration of the radio was done. Had a few problems on this one, but eventually succeeded also thanks to a couple of youtube videos that you will find in the specific models section.
Then comes the first flight test. Will it work? Please find out in the video below.
What can you expect on taking footage with the Hubsan H107C mini quadcopter with onboard camera? This video contains a couple of minutes of footage in a light breeze condition. This is just a first test fly, however there is some potential here, maybe when less windy.
It is amazing that such a small system that stays in the palm of on hand can produce such interesting results. With the radio controller, everything can be carried in a small bag ready to use everywhere. Lots of fun. Video quality very poor.
I choose it as a first quad to learn to fly manually, very happy so far.
For the photos, the GoPro was mounted to the extreme front “nose” of the quad upper platform, balanced by the battery on the other side (back) of the upper platform. You can see the placement of the gopro adaptor in the video if you look carefully. This is different from the placements suggested by Helipal, however I found that this works nicely and allows to minimize the amount of propellers and motors included in the photos/videos. The balancing with the battery should be done carefully though.
I am new to drones and as a photographer I find it invaluable to be be able to freely select my shooting point. This is a revolution in a way. Stay tuned for more vids
– Credits –
Camerawoman: Laura
Camera: iPhone5
On board photos: GoPro Hero3 Black
Editing: iMovie
Quad addict/pilot: Personal Drones (PD)
Soundtrack: Revolution Void – “Biomythos”
Thanks for watching!
A quest toward the perfect quadcopter or multirotor for aerial video and personal flying freedom and a permanent survey on the latest quadcopter news and multirotor news
This website uses cookies to improve your experience. We'll assume you're ok with this, but you can opt-out if you wish.AcceptPrivacy and Cookies Policy
Privacy & Cookies Policy
Privacy Overview
This website uses cookies to improve your experience while you navigate through the website. Out of these, the cookies that are categorized as necessary are stored on your browser as they are essential for the working of basic functionalities of the website. We also use third-party cookies that help us analyze and understand how you use this website. These cookies will be stored in your browser only with your consent. You also have the option to opt-out of these cookies. But opting out of some of these cookies may affect your browsing experience.
Necessary cookies are absolutely essential for the website to function properly. This category only includes cookies that ensures basic functionalities and security features of the website. These cookies do not store any personal information.
Any cookies that may not be particularly necessary for the website to function and is used specifically to collect user personal data via analytics, ads, other embedded contents are termed as non-necessary cookies. It is mandatory to procure user consent prior to running these cookies on your website.